Read about my previous attempts at sandal making in my Astrid Sandals version one and Astrid Sandals version two posts.
For my third pair of hand made sandals, I wanted to branch out from a purchased pattern and create my own using elements learned from both The Shoe Camaraderie and I Can Make Shoes. Along with ending up with wearable sandals, my goal in these efforts has been to learn and improve my technique before I jump into shoe-making with lasts. To that end, I had a few successes with these and also learned a number of things to take forward into upcoming projects. Here’s how it went.
I started these sandals the same as my last pair, with some small changes to the insole shape because they are open toed. This time though, I thought I’d give a carved arch support a try. Rather than layering three pieces of soft foam like I did on my last pair, I used my safety beveler to carve a piece of dense 3mm insole foam down to the shape I wanted.
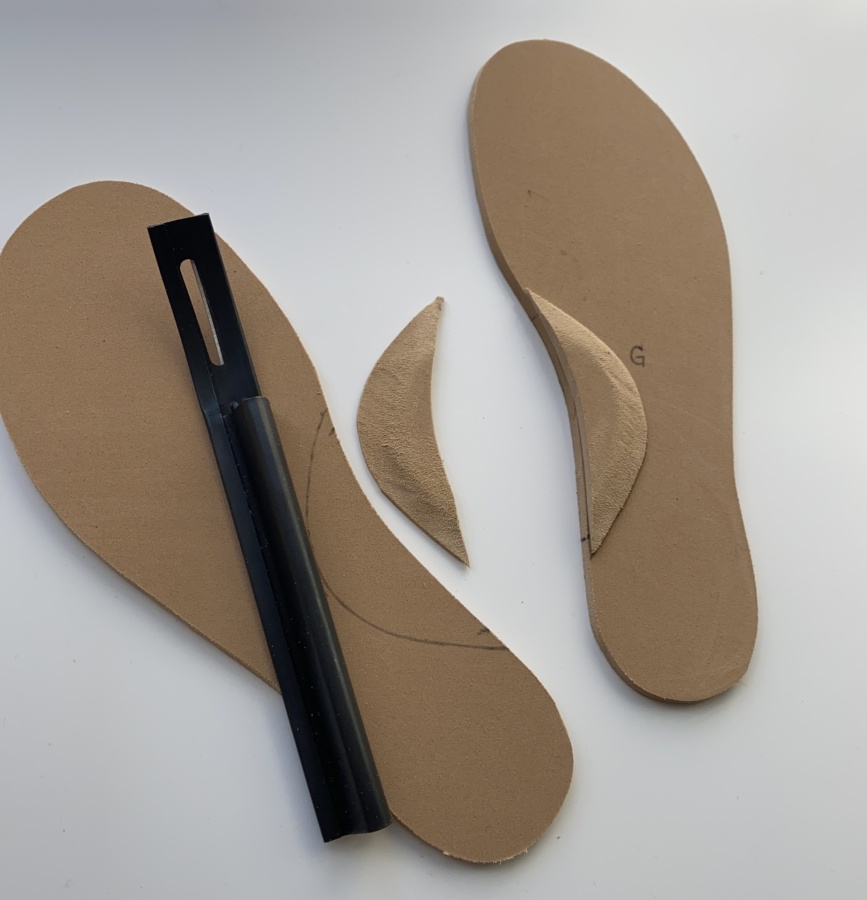
I’m really pleased with this method. The denser foam was easy to carve and meant I didn’t have fiddle with gluing tiny layers of foam together. It also feels more supportive than the layered foam versions I used in my last pair.
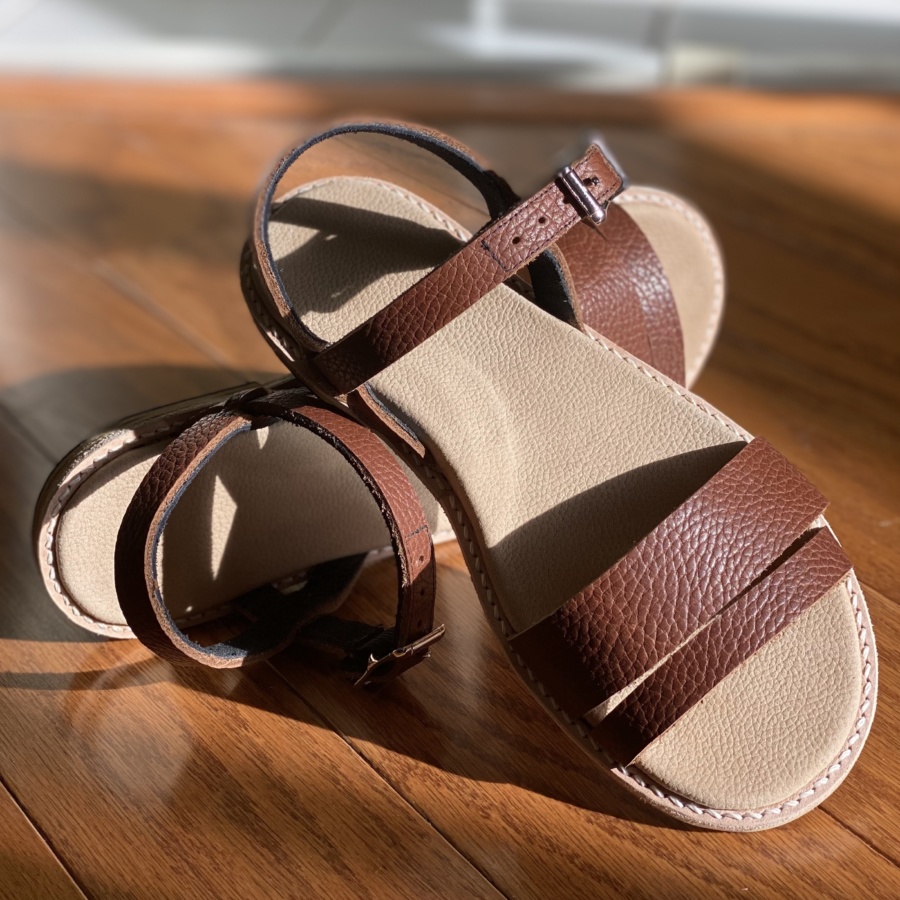
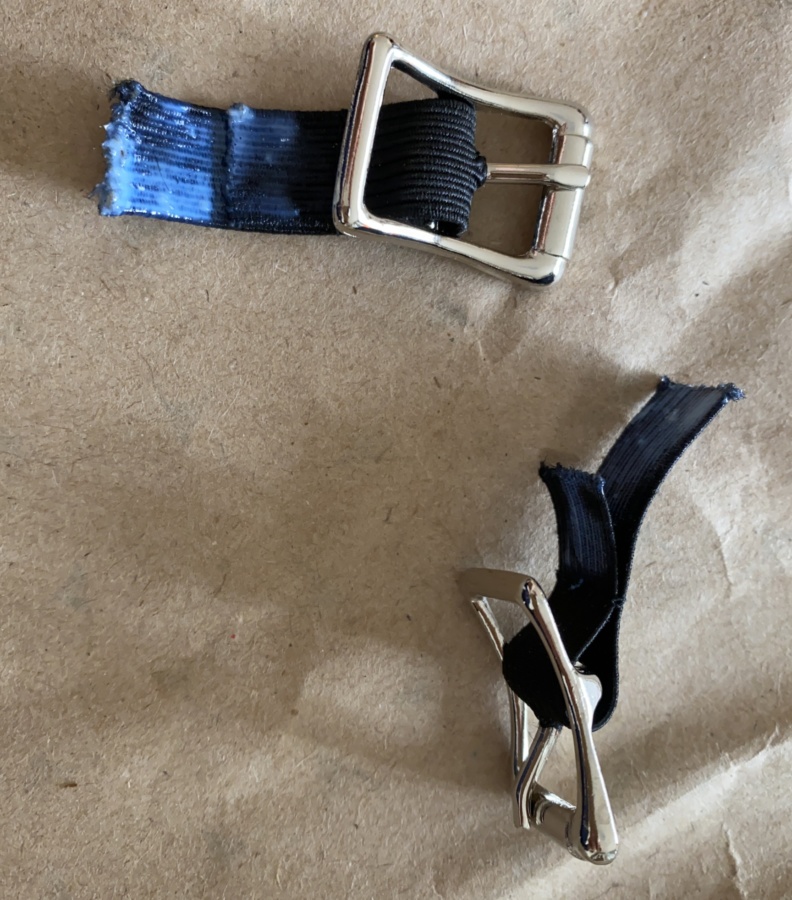
For the uppers of this pair, I wanted an interlocking ankle strap similar to the design of an old purchased pair I have. I went with a half-inch strap width because that was the width of my buckle. Looking at how RTW sandals are designed, I decided to try adding elastic to the buckle. I poked a hole with an awl in the centre of a piece of elastic and then poked the centre of the buckle through the hole. I sewed the two ends of the elastic together with my sewing machine and graded the ends to reduce bulk before covering both sides with glue.
Then I sandwiched the elastic between my main leather and a piece of lining leather and stitched a square to hold the elastic in place (because I didn’t completely trust the glue).
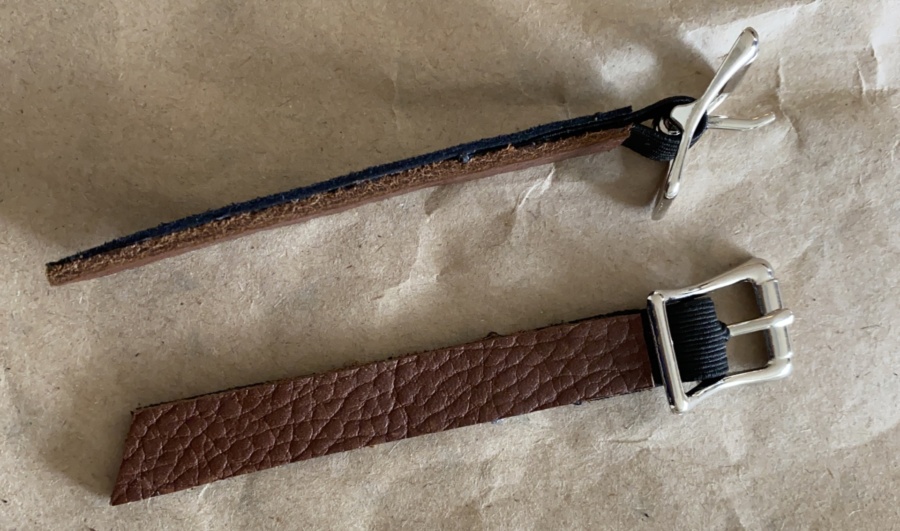
I skived the surface finish of my lining leather a bit to reduce the thickness and also allow the glue to adhere so that the soft underside of the lining leather could be the side against my skin. This worked ok. The thickness made things difficult for my machine and it’s not my neatest sewing. I think it will hold though.
Since I was lining this part of the strap and also because my main leather had some stretch, I decided to line the other side of the front strap and the back strap as well. This is where I started to run into trouble – but more on that to come.
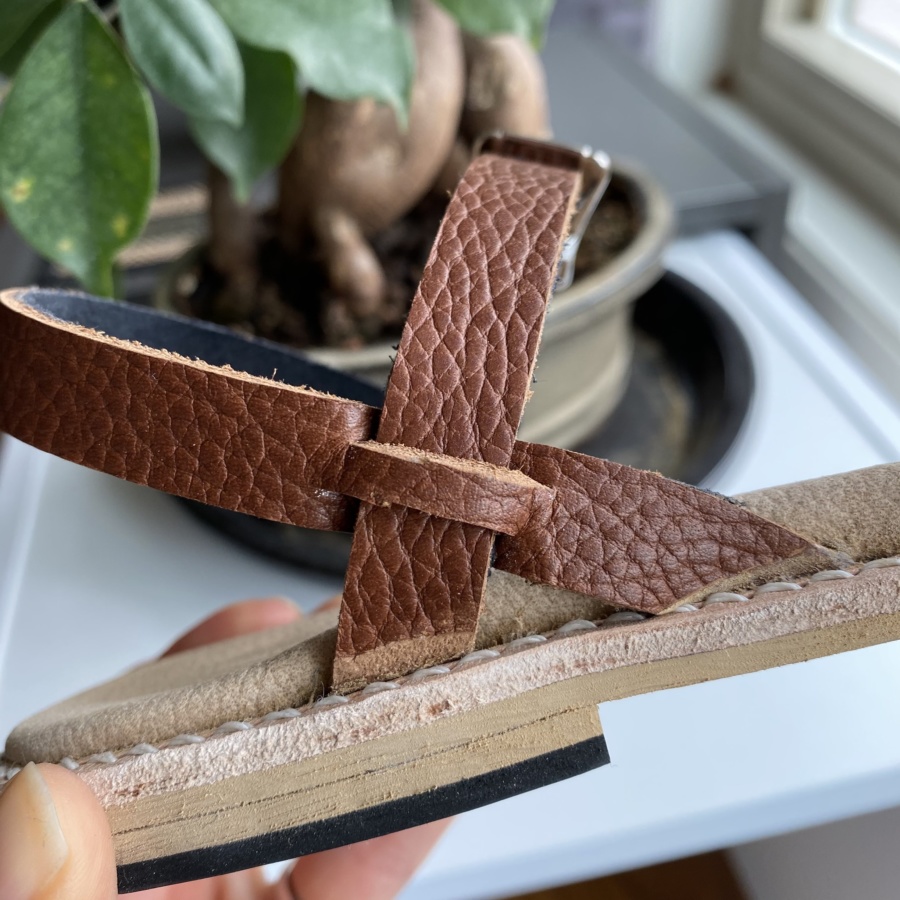
Along with adding strength to the straps, lining them allowed me to have a smooth surface against my skin under the woven section where the two straps cross. I lined both of the front strap pieces (the buckle side and the side with the holes, which I also sewed for strength), but didn’t line the back strap pieces right away. I planned the strap placement and tested the fit with the back piece unlined. I only cut the slits to in the main leather piece of the back strap (not the lining). Once I had the front strap pieces woven through the back, I added glue to the main and lining pieces of the back strap, with the front strap in place, and glued on the lining piece.
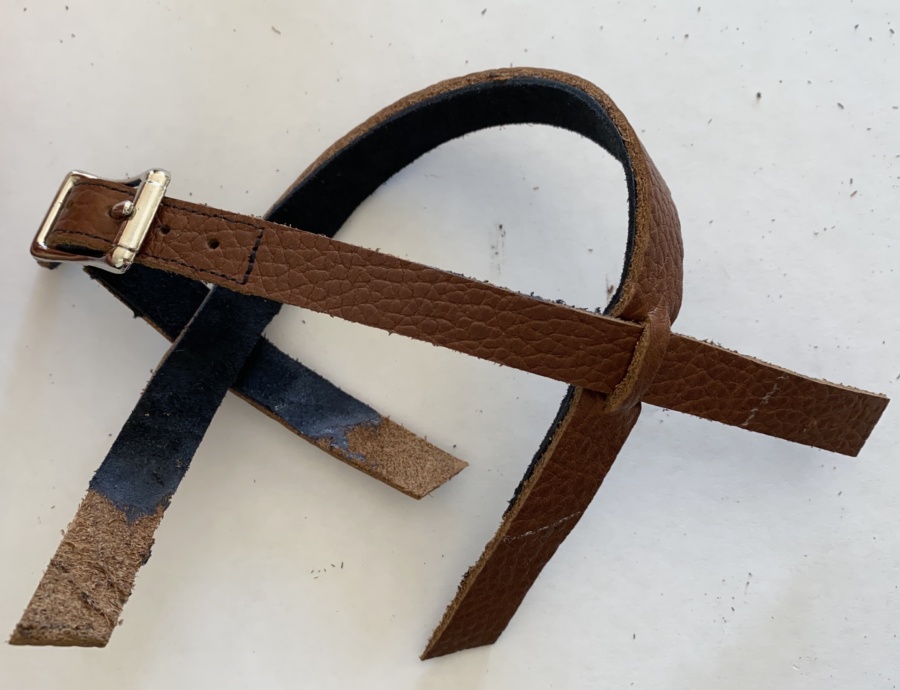
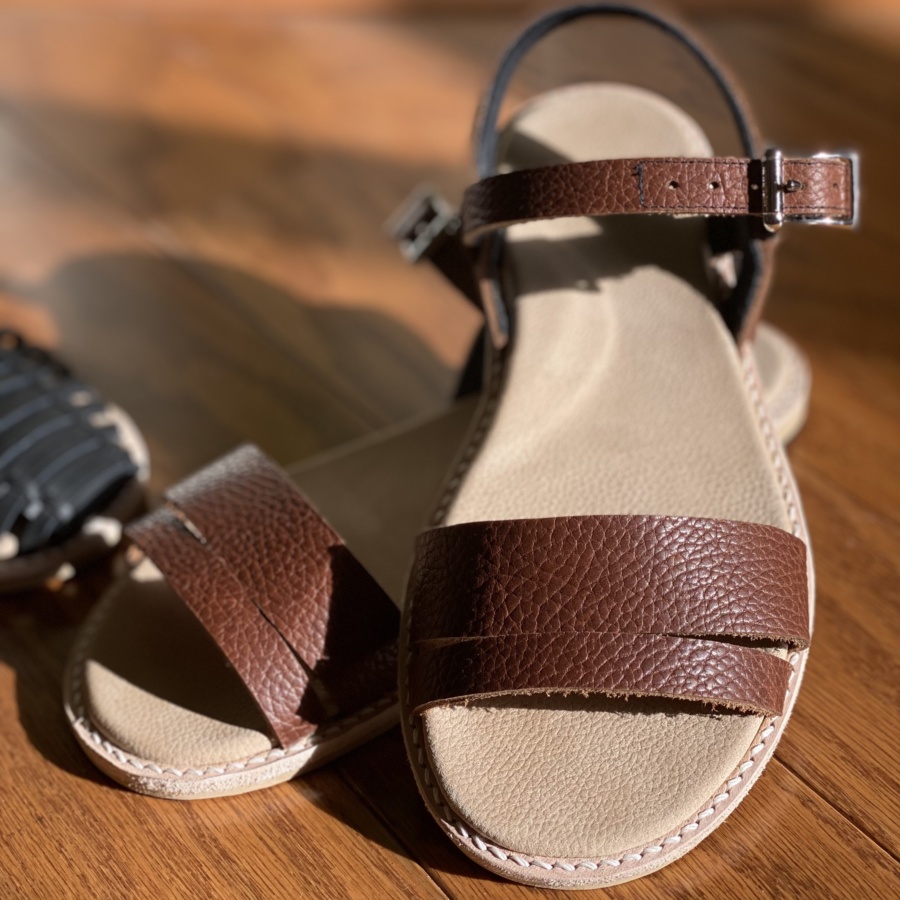
I glued all of the strap pieces curved. I’m not sure if this was necessary, but I covered my foam roller (for at-home physio) in paper and laid the strap pieces over it so they would dry with a curve. Once they were dry, I skived away the lining from the ends of each strap to make them easier to last.
Here’s where the thickness of my leather really caught up with me. Even after skiving the lining from the straps, the straps were still so thick. Too thick to allow the rand to lie even close to flat. I decided I needed to skive the right side as well as the wrong side… and this is where I learned that the rand doesn’t cover as much as I though it did. I skived WAY too far up. Even with all that skiving, the straps a too thick and there are gaps in my glue-up where the rand just couldn’t connect to the uneven surfaces.
You can’t see it when I wear them and nobody’s face should EVER be close enough to my foot to notice, so they’re still completely wearable. I’ve learned two important lessons though:
- Be careful skiving on the right side up your uppers (and do most of the skiving on the underside if you need to)
- Pick thinner leather for sandal making, or shoe making when the upper only covers part of the footbed, when your design includes a rand
Having learned these lessons on the ankle straps, and because I didn’t need the added strength for the toe straps, I chose not to line them. The two straps are one inch and one half inch. I’d intended to have them spaced further apart but somehow this spacing disappeared as I lasted them. Oh well. Having the two pieces still works well to give me mobility in the forefoot. I did have a few of the same problems with over-skiving the front straps as well in the end. Lesson double learned.
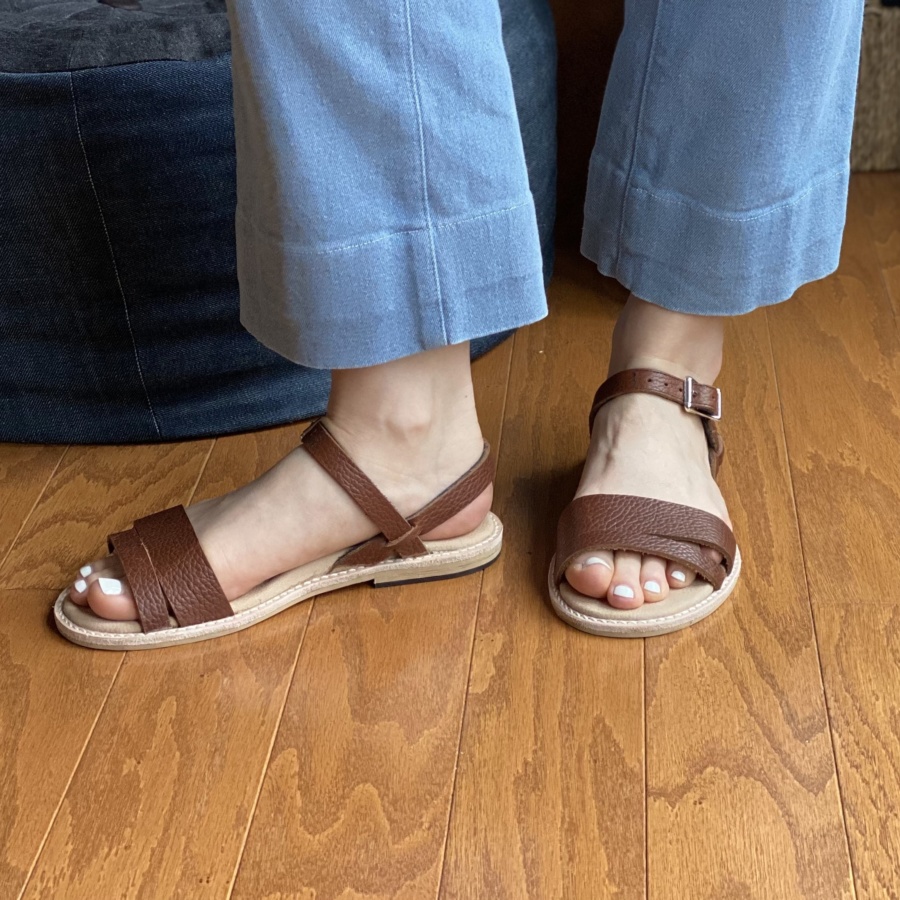
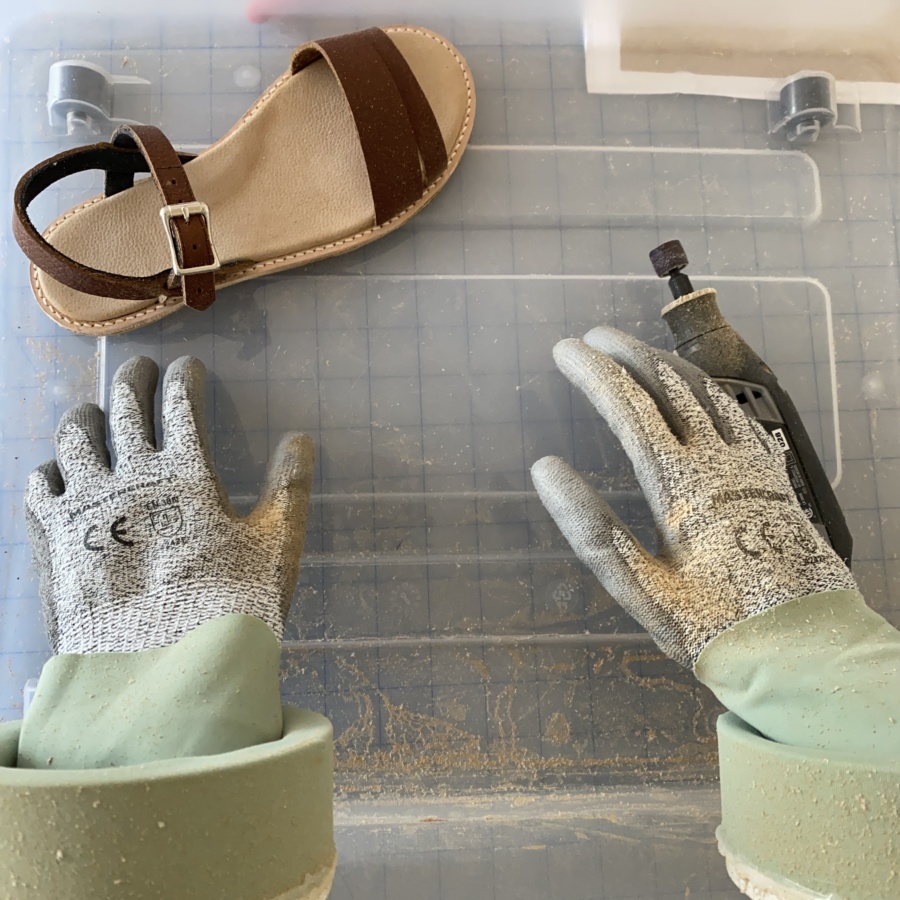
The things I am most pleased about on these sandals are the arch support insert, which worked out fantastically; the design, which is comfortable and looks exactly like I’d planned; and the finish of the sole and heel. I put my new ‘glove box’ into use (if you follow me on Instagram, you probably saw my posts about this hot glue and plumbing pipe contraption) and it worked a treat. I love that I can sand indoors, with no mess and the containment of the dust lets me slow down and focus on getting a clean finish. I sanded these ones with the 120 grit drum sanding Dremel attachment and then the 240 grit.
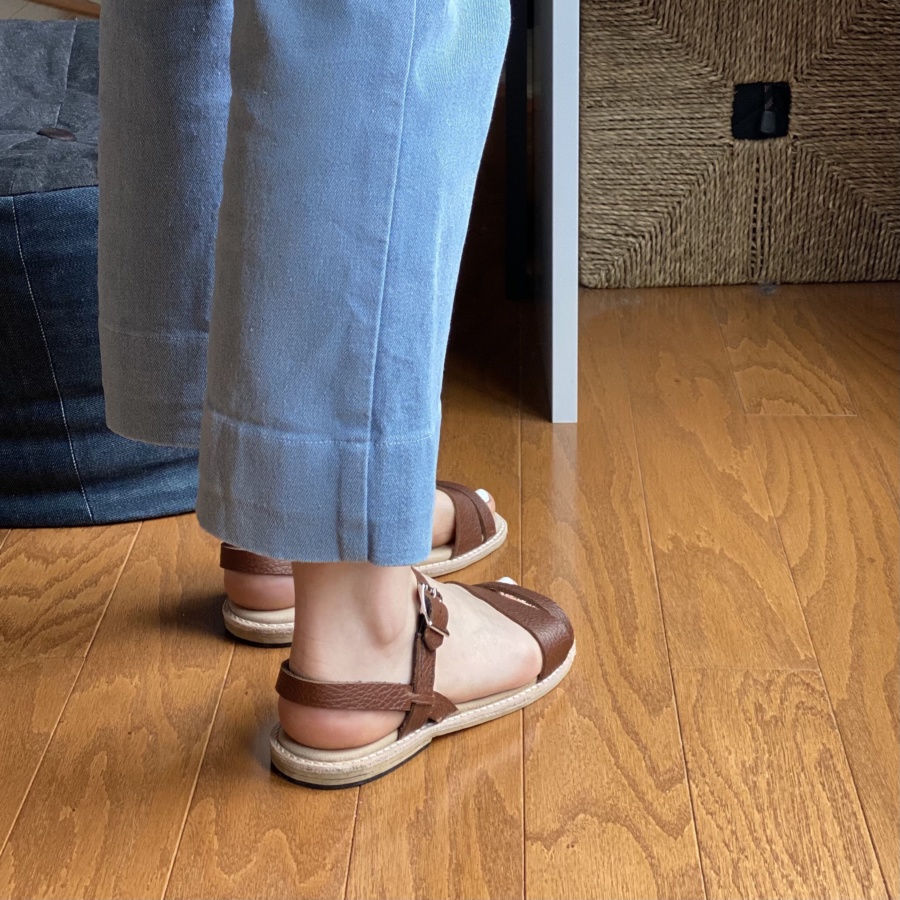
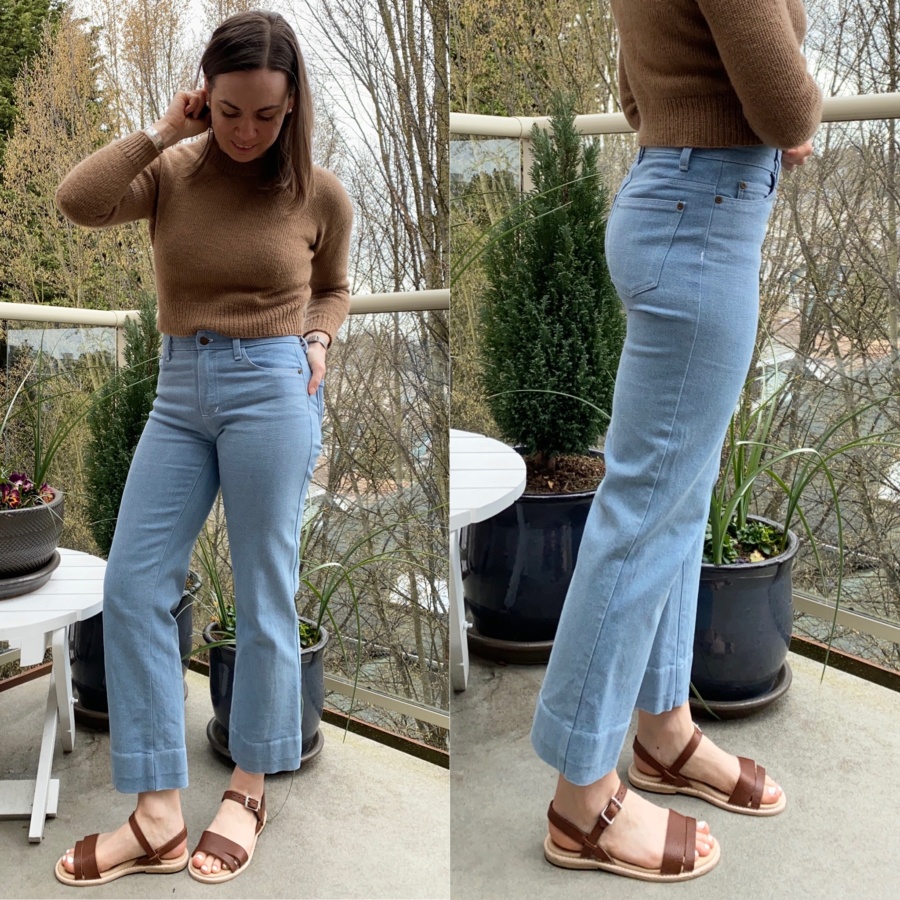
My debate now is whether I should try another pair of sandals or if I’m ready to move on to real lasting and proper, closed-toe, shoes. I’ve got quite a few ideas for both bouncing around in my head so I’ll see which of them feels stickiest over the next few days. Until then, I’ll wear them with jeans and sweaters and wait for more sandal-friendly weather.
Thanks for coming on this journey with me!
~ Lindsay
April 5, 2021 at 8:37 am
DANG. I LOVE your sanding box! That is BRILLIANT! I make designs out of laser cut wood and I’ve been trying to figure out how to keep the dust from getting everywhere. It’s just like a sandblasting booth – which might also be a good search term for finding longer gloves. I will definitely be making one of these! So glad I found this!
Also – your sandals are super professional and very cute. I think you’ll enjoy working with a last, it’s fun.
April 10, 2021 at 3:37 pm
Thanks Samantha! Highly recommend having one of these at your disposal. I’ve already gotten a lot of use out of mine.