Making my own undies isn’t something I love doing, but it’s better then having to go out and buy them and is a great way to use up scrap fabrics – so I do it and try to enjoy the process.
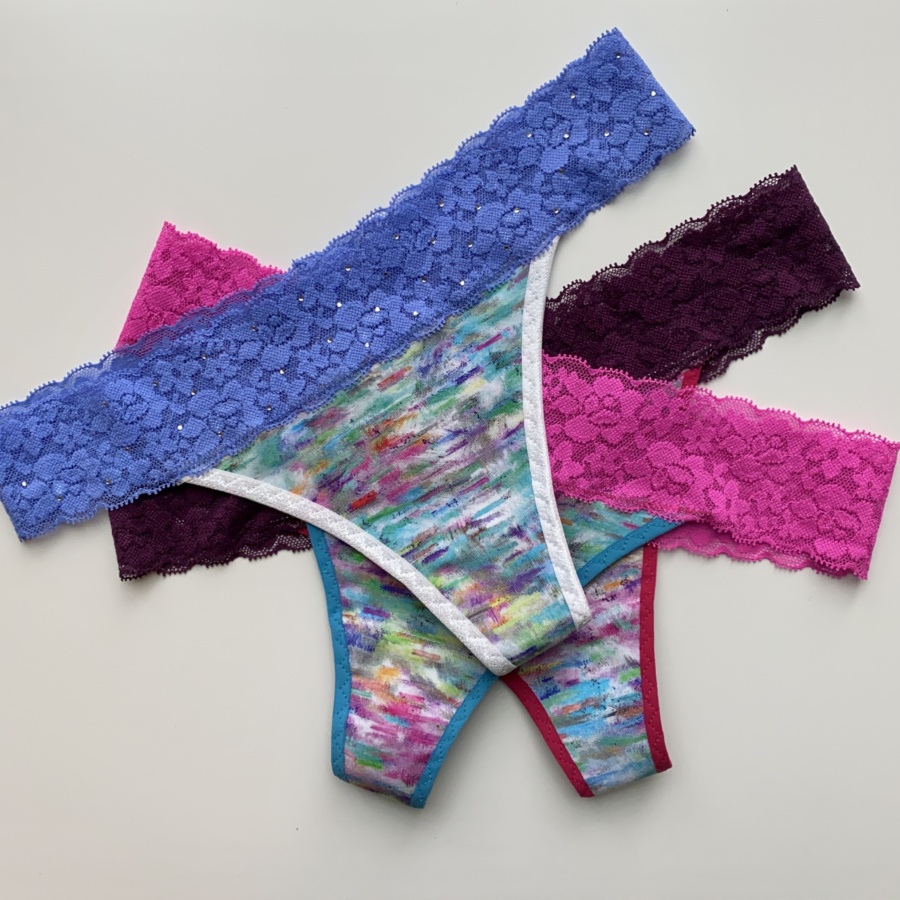
Last time I posted these lace and jersey thong underwear on my instagram, I received a number of questions about the pattern. I traced this pattern from an old ready-to-wear pair and have modified it to perfection (for me) over the years. Since there is no pattern to point you to, I thought I’d walk you through how I make these in case you’d like to try making some for yourself.
For these three pairs of undies, I used the following materials:
- A very small piece of scrap cotton jersey from my stash
- 2 pieces of fold-over elastic for each pair (mine are 32cm/12.6″ each)
- 1 piece of 2″ stretch lace for each pair (these laces are all harvested from my old RTW pairs and are 66cm/26″ long)
- Stretch or jersey needle
- Thread
- Wonder Tape
I made these three pairs in 2.5 hours, including cutting out the fabric. The most time consuming part was trading out thread spools for all the different colours of elastics. Here are the steps:
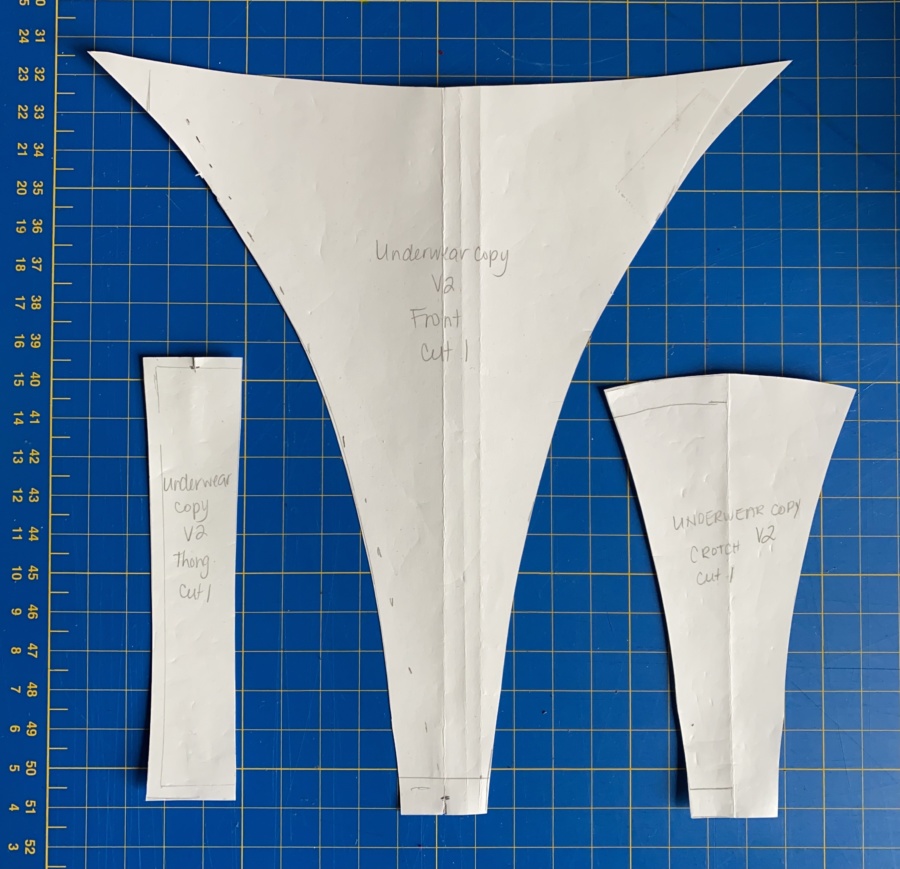
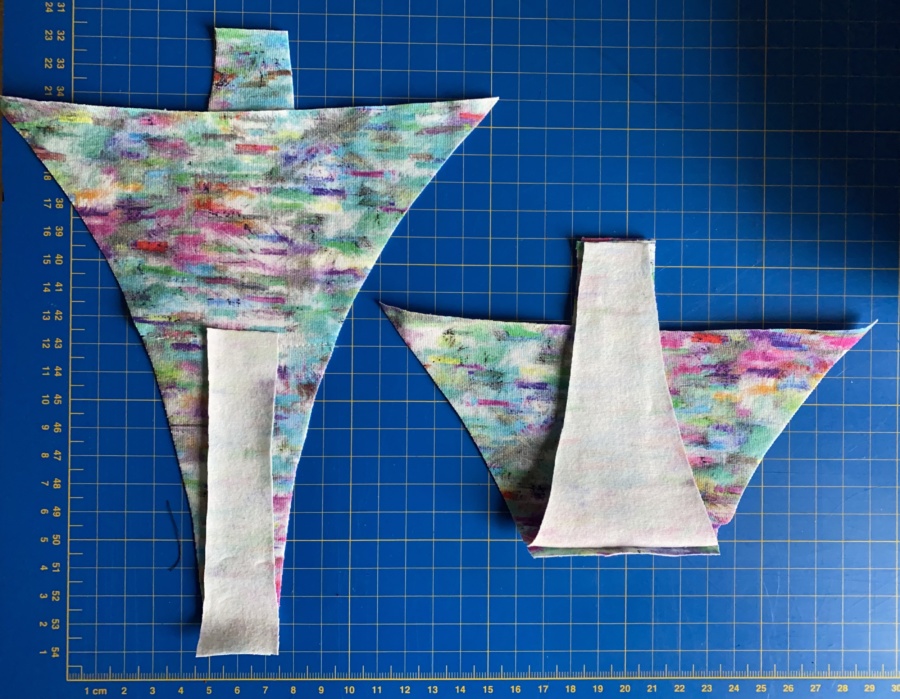
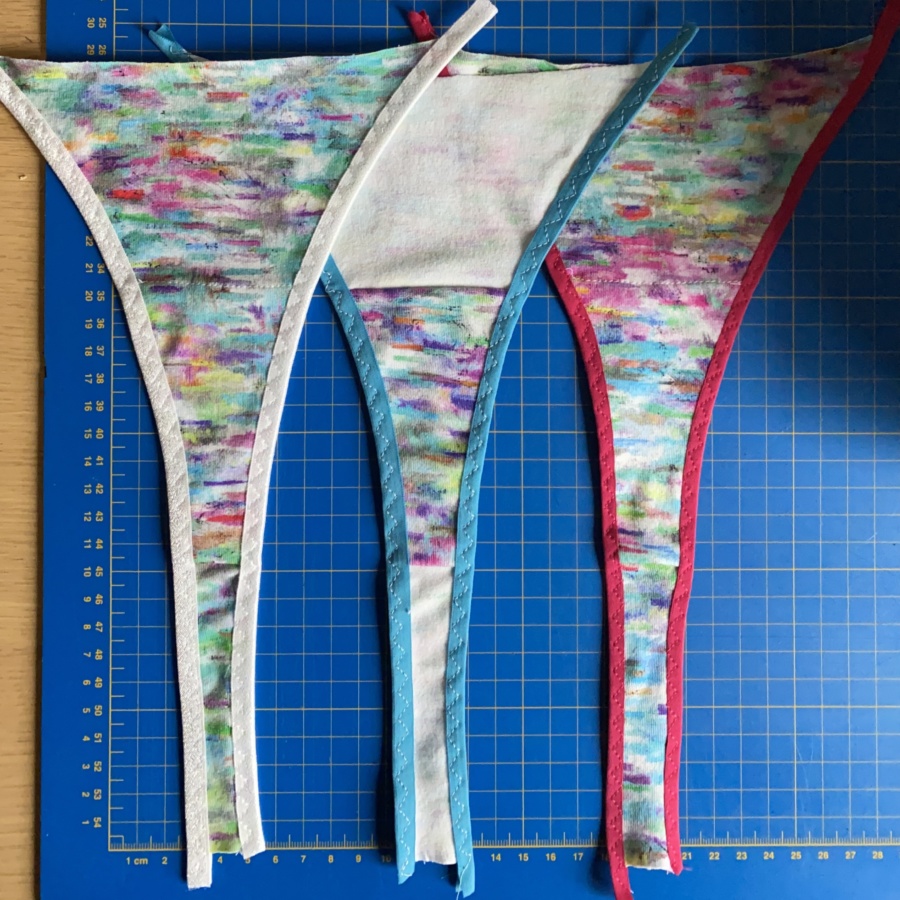
First, cut out your fabric. You can fit these undies on a remarkable small piece of fabric. I’ve photographed my three pattern pieces on a one centimetre grid below so you can estimate their size. These undies rest right on my hip bones but I’m only 5’3″ and am very short between the waist and hips.
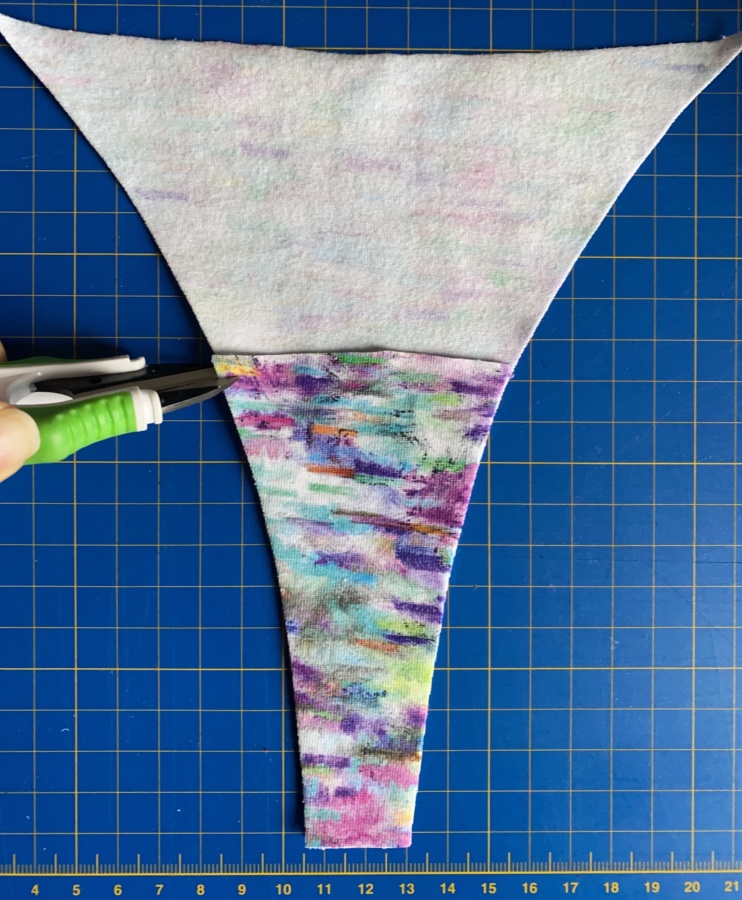
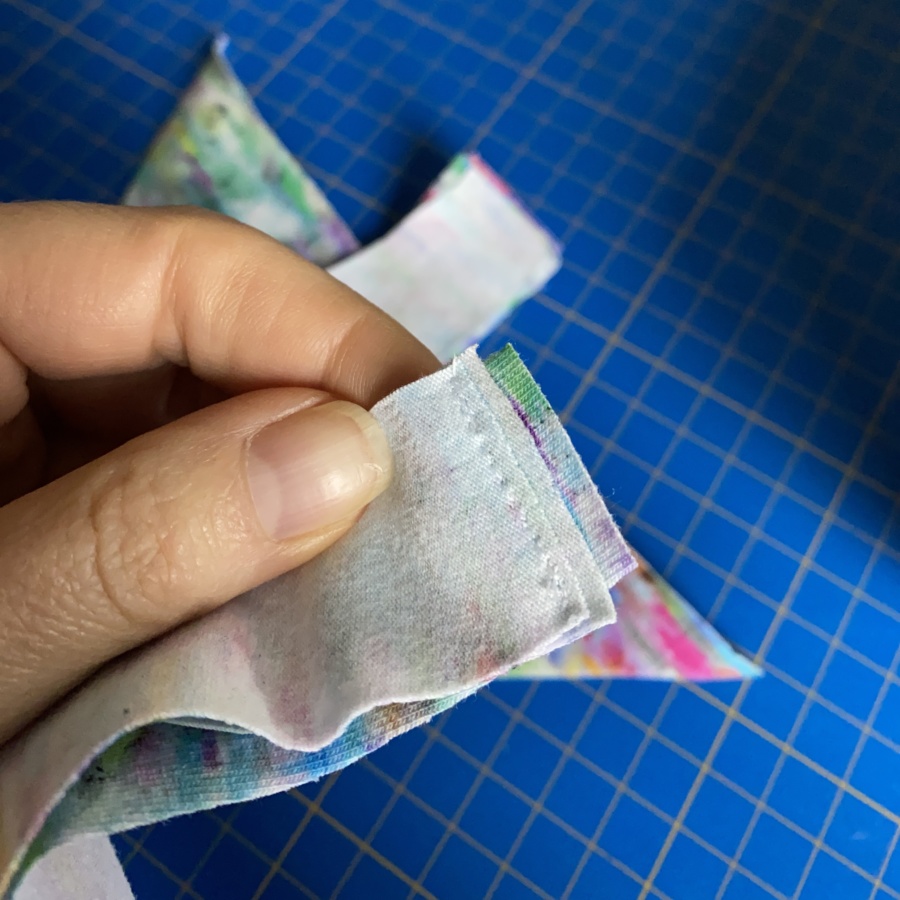
Once your pieces are cut out, start by placing the crotch lining piece on top of the front piece, wrong sides together. Cut notches into both pieces about 1/4 inch down from top of lining on either side. The notches help you line up the next step. Cutting your own notches at this point also allows you to set your own seam allowance and means it’s easy to match up the pieces if you’ve cut the lining piece a little bigger or smaller.
Flip the lining piece up so the right side of the lining is facing the wrong side of the front, line up the notches, and sew the wide top edge of the lining to the front piece.
Flip the lining back down into place and clip those little corners that are sticking out from the sides. Now your front pieces are finished with the seam allowance neatly tucked away and it’s time to sew on the back piece.
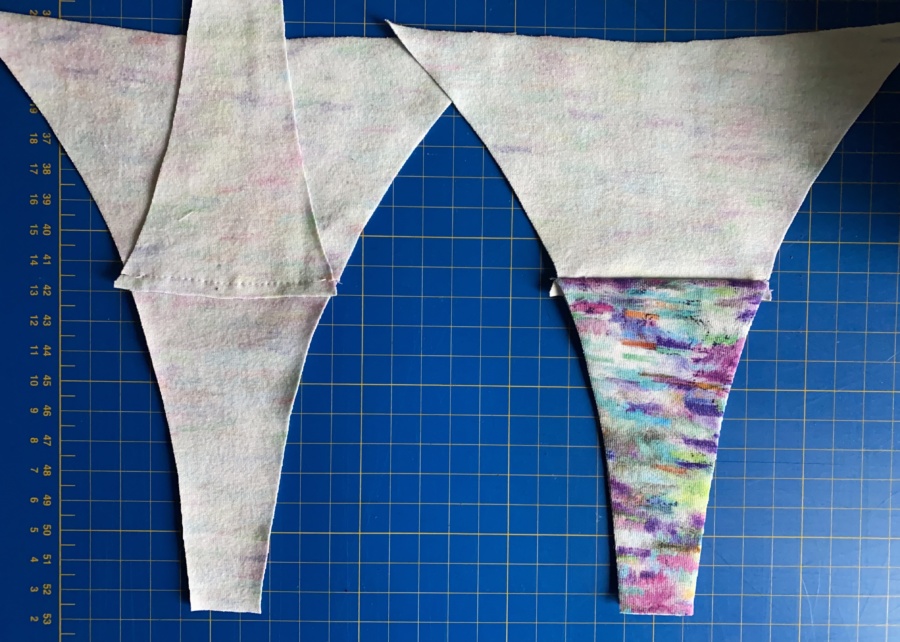
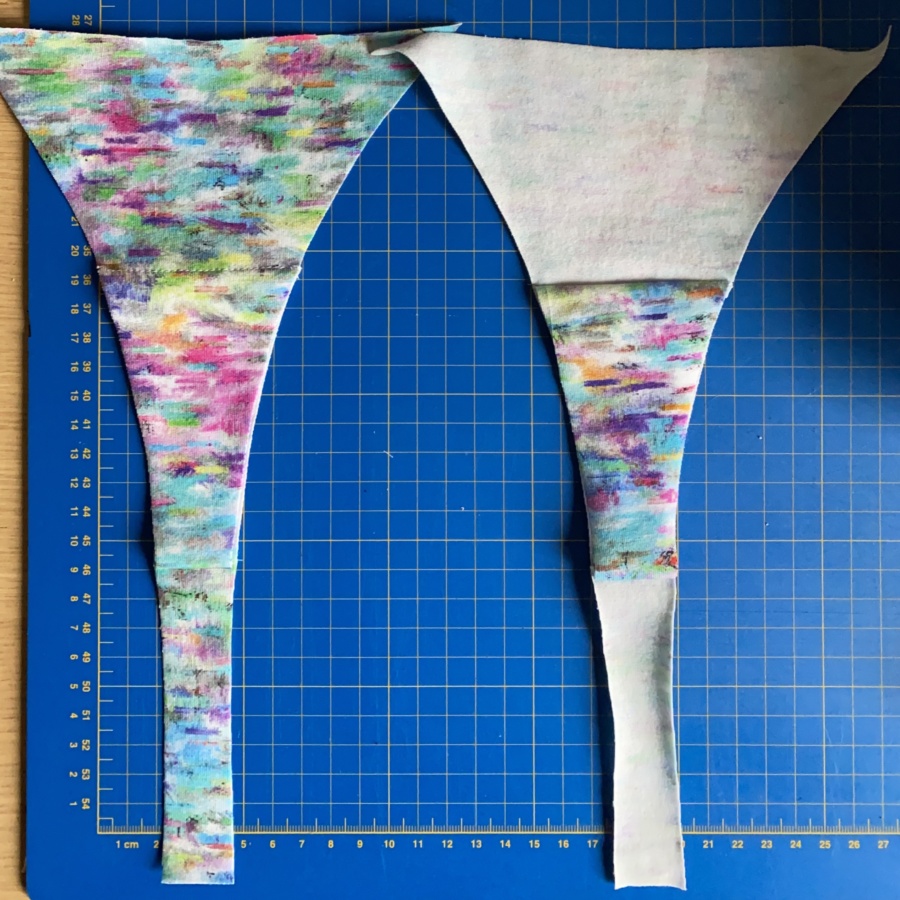
Sandwich the wider end of the back piece between the bottom edge of the front and lining and sew. In the photo below, the one on the left shows the front piece with the lining flipped up behind it and the back piece placed right sides together with the bottom on the front piece. On the right, the bottom edge of the front piece and back piece have been folded up to sandwich the back piece between the front and lining pieces, right sides together. It’s the burrito method but much easier because there isn’t very much fabric in the way.
Now take this little sandwich over to your machine and sew, then grade the seam allowances to reduce the bulk.
Pull everything right side out and you should now have one flat, long piece with a wide end (the front) and a narrow end (the back) and some lining in the middle with all seam allowances neatly tucked away.
Measure the length of one long edge of this finished piece and cut two pieces of fold-over elastic the same length. Mine were 32 cm (12.6 inches).
I sew the fold-over elastic all in one go. I just sandwich the fabric between the two side and hold it with my fingers. I find that it really helps to have a some excess elastic when you start sewing (this is why I cut my elastic the same length) so I leave about a 1/2 inch at the start of my sewing.
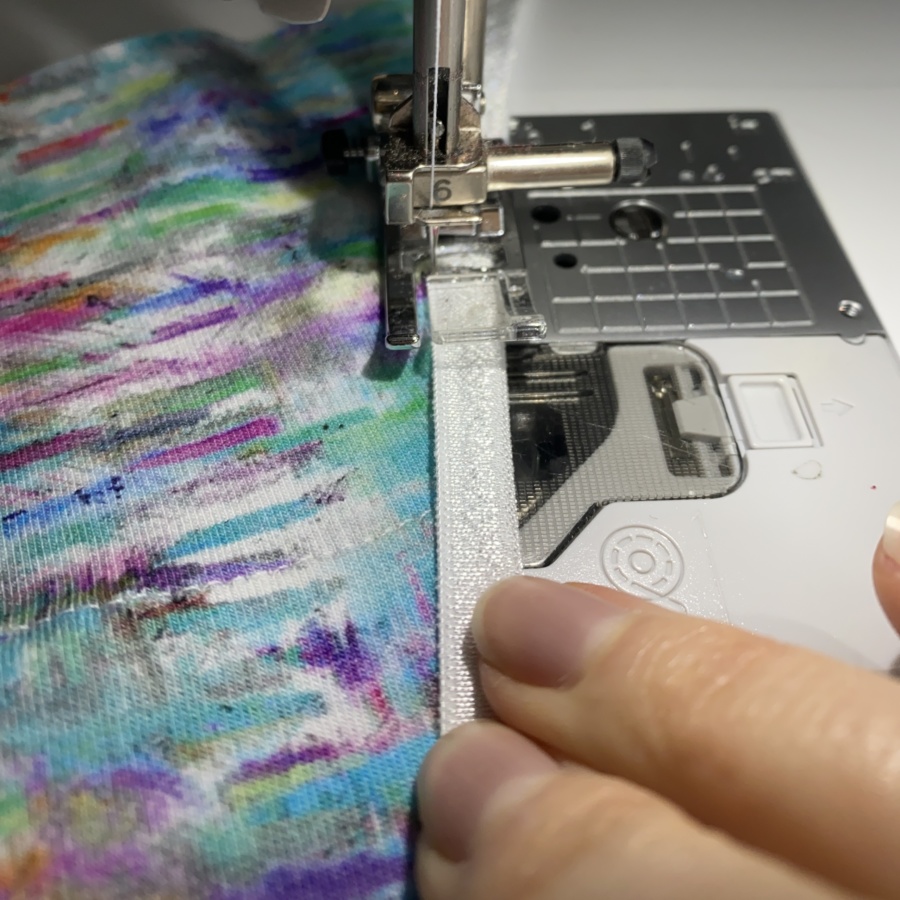
Sew the fold-over elastic to each leg edge while stretching the elastic gently. I use the three-step zig zag. I set the length to 2.0 and adjust the width based on the width of my fold-over elastic. For these pairs I used a width of 4.5 for the white elastic and 3.5 for the pink and blue elastics. Make sure the inside step of your zig zag just catches the inside of the fold-over elastic. I prefer to sew mine from the right side.
I recommend leaving a bit of extra elastic at both the start and finish of each side. You can trim it off later but it helps when you stitch on the waistband in the next step.
Now it’s time to cut the stretch lace to your preferred length and sew the ends together with a french seam or serge (sorry, I don’t have any pictures of this step). If you use a french seam, I recommend sewing it down (felling it) to reduce the bulk at the back.
Find the centre front of the lace and the centre front of the undies and mark with pins. Then apply wonder tape to the right side of the front edge of your undies. Trust me, wonder tape makes this step so much easier. I’ve tried without and the results were pretty disastrous.
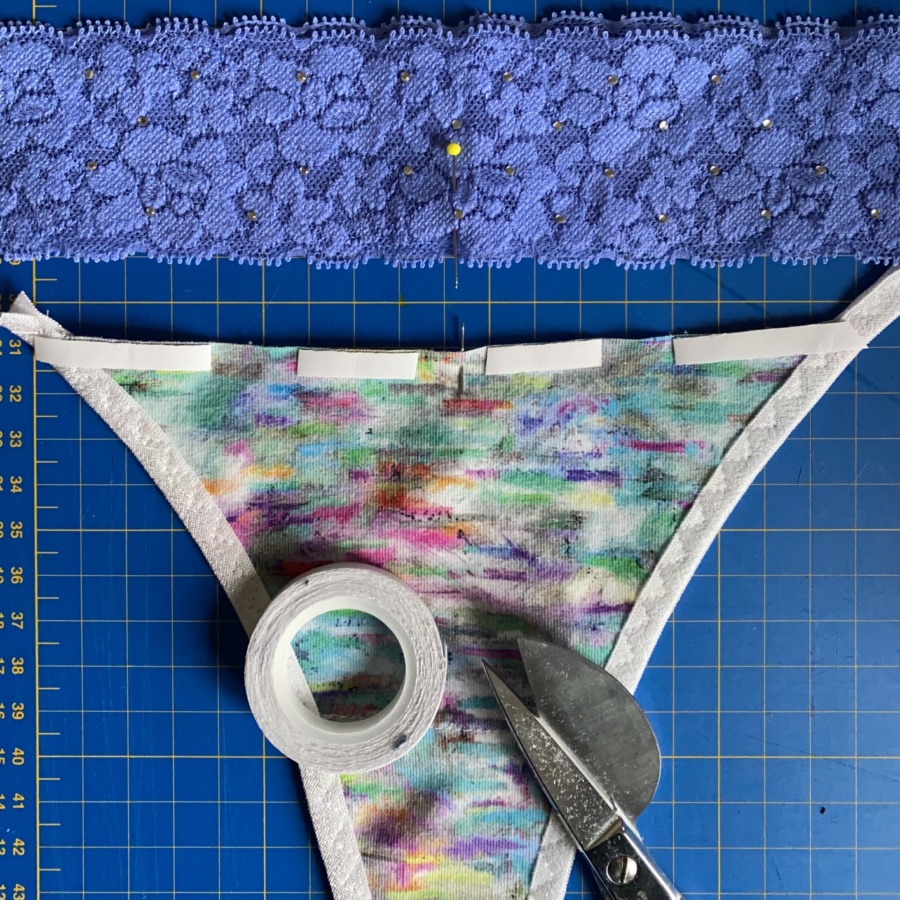
Stick the bottom edge of the lace to the top edge of the undies, matching pins. Don’t stretch the undies or the lace and the lace should just cover the wonder tape – you don’t want a big overlap here.
Sew with the lace facing down on the machine and the wrong side of undies facing up. I use a regular zig zag for this, stitch length 1.4 and width 3.5. Get nice and close to top edge of the undies so the seam allowance is secured and make sure you go back and forth a couple of times over the elastic at the sides.
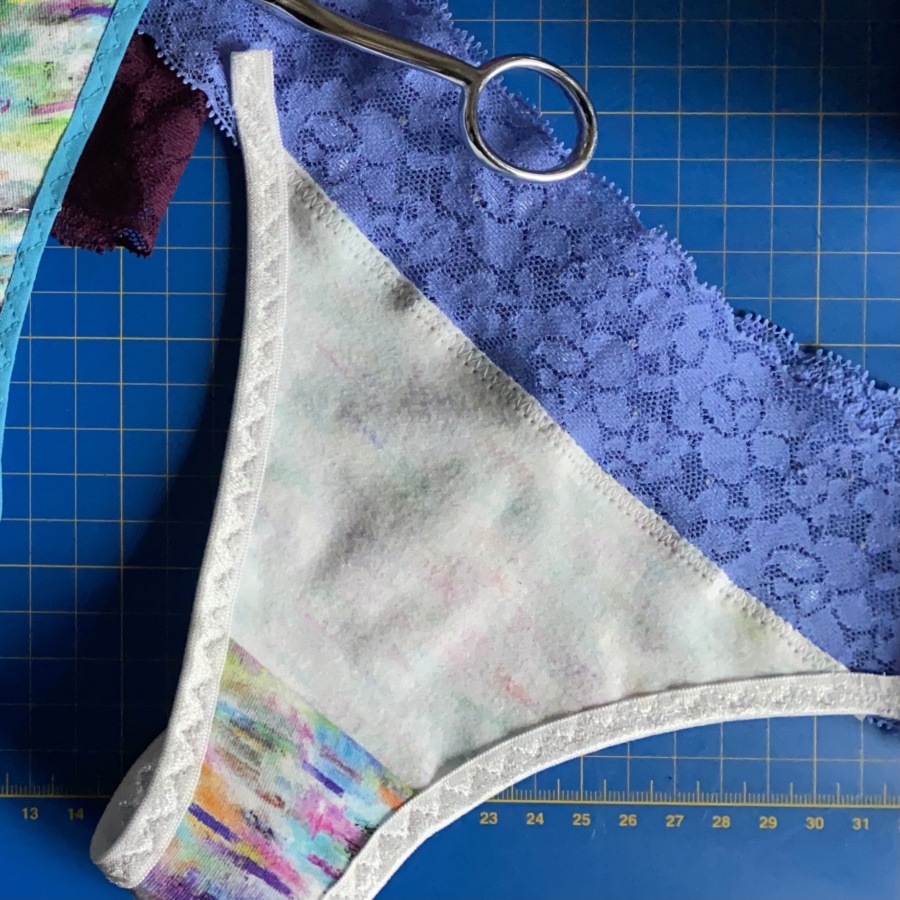
Sew the back of the undies to the centre back of the waistband and then trim those excess elastic bits from the front and back. Don’t forget to wash out the wonder tape before you try them on or they won’t stretch (and won’t fit). Then you’re all done!

Enjoy your cute, easy-to-make undies. I hang dry these undies to keep the elastics from wearing out as fast and they last for years.
Good luck and have fun making yours!
~ Lindsay