Wow. This summer was a lot, folks. Moving was more challenging that I was prepared for. Mostly because selling was new to us and then closing dates and finish dates meant we had to spend the hottest month of the year in a rental apartment. Needless to say, there was no sewing. And I gave myself bangs…
I started this project before all of that because I was using it as a test case for my husband’s belated birthday raincoat. I’ve already mentioned a lot of my challenges with this make in my last blog post, so I won’t repeat myself. Instead, let’s get into some challenges more specific to this pattern.
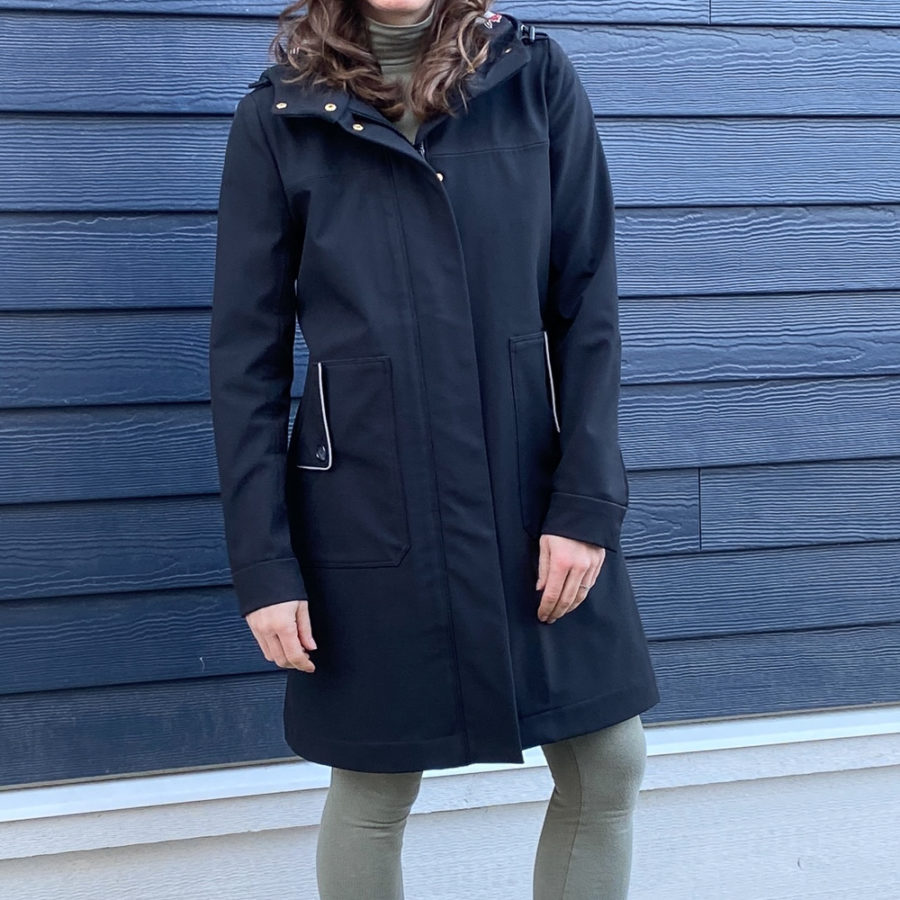
I chose the Kelly Anorak for my raincoat. I’d already made three of them so felt pretty confident about the pattern. I chose a size 6 this time, in between my first and second versions. I lengthened it, added a pleat at the back and made my own hood based on my MEC raincoat. I lowered the front neckline by about a half inch and took in the front armscyes as well, based on areas of tightness I feel on my current black cotton Kelly.
This was a challenging pattern to use with the Polartech NeoShell I chose. The front zip placket was the main place that the thickness caused problems. I ended up removing the interfacing from all of the front placket and zip facing pieces to reduce bulk and it’s still bulky.
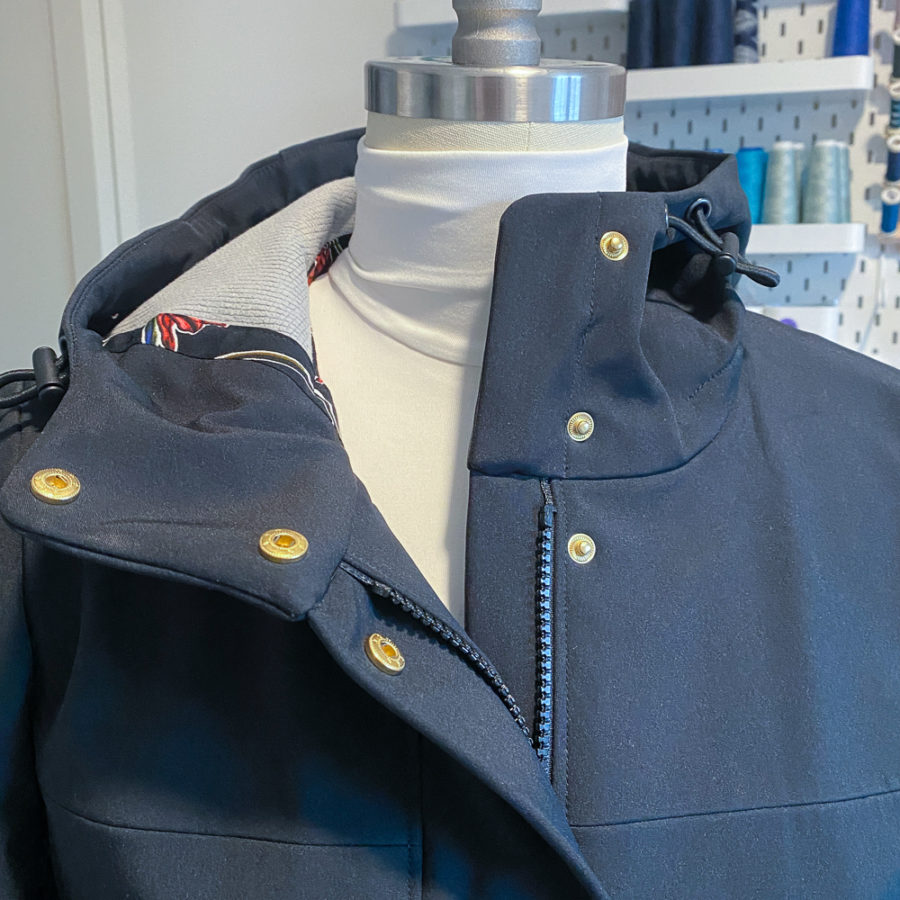
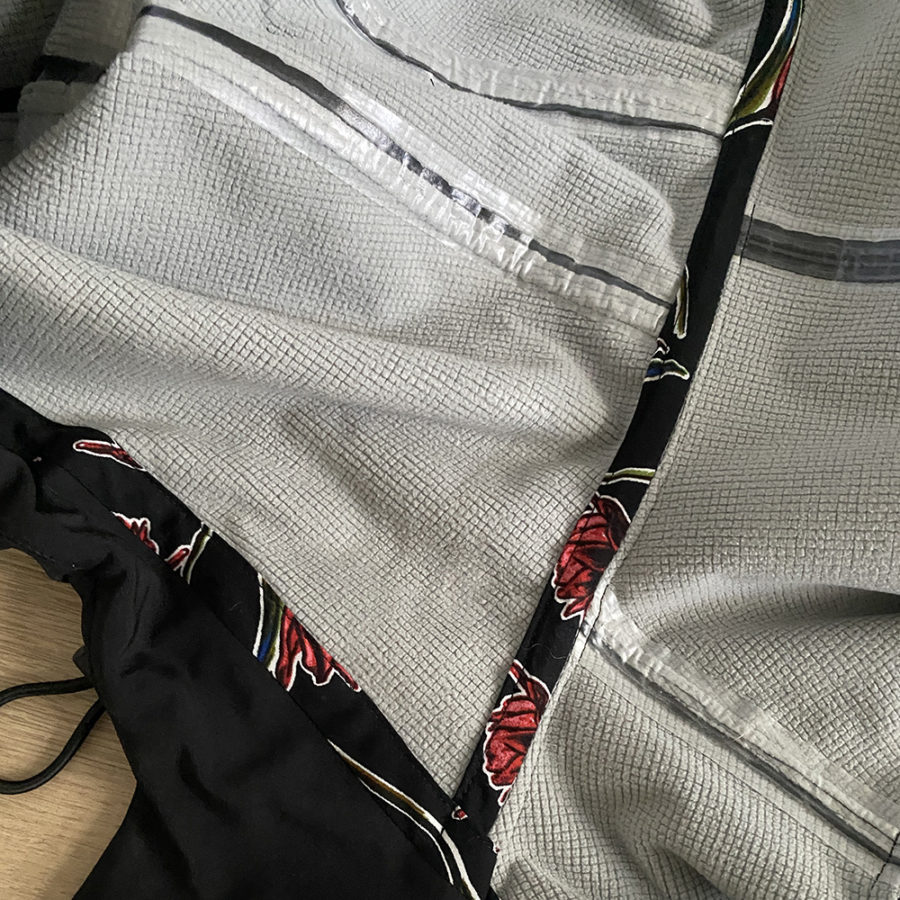
After making both coats, I can say I much preferred the Tosti front placket construction with the full zip that goes right up to the neck edge of the hood. Even with the zip facing that I added to it, it still gives a much less bulky and cleaner construction at the neckline. It also allows for a place to sew in the hood elastic, which I didn’t notice until I was at the very end of this make and realized there was nowhere nearby the grommets to sew in the end of the elastic. You can see in the photo below the outline of it going diagonally from the last grommet all the way to the neck edge instead.
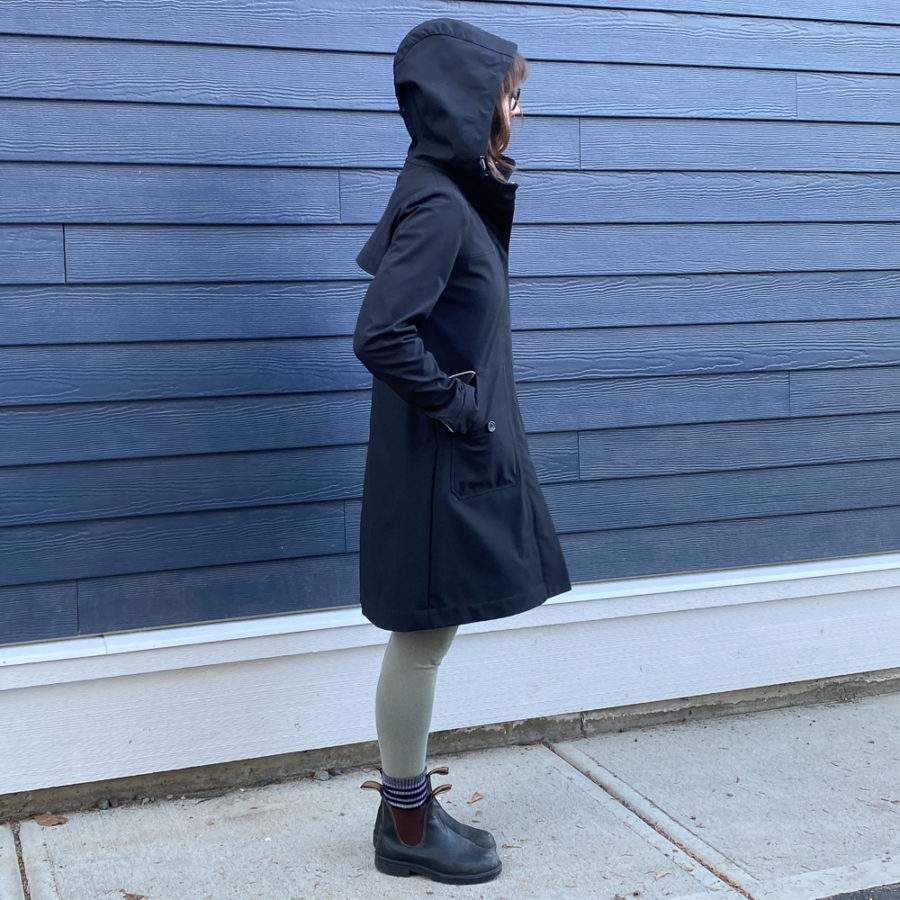
The grippiness of the microfibre wrong side of this fabric is also really noticeable with the longer coat. It rides up if I’m not standing up completely straight and I’m not sure how I’m going to like that over time. Hopefully the microfibre becomes less grippy over time.
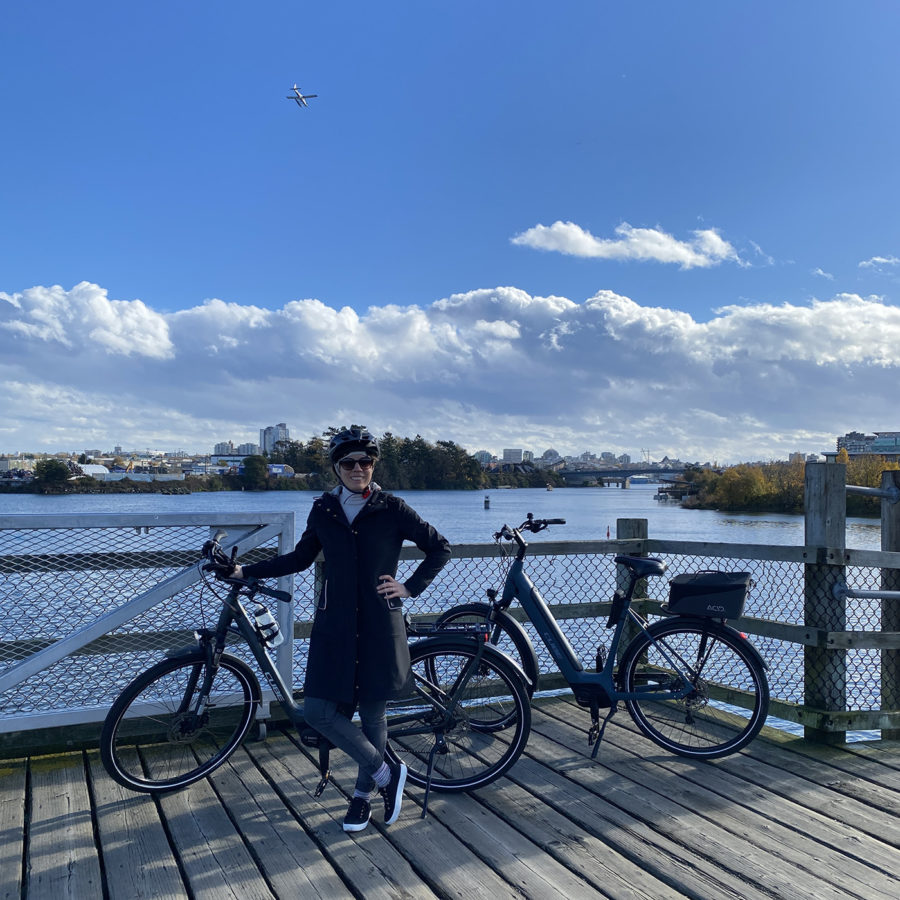
The sleeves on this also somehow ended up far too tight first time around. I ended up unpicking the underarm seam (not ideal as it left holes) and resewing it with a smaller seam allowance. Thankfully I hadn’t seam taped the seam yet so I didn’t have to unpick that. I tapped it afterward to try minimizing the holes from my unpicking. The sleeves are still tight with sweaters but they’re good with a single layer underneath. I went for a bike ride today with just a turtleneck under and was plenty warm. The fabric is a great wind blocker.
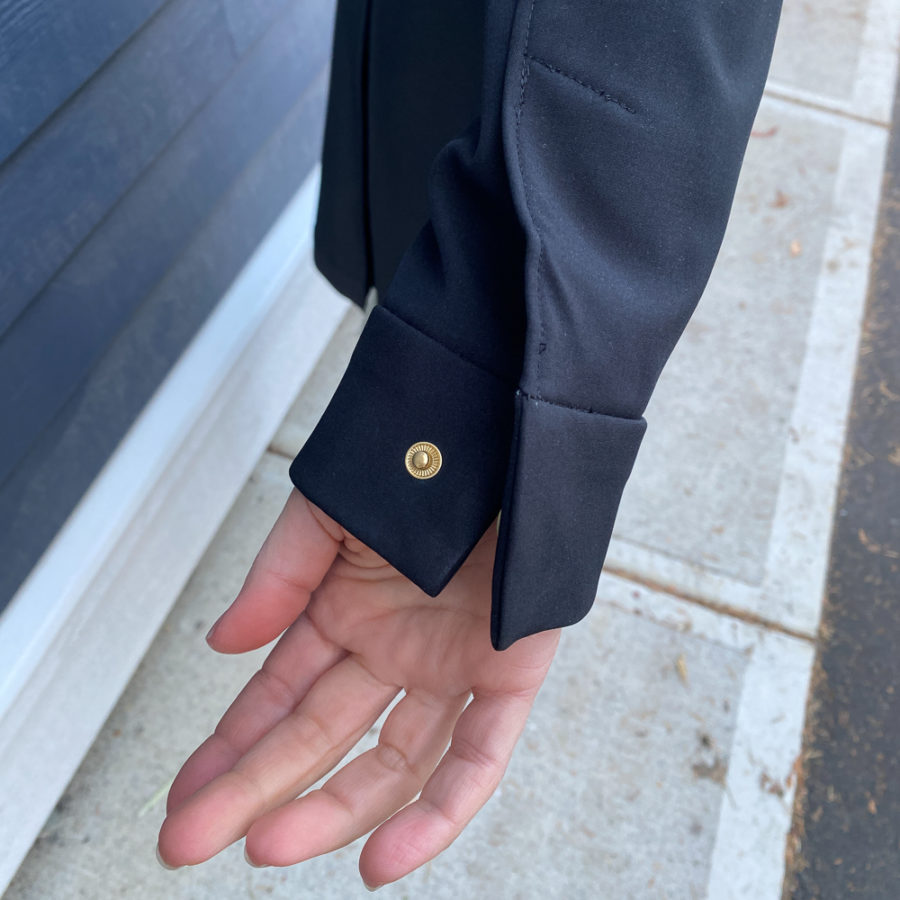
This is the first cuff version of the Kelly I’ve made and I find the cuff opening too short. If I make it again, I would extend the opening to give more room there.
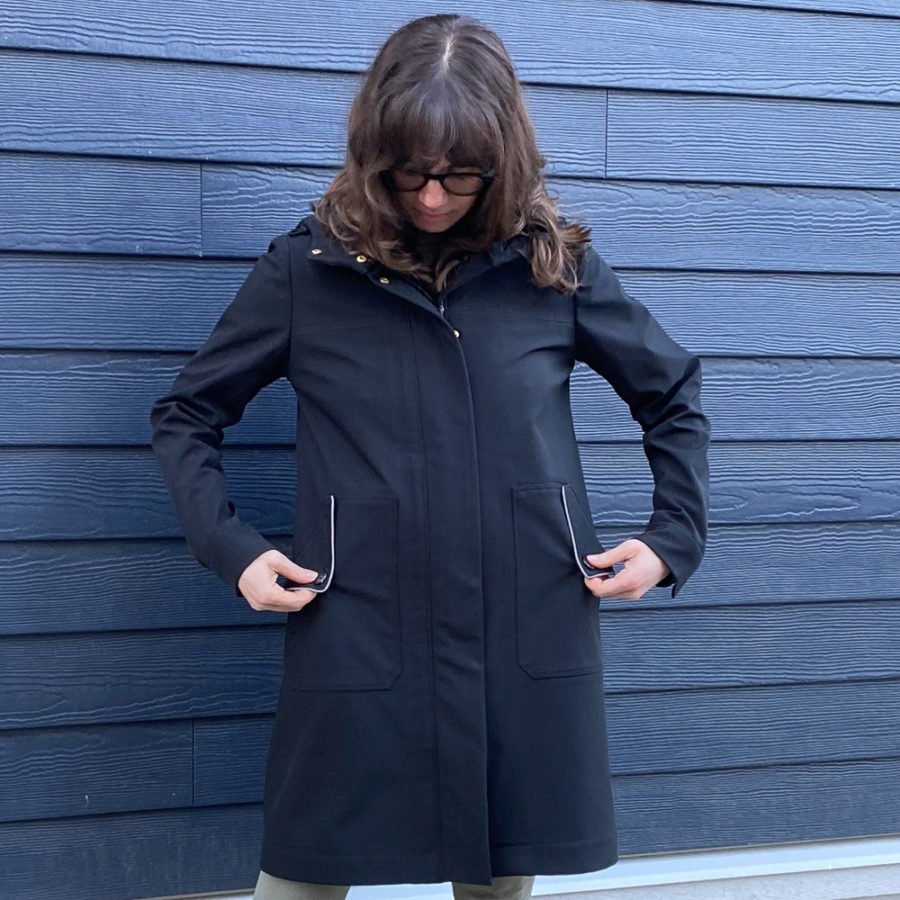
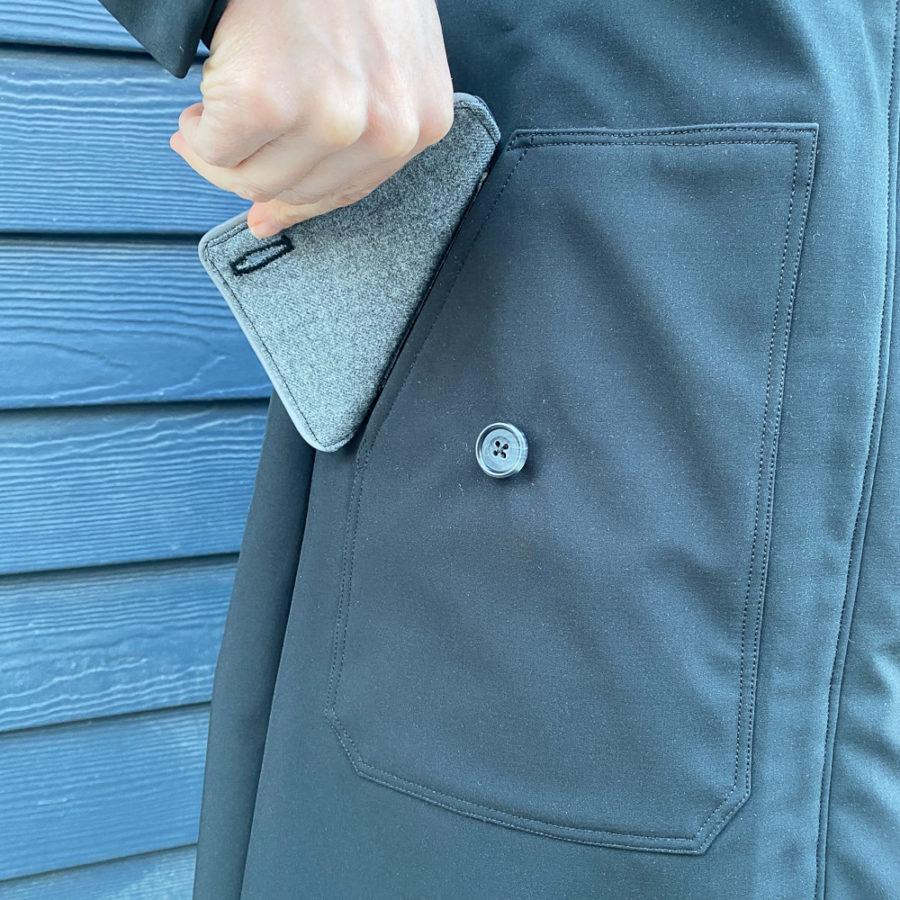
I don’t mean to sound like this project was all bad. I found it challenging and I didn’t enjoy it much, but the end result is decent. There are lots of things that I’m happy with. One of those is the pockets. They are my own design and the pocket flaps are edged in reflective tape, as is the back storm flap. After wearing this, I think I’ll stitch down the top edge of the flap to keep water from getting in the pocket opening.
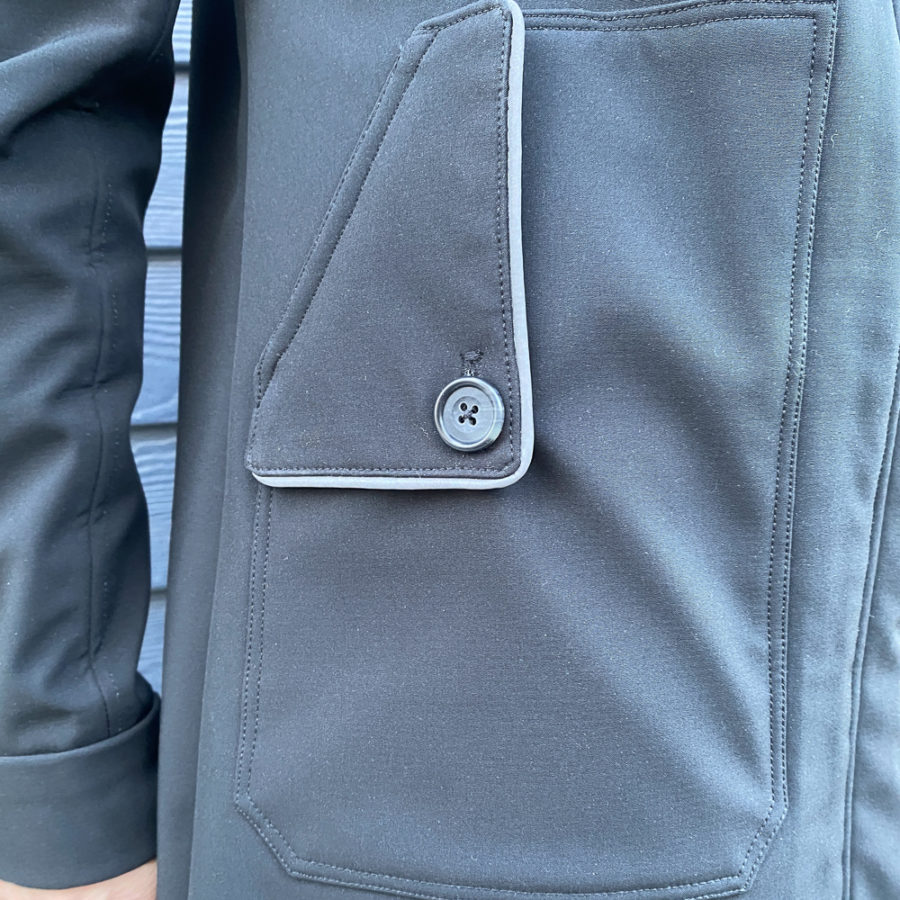
Like my husband’s, I gave my version hidden snaps. The cuff snaps are hidden too. I used gold snaps because they were the only ones I had enough of. I’d have preferred silver, to work better with the reflective tape, but at least they can all be hidden.
I used heat and bond for the front facings to avoid excess top stitching, I also tried it on the hem and didn’t find it secure enough so I pulled it out and stitched down the hem instead. It won’t matter if water gets in the seam down there. Let’s be real, if the rain is bad enough that it’s going to get into the hem of my coat, I’m not going to be out in it!
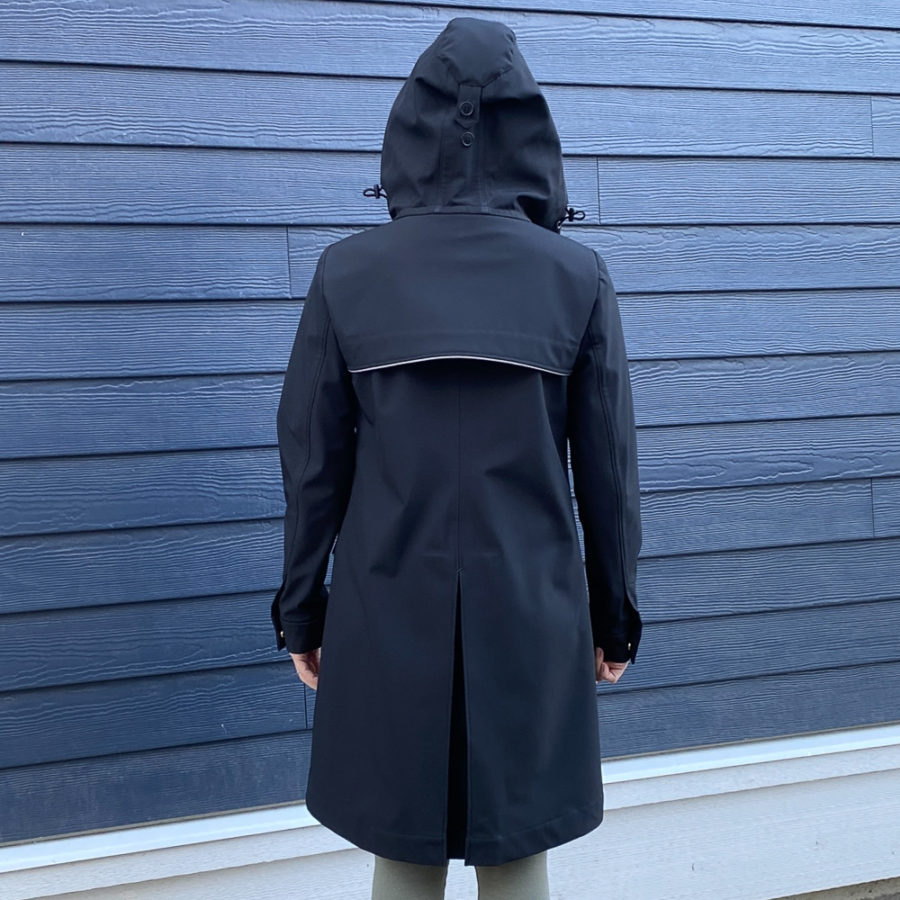
I’m pleased with the back pleat. It is necessary for movement as I made the front zip a bit too long, but I also like how it looks. The coat rides up if I ride my bike with it zipped, but the pleat allows me full range of leg movement. I should have put in a two way zip but it would be prohibitively challenging to change the zip length now, so I’ll live with it.
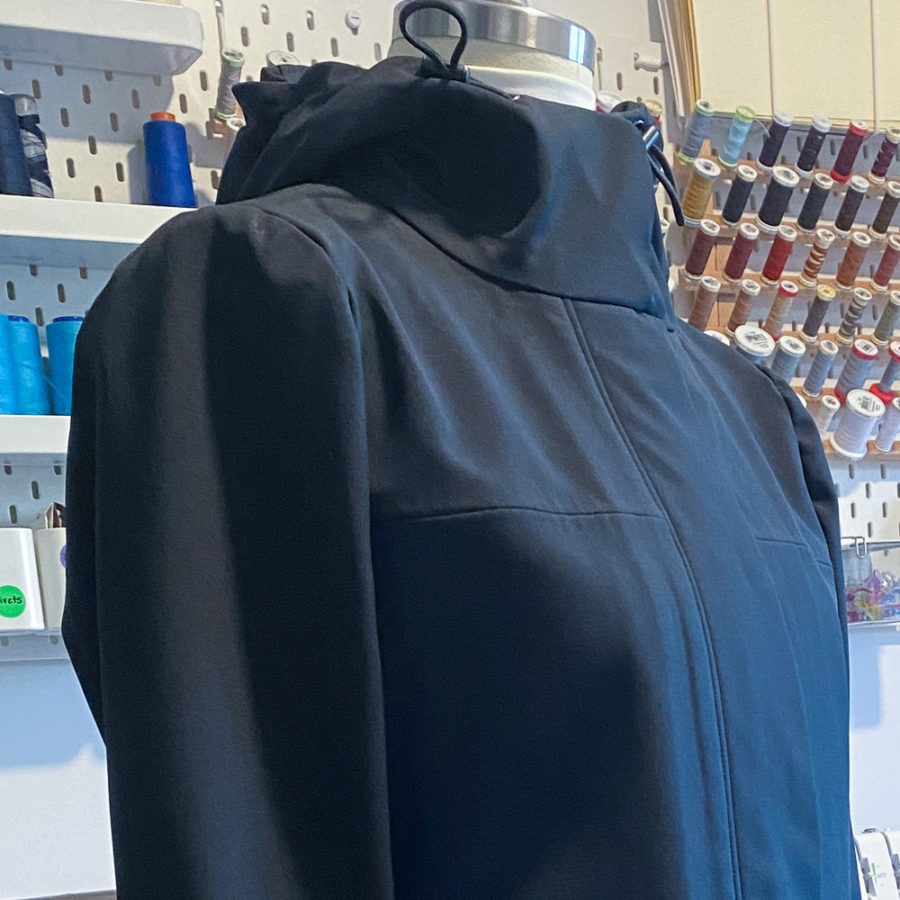
The hood turned out great but I had even more difficulty with the top layer of mine than I did with my husband’s. You can probably see the gathered edges. I was trying to make it lay flatter underneath, which I achieved. The result is that mine looks better on the inside and my husband’s looks better on the outside.
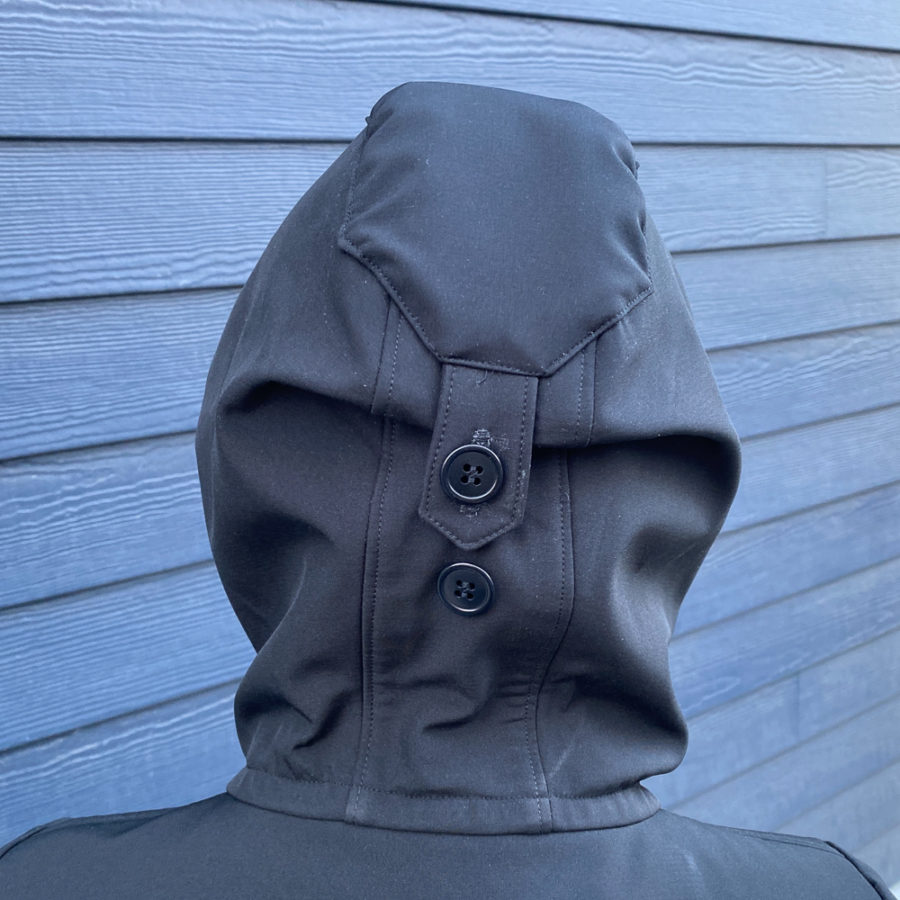
You can see in the closer photos that ironing this fabric was a bit challenging. I ironed in creases where I didn’t intend to when trying to waterproof seams. On thicker areas, ironing produced shiny spots that you can see at the base of the hood in the photo above. Even with a pressing cloth. They marks are evidence of this coat being a learning process. The biggest thing I learned was that I don’t like sewing raincoats :P
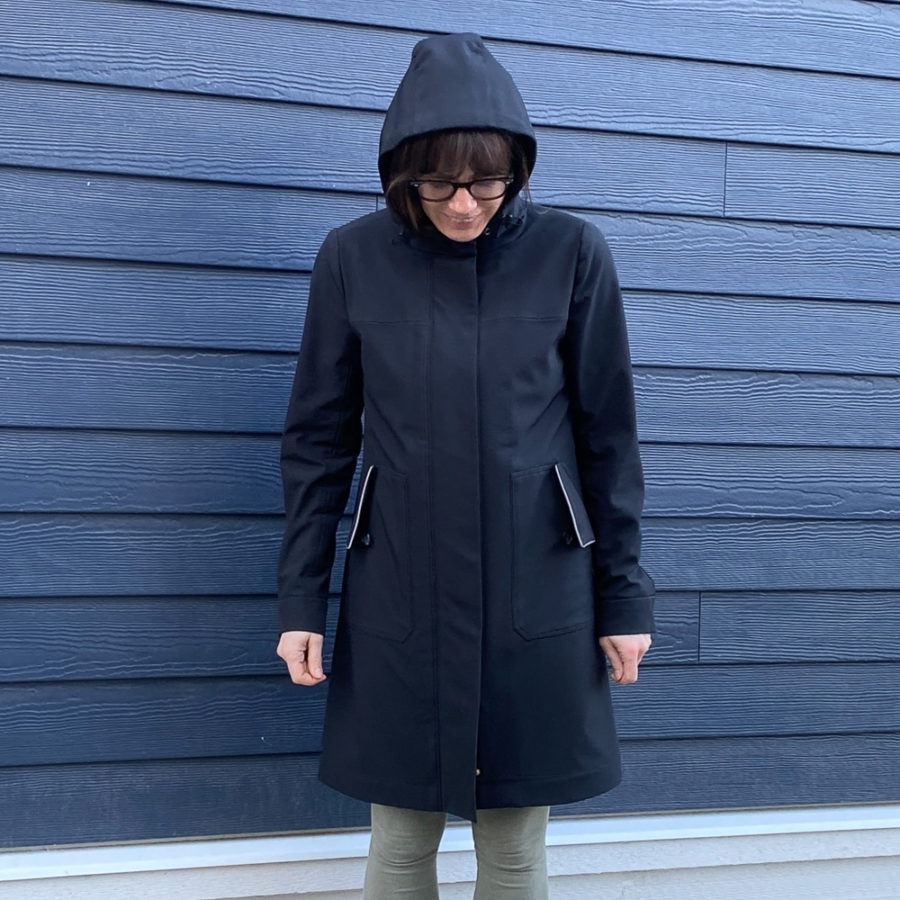
Regardless, it turned out well. I’m pleased with the fit overall. The sleeves are ok now that I let them out a bit. I didn’t want to have a waist tie and the shaping I gave the sides and back works well to break up the otherwise very straight silhouette. I also gave my coat a custom bias binding on the inside, which I love.
I’m sooooo glad to have these two coats out of the sewing room. They’ve been hanging over my motivation for half the year and it feels great to get out from under them.
I haven’t included details about where I purchased my fabric because I don’t feel confident recommending the store. Their website is not at all user friendly. As a content and UX designer in my day job, I feel bad sending people there. But here are my fabric and notion sources:
- Fabric and reflective tape – Discovery Fabrics
- Zip – Gala
- Snaps and waterproofing tape – Amazon
- Heat ‘n Bond – Michael’s
Thanks for stopping by!
~ Lindsay
I’ve turned off comments on my blog so the best way to connect with me is instagram or email. I have been inundated with spam for years and I finally got tired of moderating it and trying to sift through it for real people’s comments. It’s always lovely to hear from you though so please feel free to reach out.