I had big plans for my husband’s birthday this year. My first ever real raincoat! His birthday was in May… I finished it in the final days of October. It was a very dry summer, so he didn’t need it until now, but I’m usually not so tardy. This one was HARD, folks!
There were two reasons why this make took so long. The main reason is that it was challenging and tested me in a lot of ways, from finding the right materials to making pattern mods for a picky client. Because it was challenging, I was behind schedule to finish it. Then we sold our home, packed, moved into a rental for a month and then moved into our new home. I thought I’d be able to sew a bit during this tumultuous time, but I did not have the mental or physical energy, so it languished on a hanger until I got my new sewing room set up.
Let’s start from the top. Choosing fabric. My client didn’t want a thin shell. He wanted some structure and warmth. I didn’t plan to line this jacket so I went looking for something with a decent reverse side. I ended up going with the a Polartech NeoShell with a microfibre inner layer. In hindsight, this wasn’t maybe the best choice for an unlined jacket. The inside is pretty grabby. But it’s soft and pretty warm as well, which is nice.
I wasn’t confident when I bought the fabric online, or on the techniques I’d need to employ to make the coat, so I bought additional fabric for my own rain coat (more on that in another blog post to come). I used it to pretest things I wasn’t sure about.
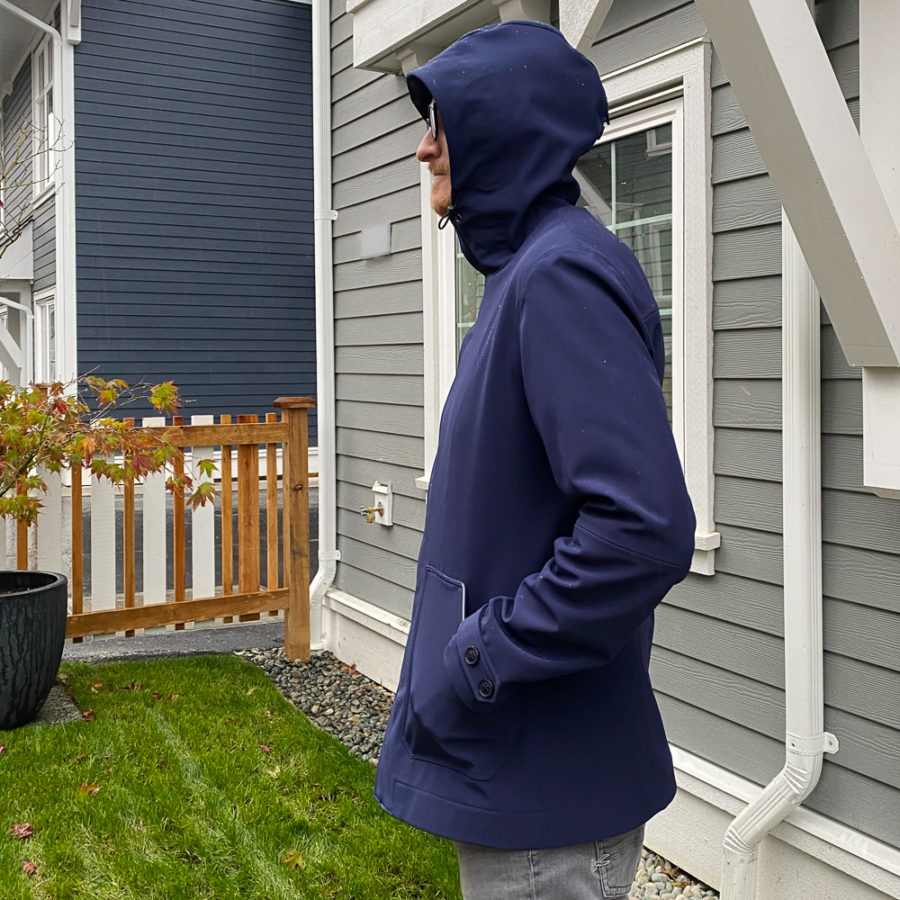
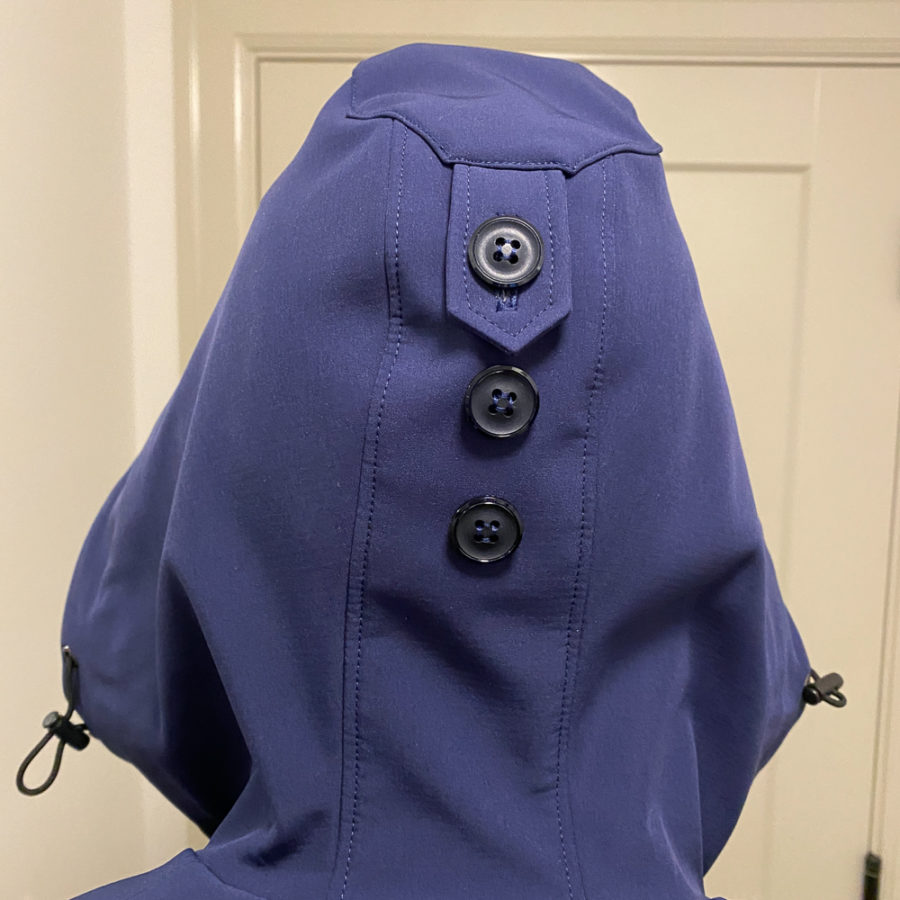
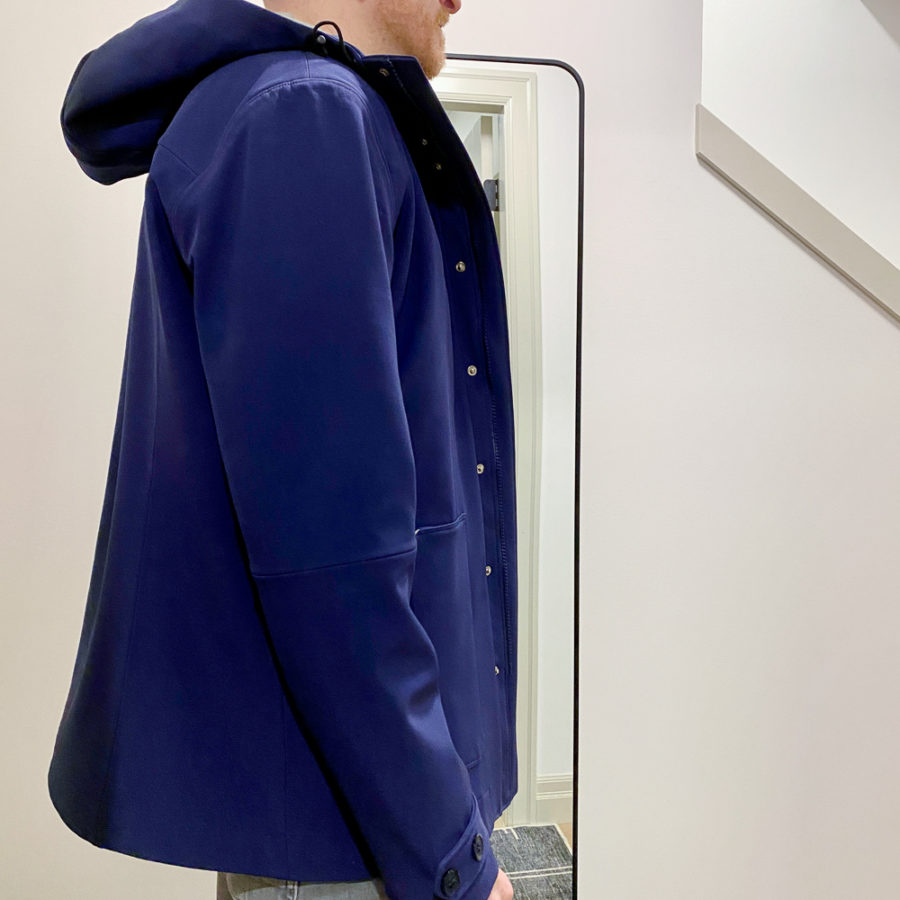
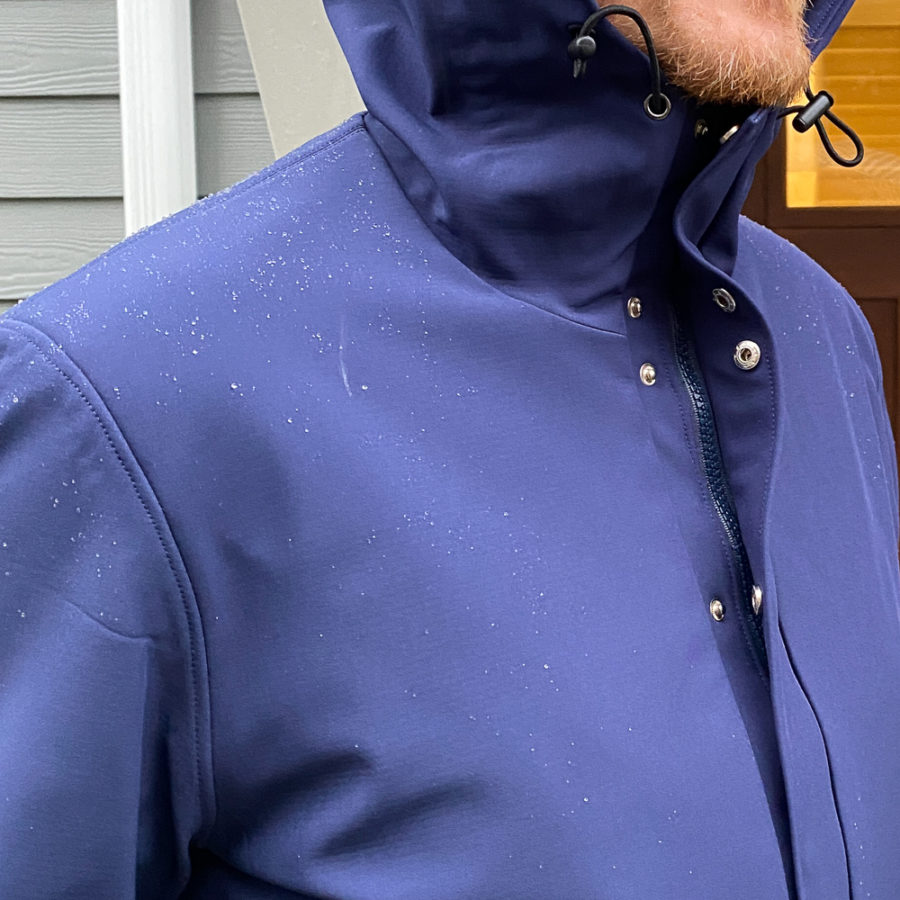
For the pattern, we used the Men’s Tosti Coat from Waffle patterns. I’d previously used this pattern for his spring jacket and his Italian wool coat, so was pretty confident with the fit. It needed some mods though. The main one was the hood. He wanted an integrated hood, which the Tosti doesn’t come with, and we needed to alter the hood shape because the Tosti hood is much too big. I decided to trace the hood of my MEC raincoat and reuse the technique for adjusting the hood size that I’d tried out on my black Kelly Anorak.
The hood worked well but was really challenging to sew the top layer and have it all lay flat. Taping the seams on the inside was also a challenge, but this wasn’t unique to the hood. The fit on it turned out really well, even if it’s not super nice to look at from the inside.
The next big challenge was the sleeves. Not to make them or sew them in, but to waterproof the seams. Ironing on seam tape on the inside of the sleeve seam at the shoulder was an exercise in frustration. So much so that I did not bother waterproofing them on my version of the coat and will just deal with whatever water finds its way in!
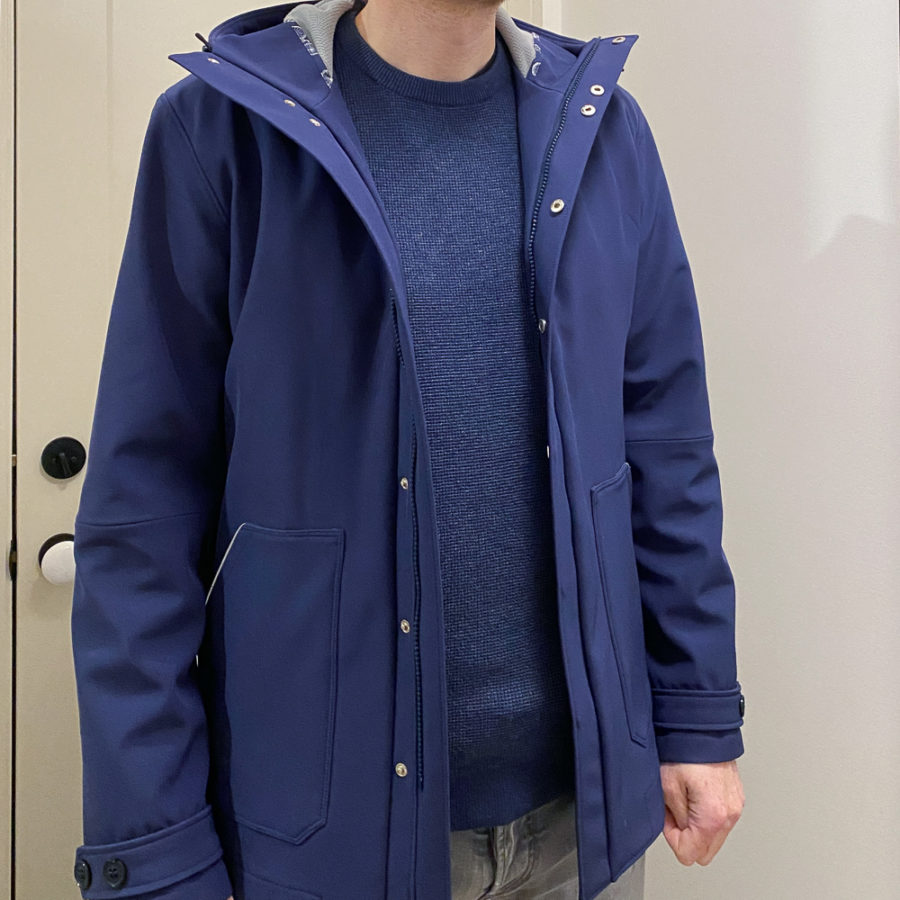
The other mods were an added zip facing (the Tosti coat doesn’t come with one), alterations to the facing to accommodate the lack of lining, and a small cuff detail. It’s not function (by request), but gives a more finished look to an otherwise quite plain sleeve design.
Once I figured out the hood and learned how to use the iron on seam tape and Heat ‘n Bond, this project went relatively well, if very slowly.
Things that I’m proud of/happy with:
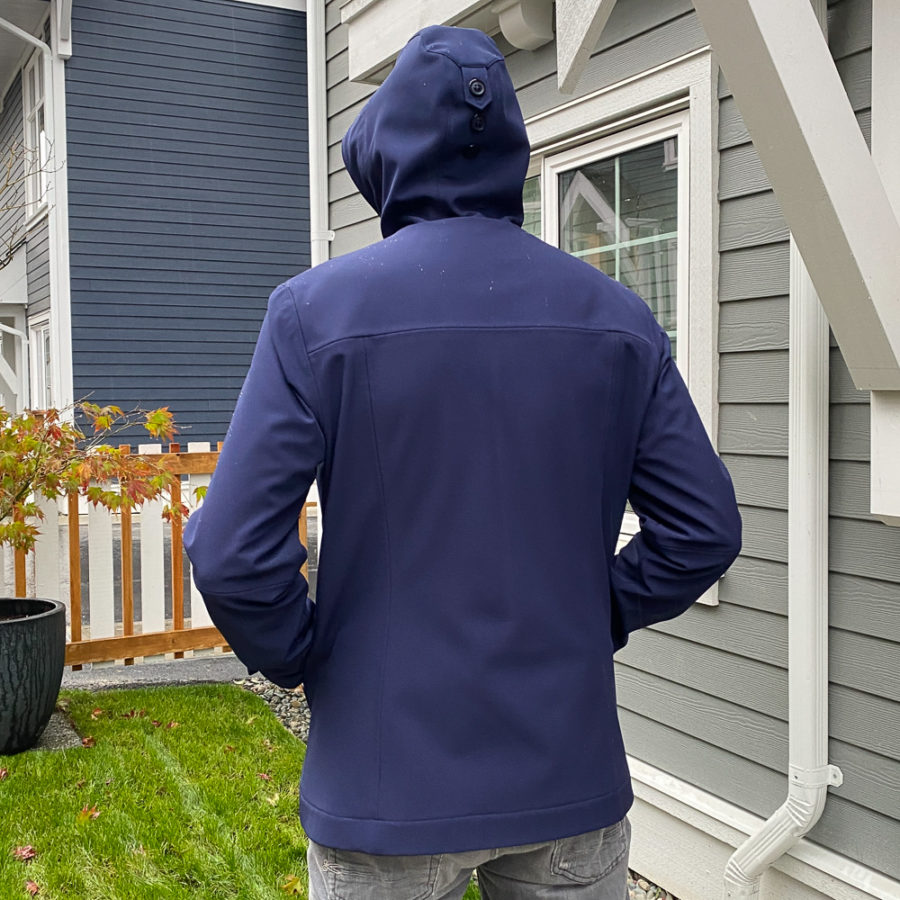
- The fit. It fits about perfect and looks really good on him.
- The hidden snap placket. I had to figure this out on the fly and it turned out really well.
- The hood. It’s not great to look at but it’s quite functional and fits great.
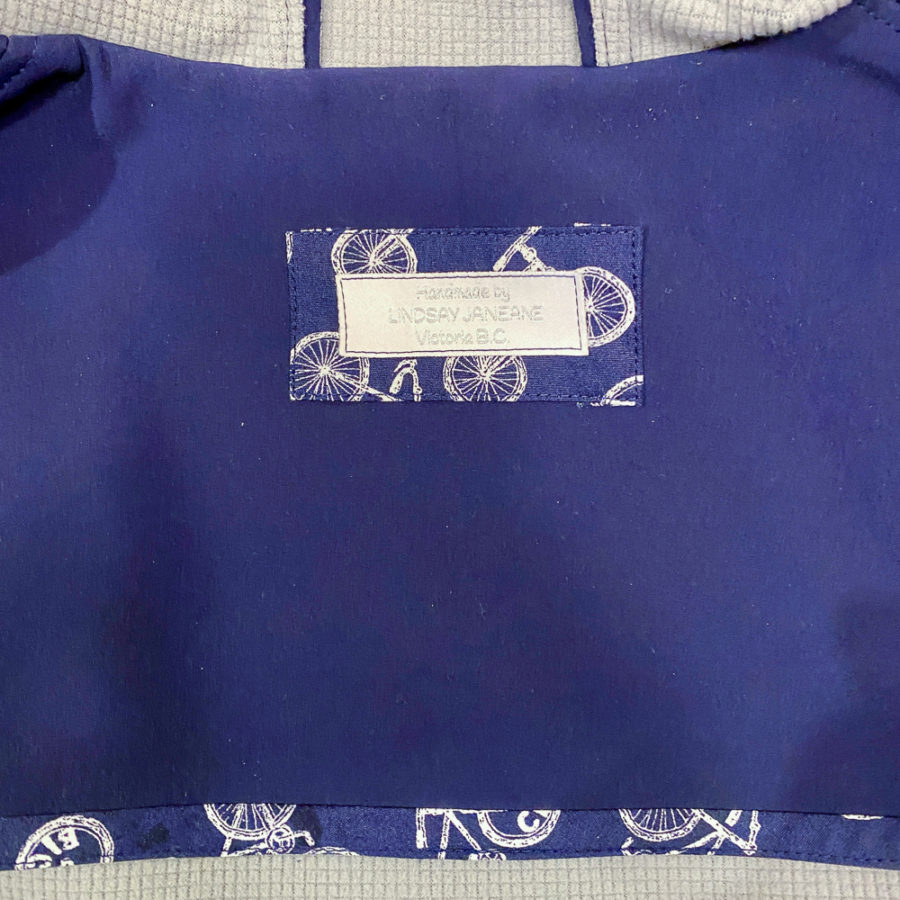
- The facing and hem. I drafted him a custom inner facing and bias bound the edges for that custom touch.

I’m proudest of getting it done! There were moments when I thought I might throw in the towel. I made him promise over and over again that if he didn’t like it, he’d go out and buy himself a “real raincoat”. But this is a real raincoat! Yes, I’m worried about how the waterproofing on the inside will work out over time. Yes, I ruined my iron making his coat and mine. And yes, some parts of it are a bit sus if you look closely. But it fits, and it works, and I delivered it to him the day before the first torrential rain day of fall. I’m counting it as a success. It was the first finished garment to come out of my new sewing space in our new home.
I’ve finished my coat now too… more on that soon.
Thanks for stopping by!
~ Lindsay
I’ve turned off comments on my blog so the best way to connect with me is instagram or email. I have been inundated with spam for years and I finally got tired of moderating it and trying to sift through it for real people’s comments. It’s always lovely to hear from you though so please feel free to reach out.