Let me start by saying, I dislike making underwear. It’s fiddly and slippery and I just don’t enjoy it. So I don’t. Then two years go by and my few bras as threadbare and too small and my underwear is falling apart from too much wear… and I have no choice but to make underwear. Well, that’s not true. I have a choice. I could BUY underwear. But I have a stash of supplies, knowledge, and time, and my me-made bras are far more comfortable than anything else I’ve worn, so obviously I’m going to make my own.
Because I dislike making underwear, when I make it, I make a lot. My hope is that it will last me years and will thus keep me from having to make more for a long, long time. So I gathered my existing supplies, augmented with bits and bobs from The Makehouse and Bra-makers Supply, and got to work.
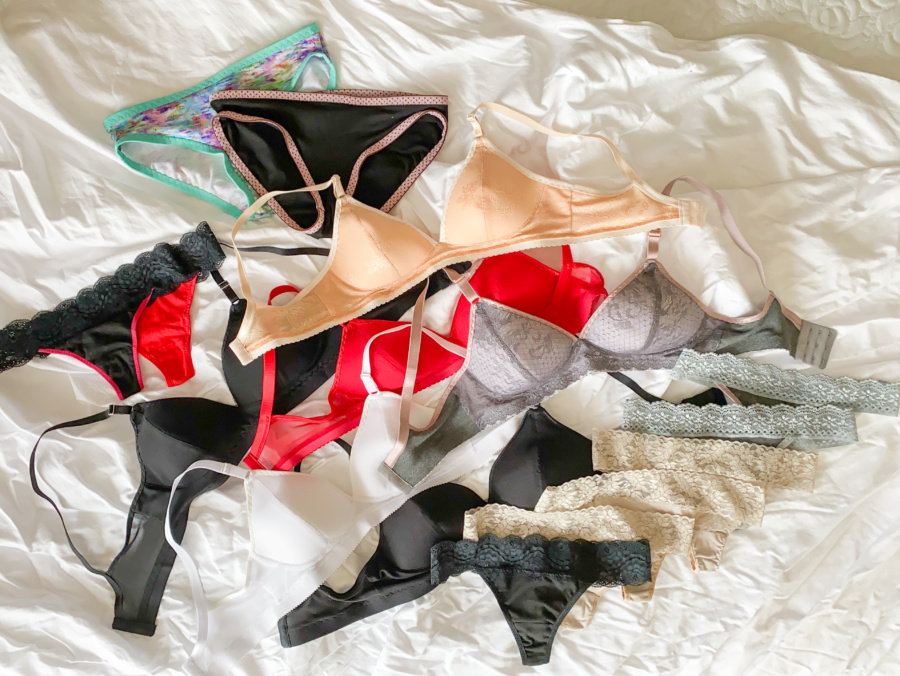
My go-to bra pattern since my explorations in 2019 is the Cloth Habit Watson Bra. It doesn’t have an underwire, has a deep V front neckline, works well with foam lining, and is drafted so the straps stay in place. It’s also easy to fit, supportive and comfortable, and looks great – it checks all of my boxes. For my full undies, there’s no beating the Megan Nielsen Acacia undies. The pattern was free when I found it, years ago, and it’s one I’ve made numerous times. I’ve even turned it into bikini bottoms more than once. My thong underwear are my own pattern, adapted from some ready-to-wear ones that I used to purchase many years ago.
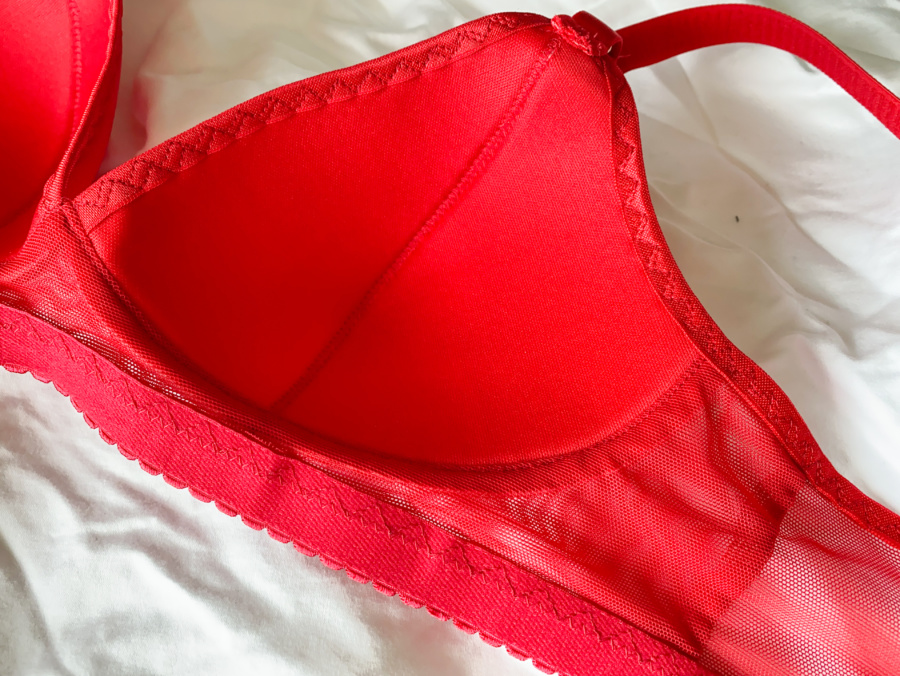
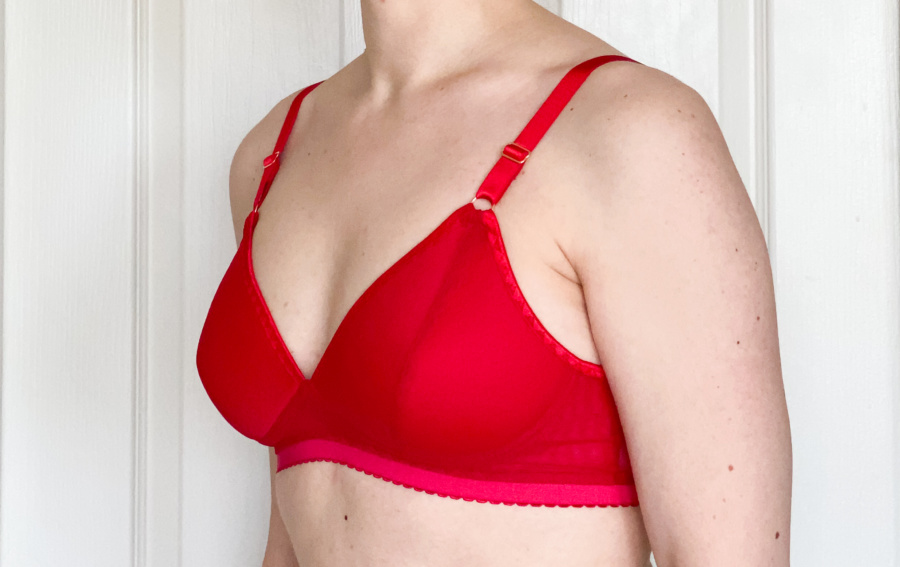
Watson Bra
For these versions, I made the 34C size, one cup size bigger than my bust measurement. I measured 34B but increase the cup size to account for the foam and give me a little more bust coverage. This being said, I remove about a quarter-inch of the curve from both sides of the cup pieces at the bust point because I find that it is a bit pointy otherwise (this might be an issue unique to using foam). This sizing is a change from when I last made a set of these bras two years ago – for those versions I made 32D. They had gotten a bit too tight for comfort in the band though, hence the need to make some new ones.
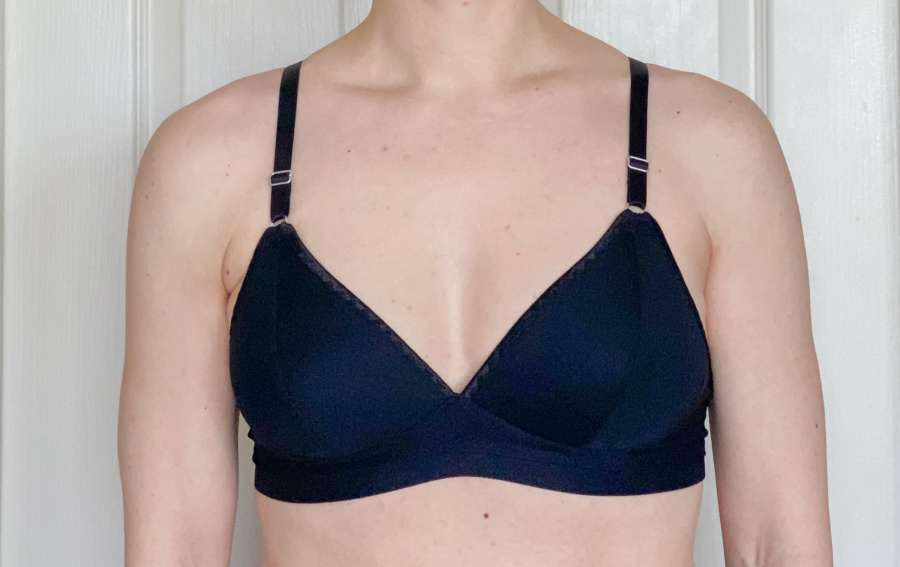
Adding foam to this pattern is easy. I just create cup pattern pieces without the seam allowance on the joining edge and cut the foam from them. I butt those two pieces up to one another and sew them together with a tight, wide zig zag (length 2, width 4.5). Then I pin the fabric cups to the foam cups, stretching the fabric a little so it lies very flat against the foam, and sew around the outer edge. I treat them as one piece for the rest of the construction.
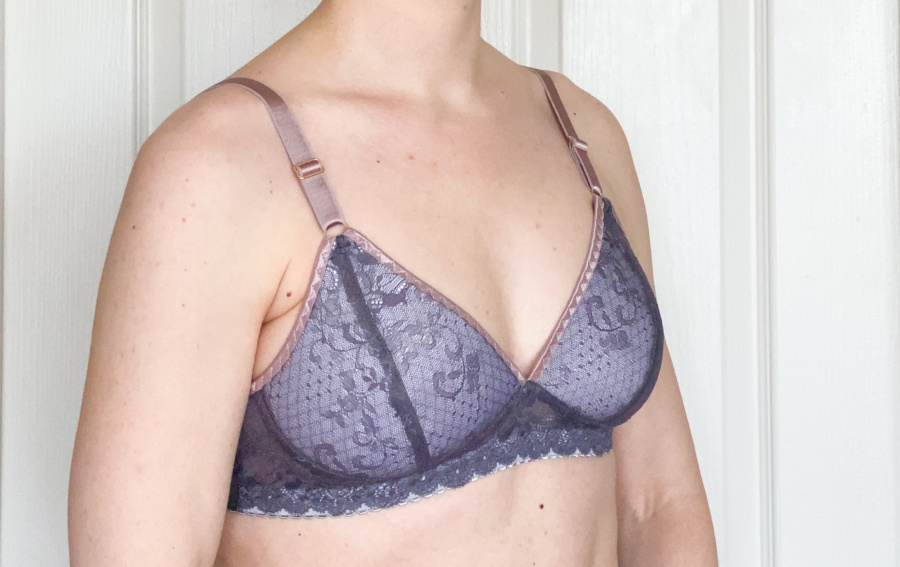
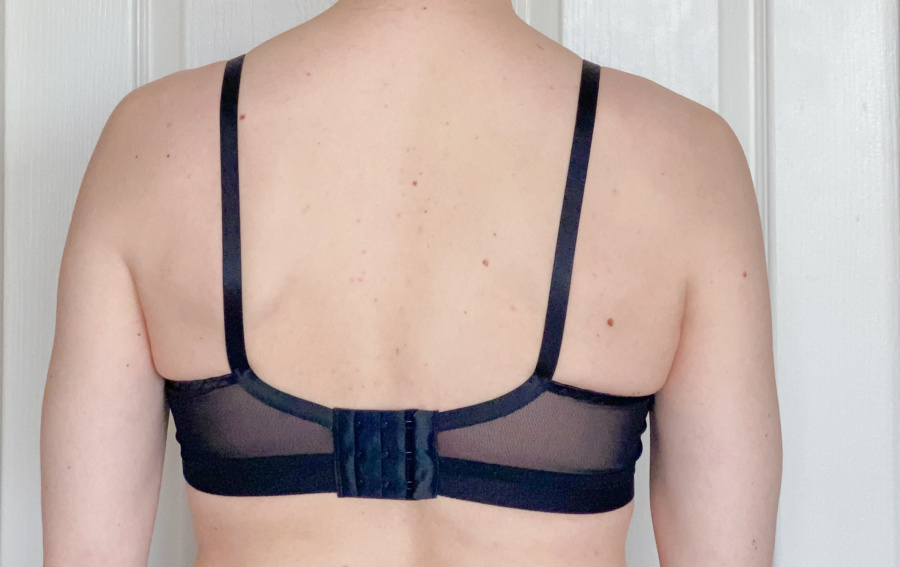
The other big change I made this time around was to construct everything with a clean inside finish. The pattern has you sew the main and lining pieces of the cradle together as a first step, but I kept them separate and sandwiched the cups between them, right sides together. This is a bit tricky. It requires lining up opposing curves with very, very slippery fabric. I sandwiched one cup at a time and used a pin to line up the centre front point as well as I could. Once the main and lining pieces of the cradle were sewn to the cups, I sewed the back pieces to the cradle main and lining at the side seams the same way, then top stitched below the cups from side to side as instructed in the pattern. The result is all seam allowances hidden between the main and lining pieces of the cradle. It was tough but I got better as I went through these six versions and the resulting clean finish is wonderfully satisfying (though it makes it hard to tell which is the inside of the black, white and red versions!).
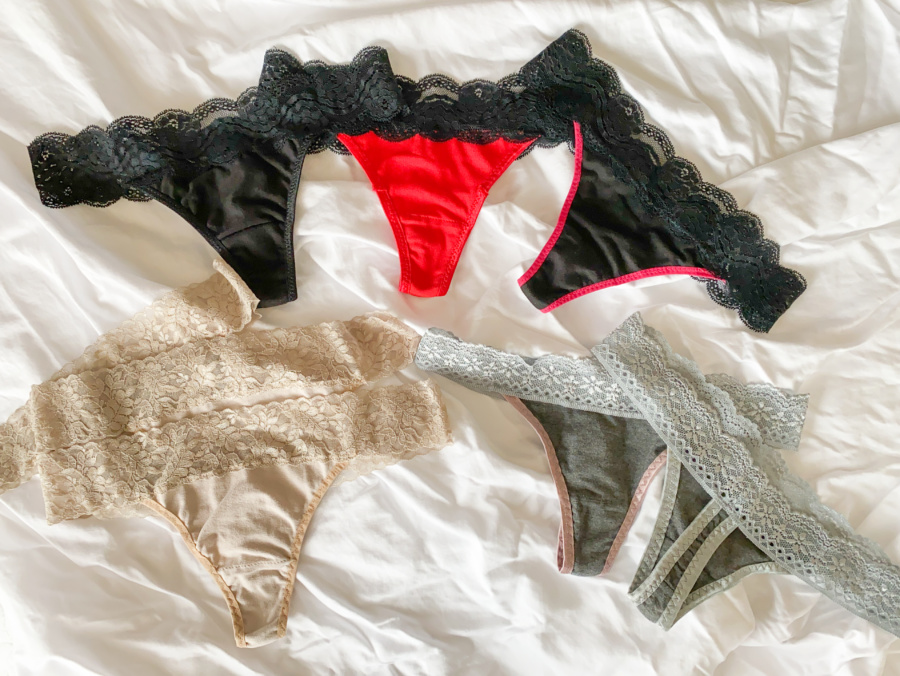
DIY Thong Undies
These have been my go-to undies for almost 20 years. I prefer thong underwear under clothes and these are the most comfortable I’ve found. I used to purchase them but their quality declined over the years so I cut some apart to make a pattern a few years ago and haven’t purchased any since. They have a lined crotch with all seam allowance hidden and the leg holes are finished with thin fold-over elastic. The two-inch wide stretch lace waist band lies flat without any pinching or digging in, making them invisible under clothes. And they’re a great way to use up scrap jersey fabrics!
The pattern is three pieces and takes very little fabric. If you’re interested, I’ve made a tutorial to show how I make these little undies. It shows the pattern pieces and has step-by-step photos of construction. These undies are quick and easy to make. I made all three pairs featured in the photo tutorial in about 2.5 hours. I’m not photographing myself wearing these so you’ll have to take my word for it that they sit wonderfully flat, are invisible under cloths, and are very comfortable.
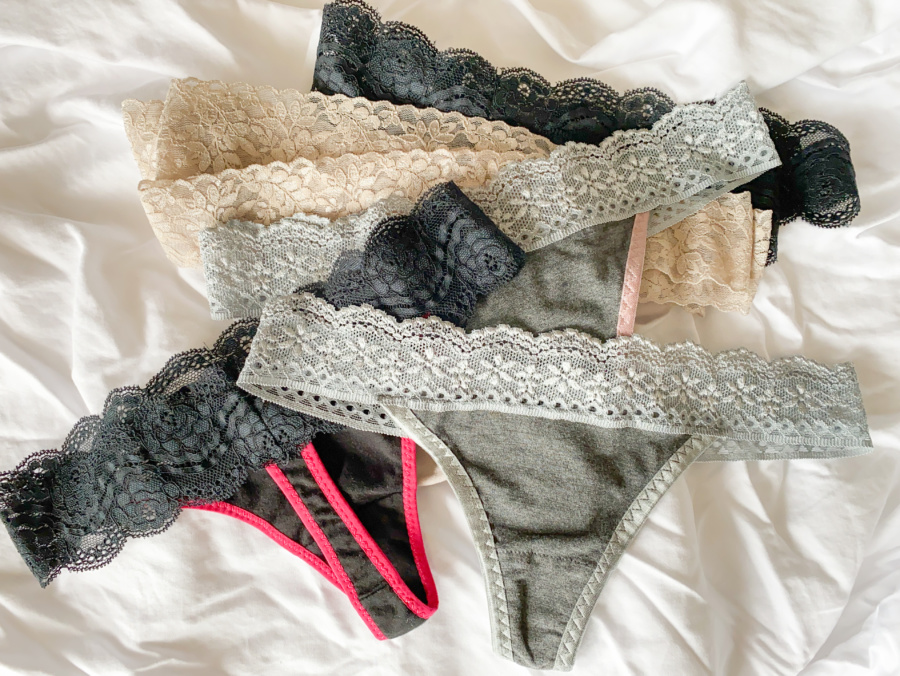
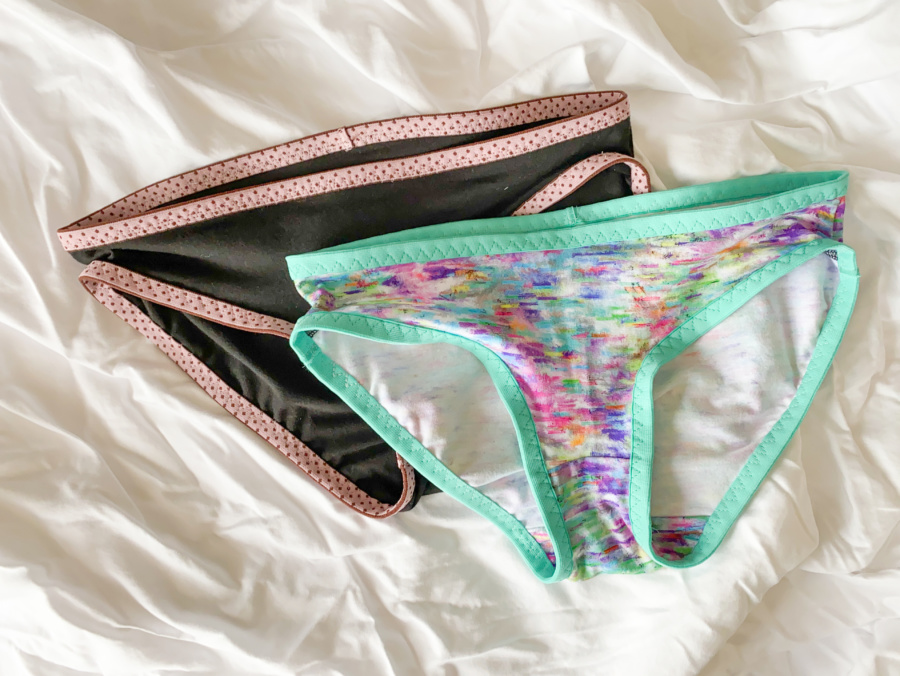
Acacia Undies
There’s not much to say about these. I make the size XS and I prefer using fold-over elastic for the top and leg holes. These were made out of scrap fabrics and elastic from my stash. They are super comfy and my go-to for bedtime.
Now that I’m through it, the making of these bras and undies doesn’t seem as daunting as it did before I started. They were easier than the first time and turned out great. I’m especially pleased with the hidden seam allowances, which will help these garments last much longer. I hope these ones continue to fit me for another few years but if my body changes and they no longer fit, that’s ok, I won’t wait so long next time to replace them with ones that do.
Thanks for stopping by :)
~ Lindsay