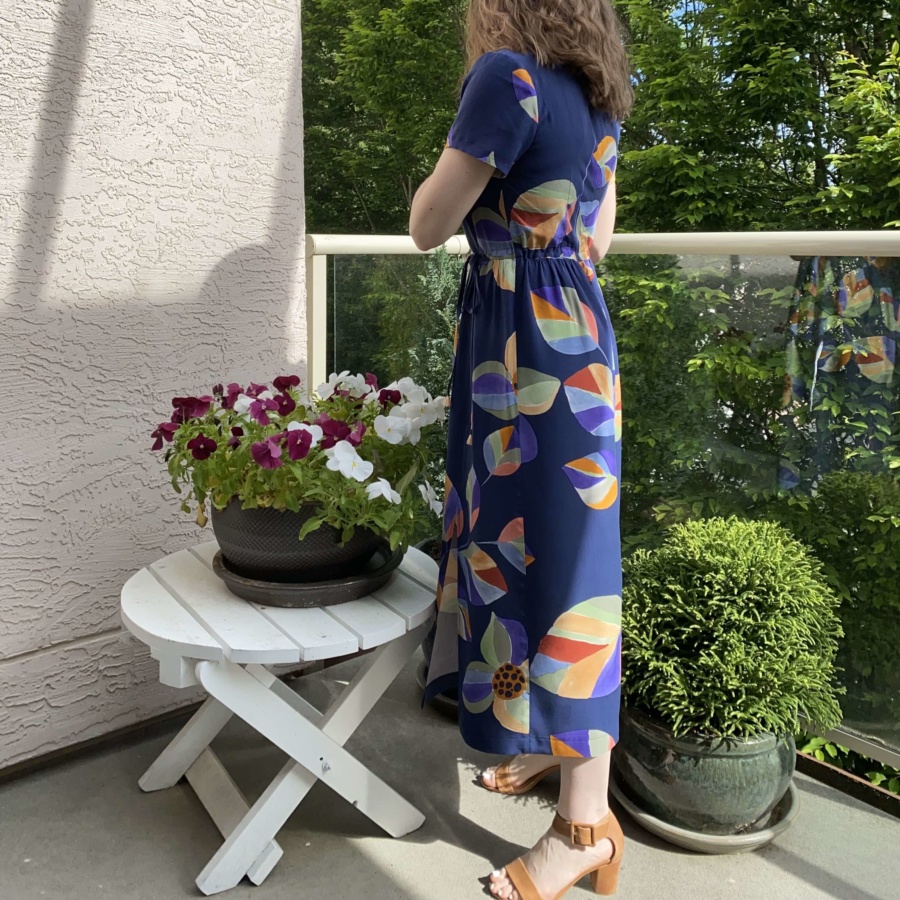
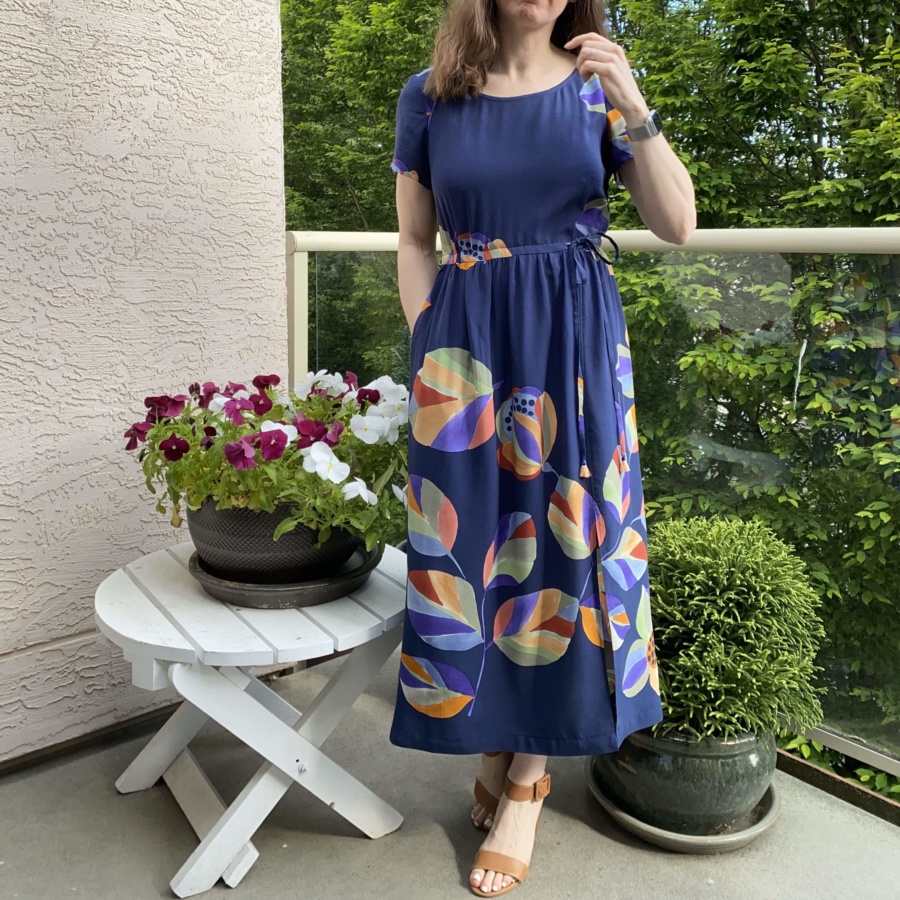
I had two summer dresses on my list this year. The first was my Fiona dress with gathered skirt. The second, I wasn’t certain of until I started to work on it. My uncertainty was about the fabric. In both the many vibrant colours and the large size of the print, this fabric is outside of my comfort zone.
I’d been attracted to this print since the first time I saw it. I didn’t purchase it then because I don’t wear large prints (I’m quite small and I think they overwhelm me) and didn’t have any idea what I’d make with it. Fast forward to a couple of years after I’d first seen it. My friend was de-stashing in preparation for a move and offered me a large cut of it that I couldn’t pass up a second time. I brought it home and It sat in a pile on my floor for a few months while I stared at it, contemplating how I would feel comfortable wearing such a large and colourful print.
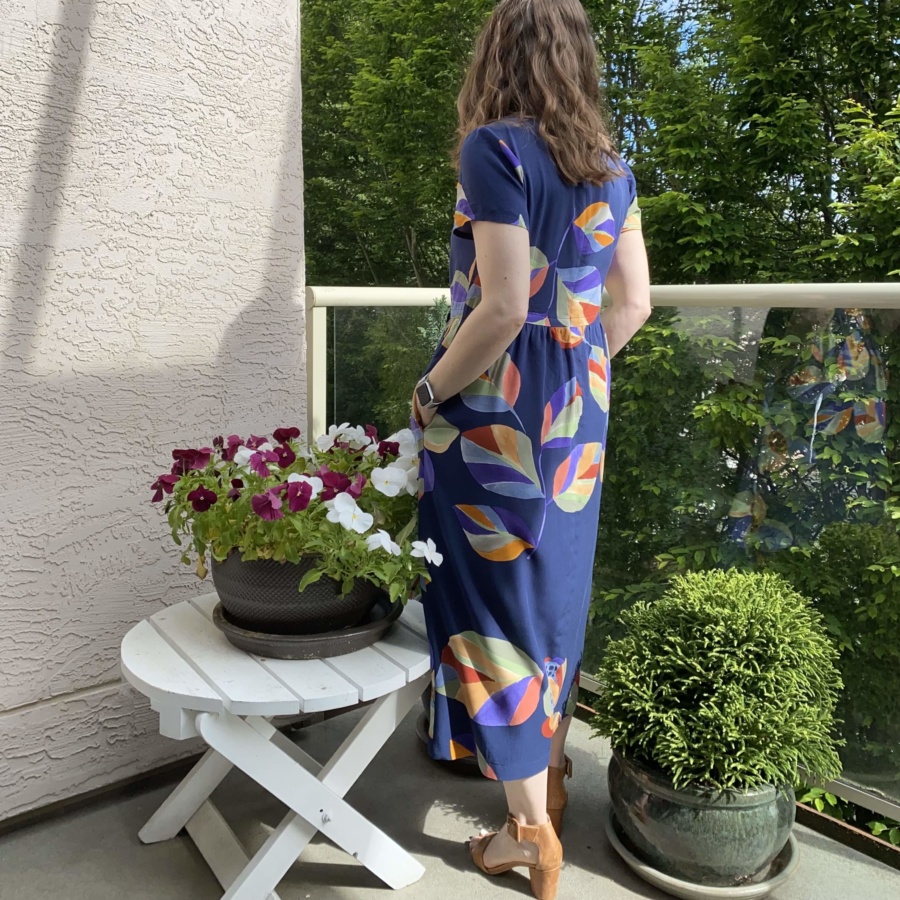
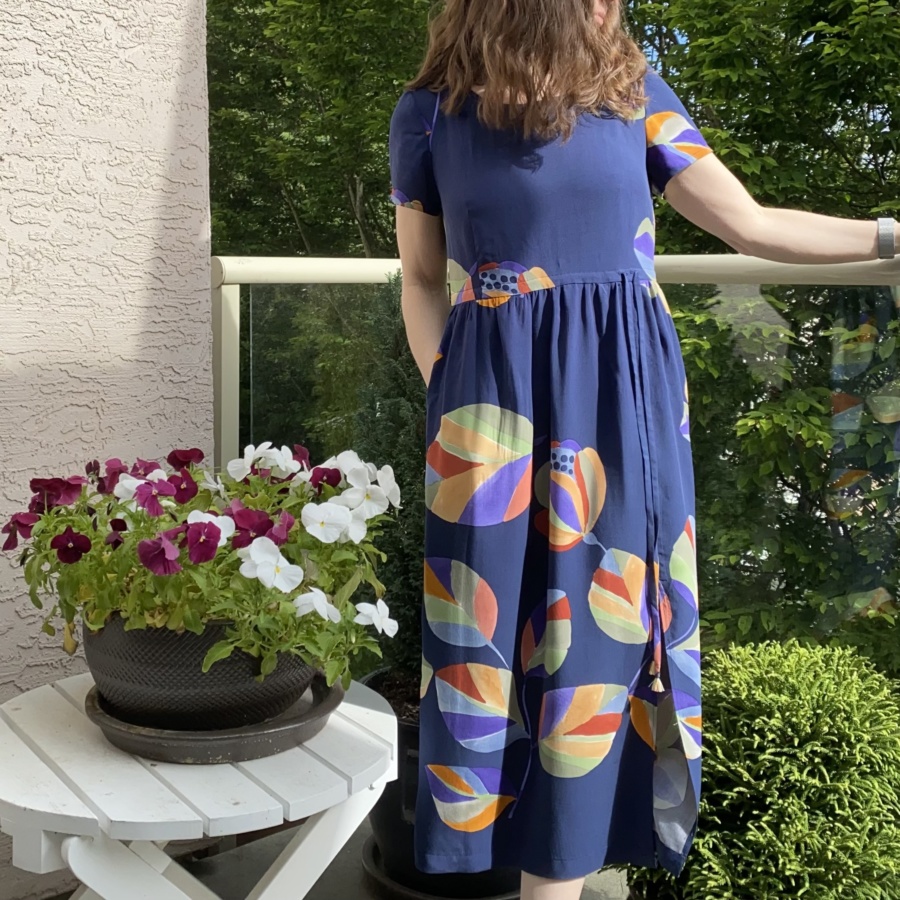
I decided on a simple, long silhouette so as not to break up the print with too many seams. It’s a very light-weight viscose so I knew it needed to be an unstructured garment. Last summer, my beloved French Navy Orla split-front maxi dress went in the dryer accidentally and had to be donated. I felt its absence from my wardrobe so I decided to try remaking it with my newly acquired fabric and to do what I could to keep the print from covering too much of the dress.

I reused the pattern I’d made for my first Orla slit-front maxi (minus a few in inches to make it midi length). The pattern is based on the size medium with slightly less dart volume at the front. For this version I also added a forward shoulder adjustment, and a higher neckline. I finished the neckline with bias binding but from the same fabric.
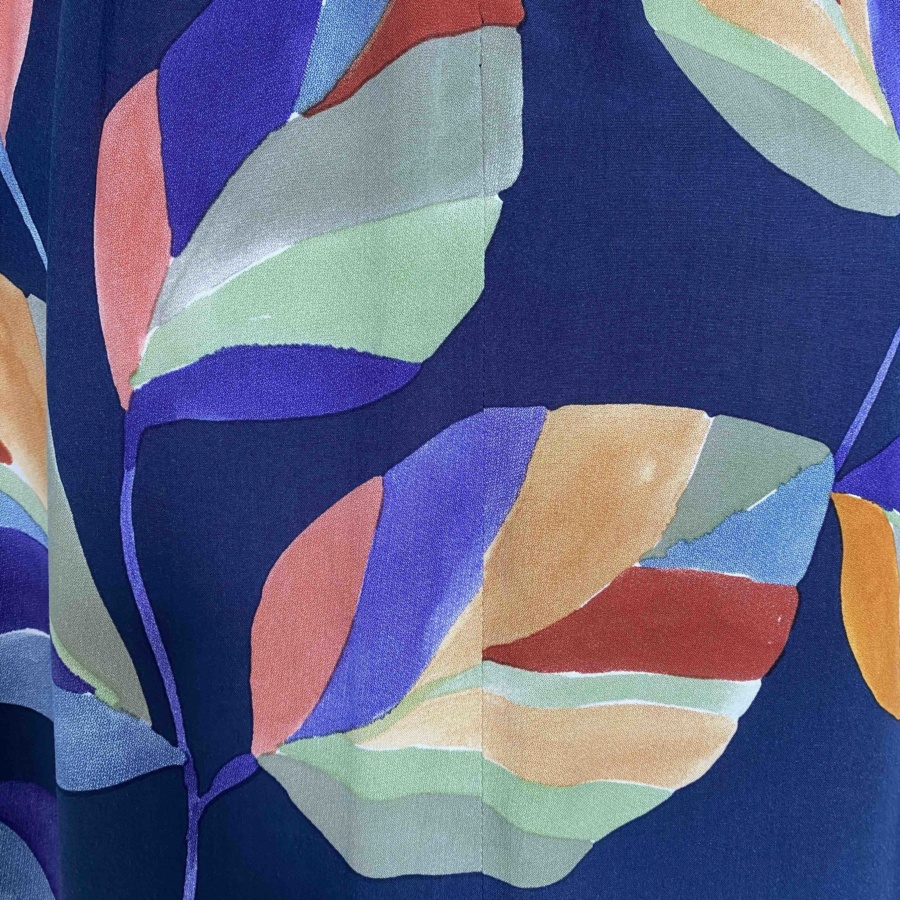
I decided to challenge myself by pattern matching the centre back bodice and skirt seams and the front slit. I also wanted to keep the area around my face primarily blue so cut each piece of the pattern as a single layer. It was challenging! The light-weight viscose was super shifty and grain was virtually impossible to maintain. In hindsight, I should have cut with the fabric face down as the grain is much easier to see on the un-printed underside of the fabric. A lesson to bring forward for next time I try to pattern match a shifty viscose (if there ever is a next time).

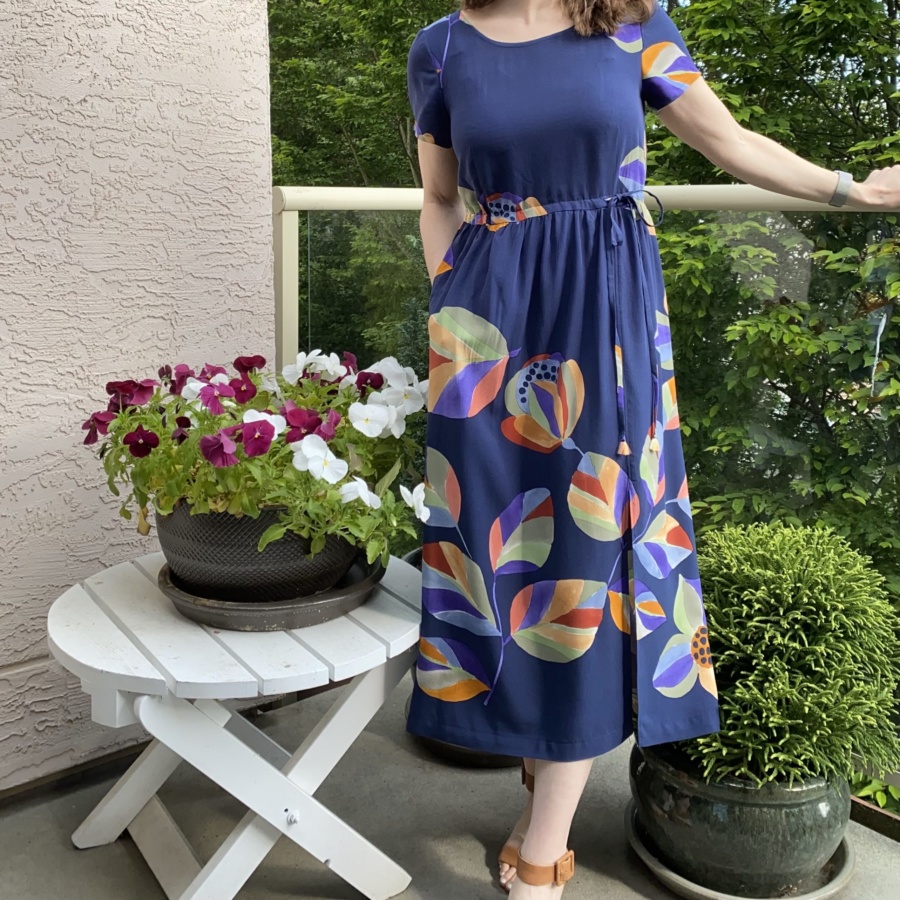
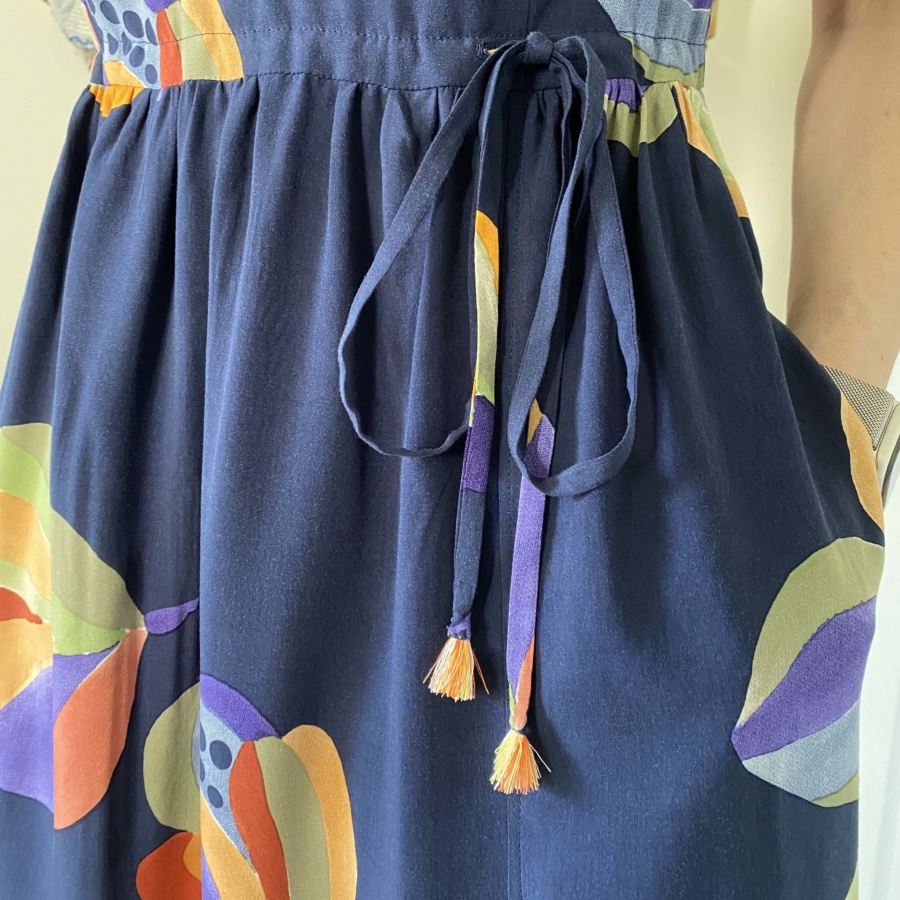
I got so wrapped up in trying to pattern match that I didn’t check the fit. I was about to put the zipper in when I realised it was quite too big at the waist. It’s had about three inches of ease. I was committed though, so I decided to add a casing to the inside instead of taking in the centre back seam. This allowed me to maintain the pattern match and add a tie at the waist to cinch it in. The tie gives me options for how I wanted to wear the dress – loose for hot hot days, tight for more dressed up occasions, or in the middle for most other times – and has the added benefit of enclosing the waist seam allowances for a clean inside finish.
My pattern matching was about a 90 per cent success. From a distance, you can’t tell there’s a seam in the centre back or the front skirt. If you get close though, you can see that it’s not quite perfect. I know how shifty the fabric was to cut and sew, so I’m quite pleased with the outcome.
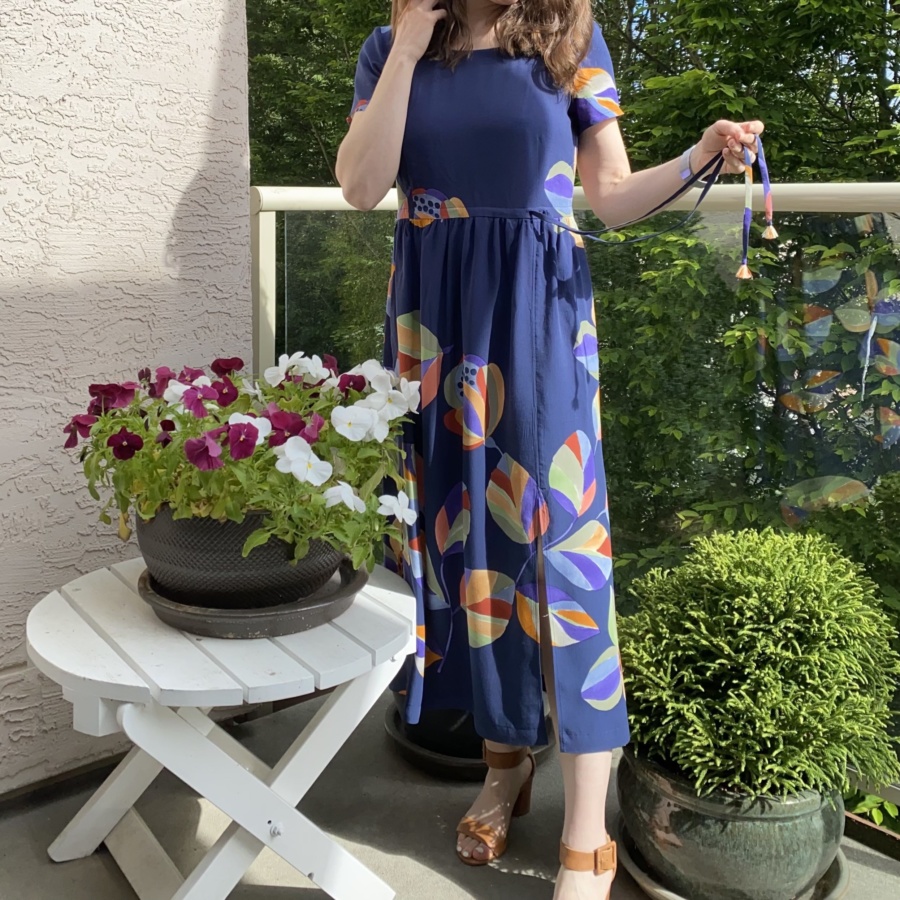
I sewed the ends of the waist ties into the zipper at the centre back and added two small button holes to the bodice, on either side of the left dart. The seam for the leg slit lines up with the dart so the ties align with the slit.
I haven’t yet had an opportunity to find out if I’ll wear this printed version as much as I wore my more subtle blue and white striped version. I’m not entirely comfortable in the print but the primarily blue front bodice helps and I think the way I cut the pattern keeps the print from overwhelming me. I do like the colours. It’s unlike anything else I have in my wardrobe, except maybe my second Orla in Rifle Paper Co. viscose, which I wear all the time in the summer and really love. I probably have no reason to be afraid of this one and it will become a favourite too. We’ll have to wait for it to get warmer to find out…
Thanks for stopping by!
~ Lindsay
P.S. I’ve turned off comments on my blog so the best way to connect with me is instagram or email. I have been inundated with spam for years and I finally got tired of moderating it and trying to sift through it for real people’s comments. It’s always lovely to hear from you though so please feel free to reach out.