Since making my Intrepid Boiler Suit and Len Coveralls this year, I’ve decided I really love the collared shirt look without having to tuck said shirt into pants or a skirt. But what’s easier to take on and off than a collared jumpsuit? Why a collared dress of course!
I have previously made the sleeveless view of the Colette Penny Dress and I liked the fit so I decided to try mashing together two versions to make one with sleeves… and it didn’t go as smoothly as I’d have liked.
Deadstock rayon crepe
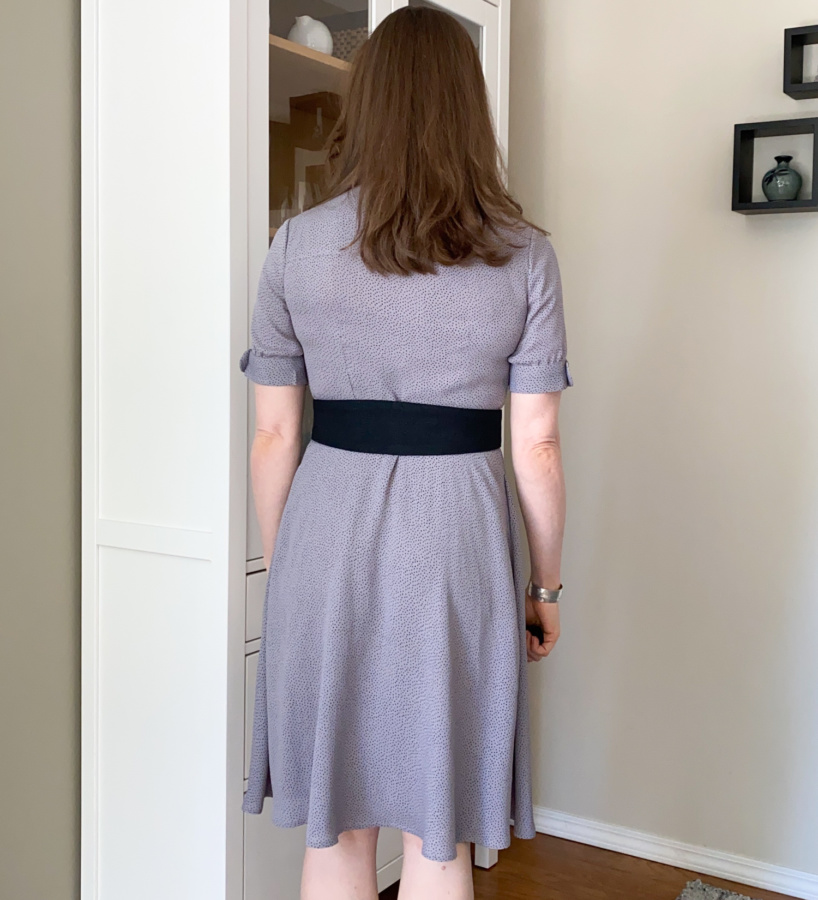
My first go at this penny-with-sleeves was with some deadstock rayon crepe that I picked up at Blackbird Fabrics. The fabric proved highly unsuitable for this pattern and, to make matters worse, I didn’t have enough. But did that stop me? No! Though it definitely should have and would have saved me some suffering!
I’m quite disappointed with this make. There were so many problems, so I’ll just list them:
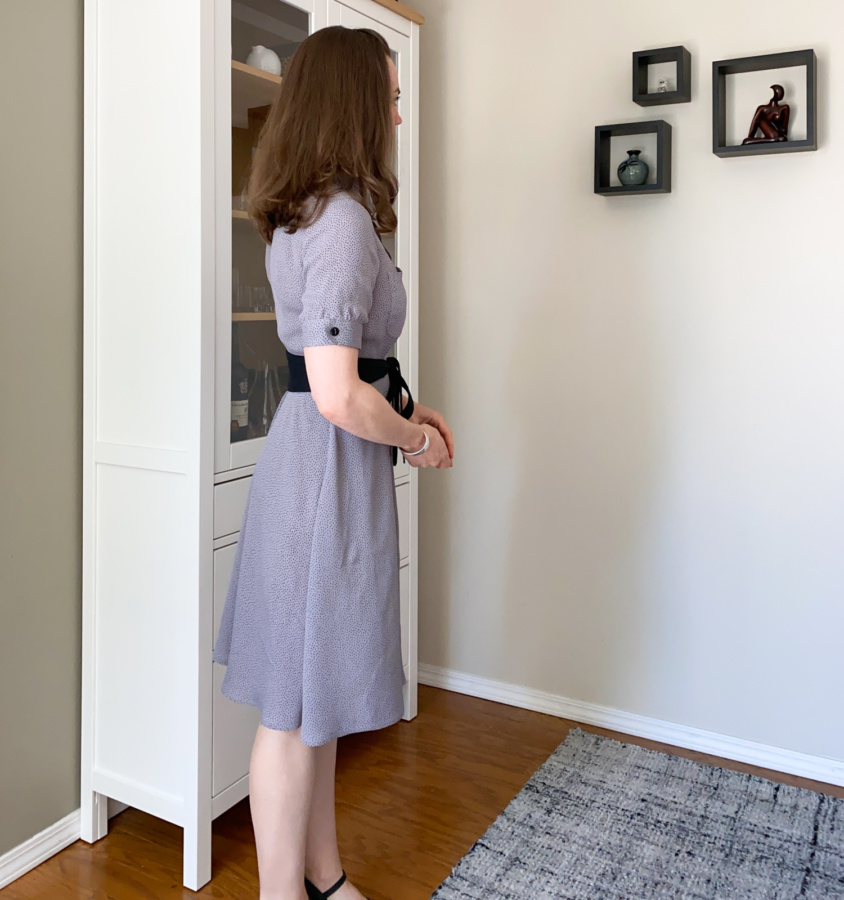
- This was the shiftiest fabric I’ve ever worked with and it was also stretchy making it nearly impossible to cut or sew the pieces on grain. I had to cut out the sleeves twice because they were so off-grain the first time and the hem and pockets are totally wonky but it’s the absolute best I could do. This fabric was so shifty I don’t even think spray starch would have worked because I couldn’t get a single layer of the fabric to lie flat on grain.
- I didn’t buy enough fabric and had to cut out two extra sleeves, so couldn’t cut out the belt pieces to complete the look and help with problem 3…
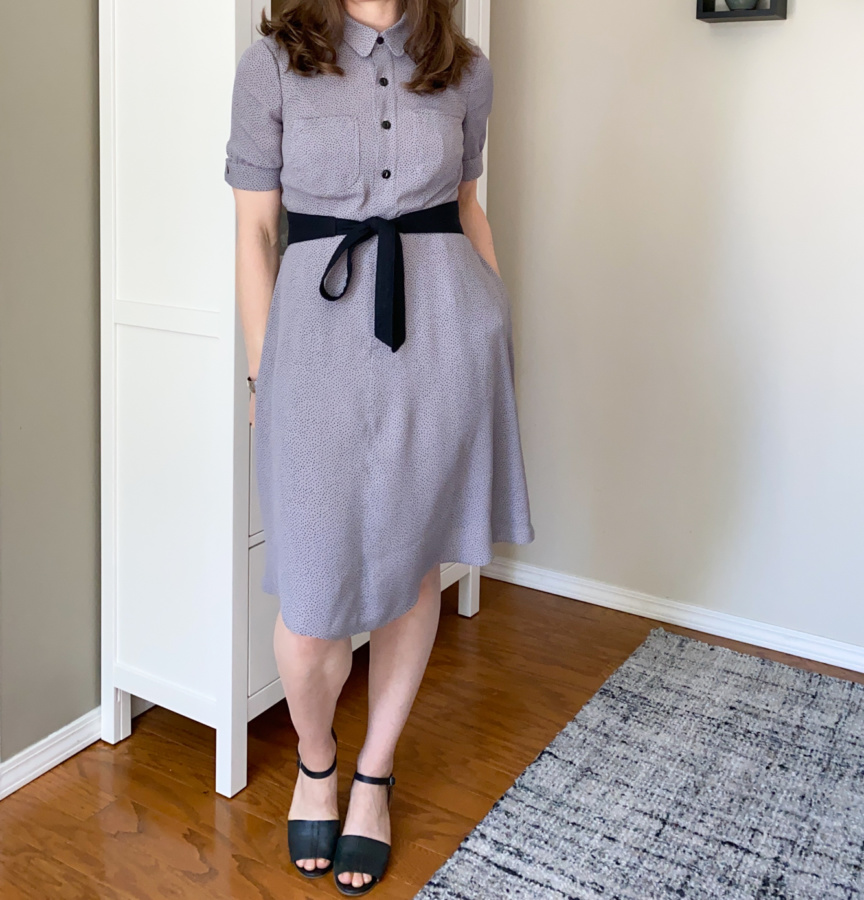
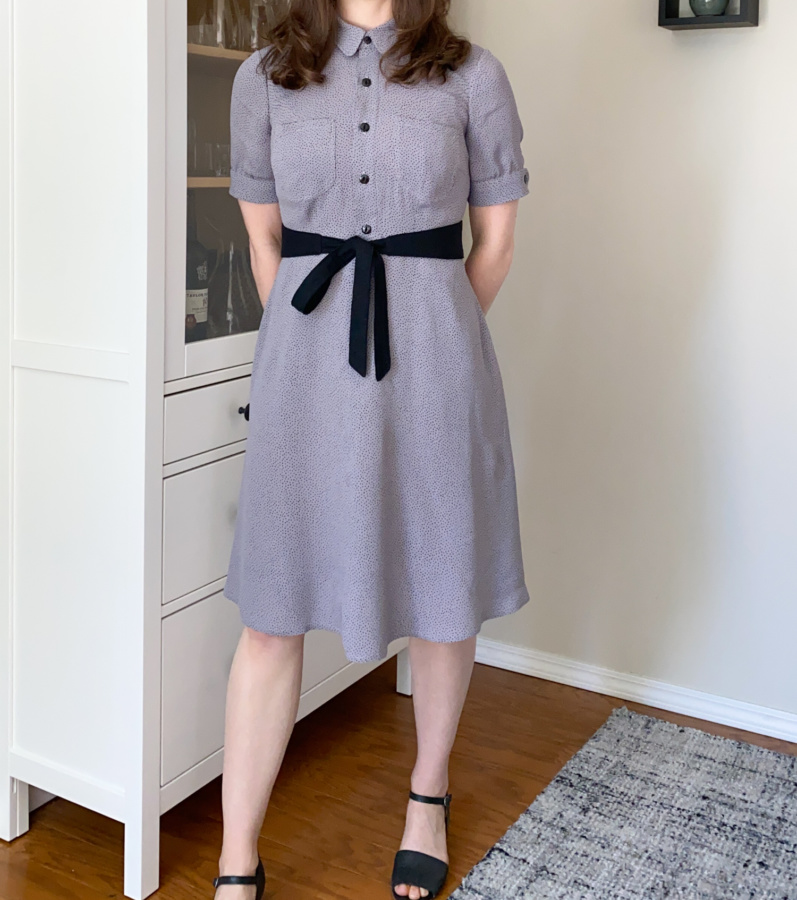
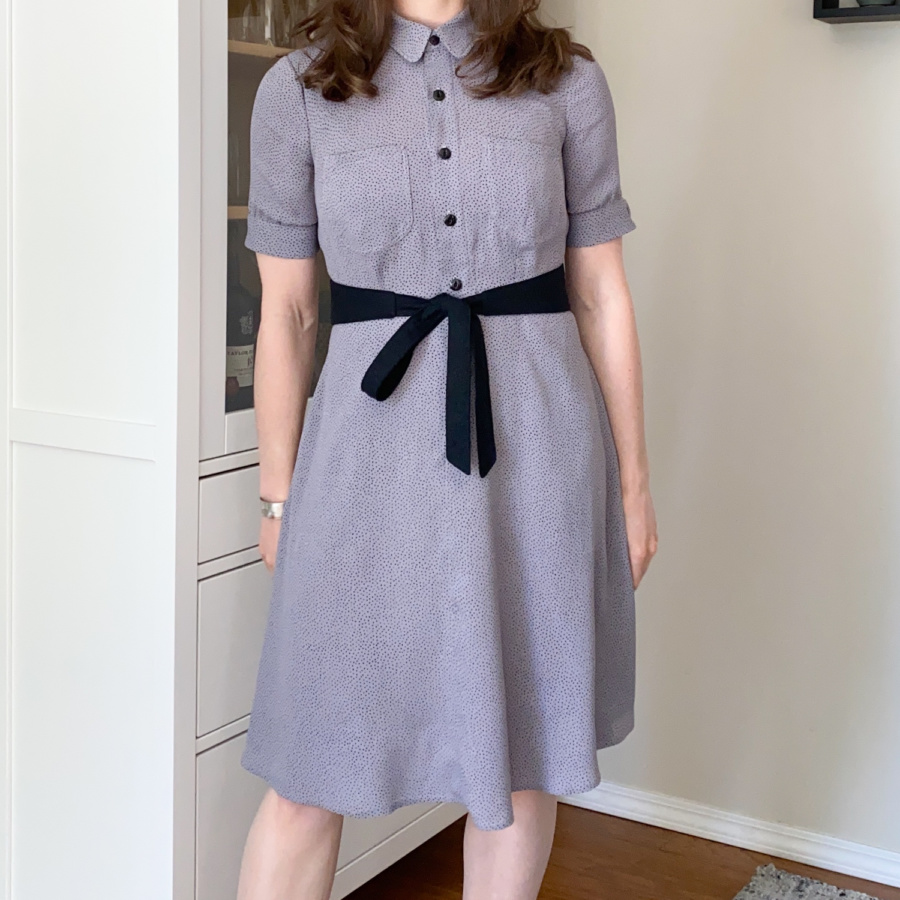
- Somehow the waist seem ended up a good inch too high making a normal belt (my plan when I realized I couldn’t make the fabric belt pieces) not work unless a) I wanted a belt around my ribs or b) I didn’t mind a belt sitting well below the seam. I wanted neither of these so this necessitated making my own tie belt that was extra wide to hide the extra high waist seam. It’s not the look I was going for but I suppose it’s works well enough.
- The fabric was far more sheer than indicated on the online listing so the shape of my lower body is clearly visible in most lighting situations… not exactly work appropriate. I can line it but it’s so sheer and such an odd, unmatchable colour that the skirt will end up looking like a different colour than the top. I may still do it though because I wanted to where this dress to work someday (when we go back to working in the office again). Either that or make it a winter dress and only ever wear it with tights and a cardigan.
- I cut the front skirt pattern pieces the wrong way round so had to switch the direction of the button placket. Not a big deal but I’m glad I noticed early on. The pattern pieces really should say to cut with the fabric wrong side up to help people avoid this error. I’ve written that on mine now.
- The lint. Oh the lint. I’ve worked with rayon crepe before on my Lois Dress, but this stuff was not even close to the same quality. It frayed if I looked at it wrong and dropped fine purply/grey lint everywhere. Not a huge issue but it did make this make pretty un-fun.
So, even though I’d french seamed it all, I decided it was a toile and moved on to version number two in Atelier Brunette viscose twill.
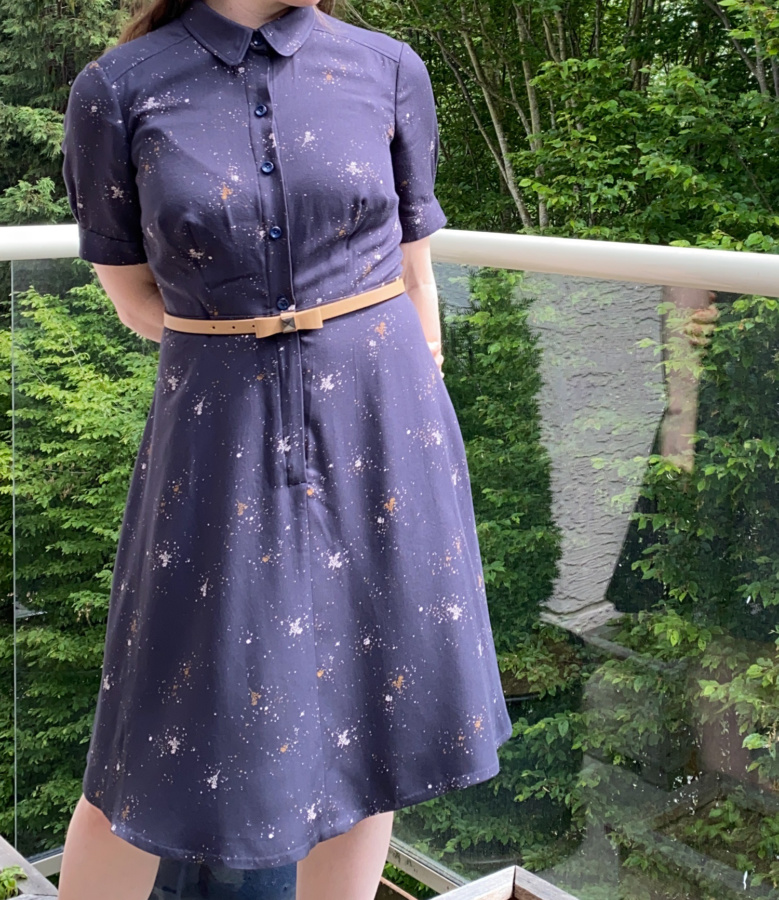
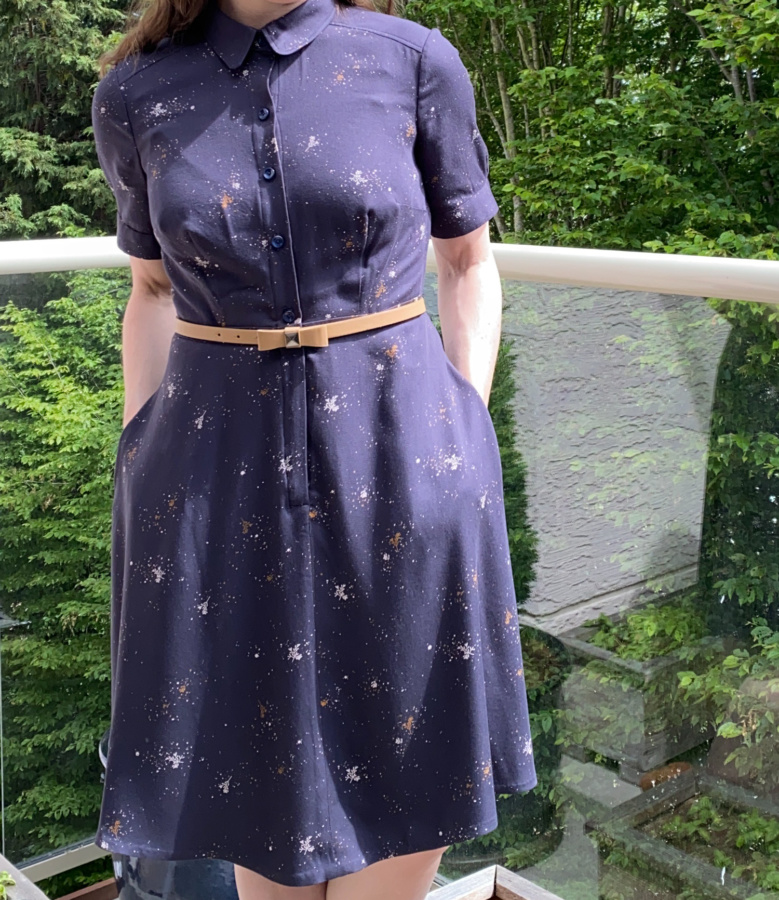
Atelier Brunette viscose twill
Oh what a beautiful fabric. I picked up this Atelier Brunette twig in navy from Five Arrows Fabric Prince Edward Island. It is so buttery soft, I should have just turned it into a very expensive scarf so I could cuddle up in it and stroke it. Seriously, it’s that scrumptious, and that pricey.
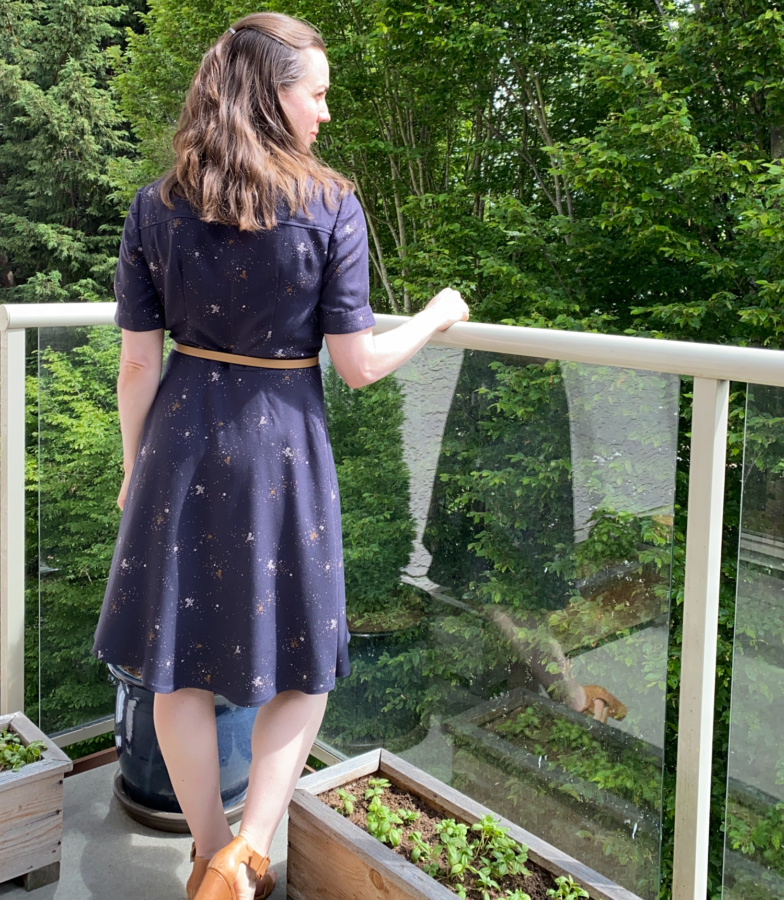
This version turned out much better than my previous one in both the fit and the opacity of the skirt, but I still think I made the wrong fabric choice. I had to work extra hard on the fit, which required seam ripping, which was not a good idea with this delicate fabric. In hindsight, I think my fitting issues in the top would probably have been much easier to manage with a more structured fabric. A more structured fabric also would have helped with the fly placket, which I had trouble getting to look as nice as I would have liked.
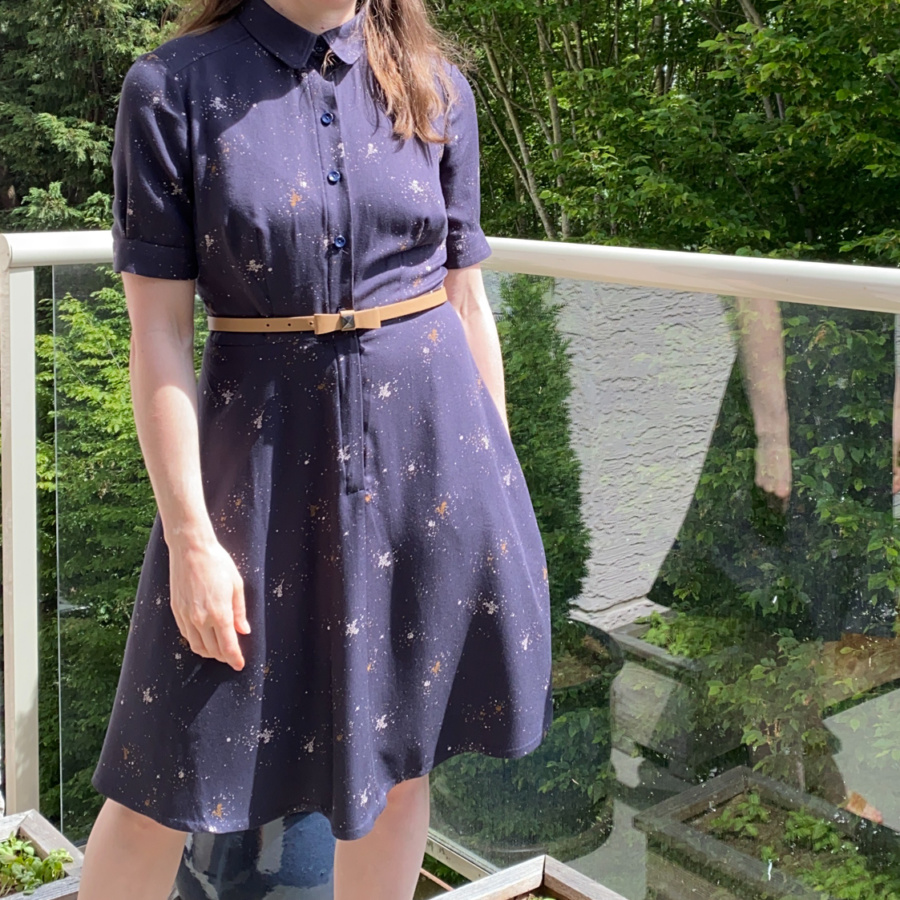
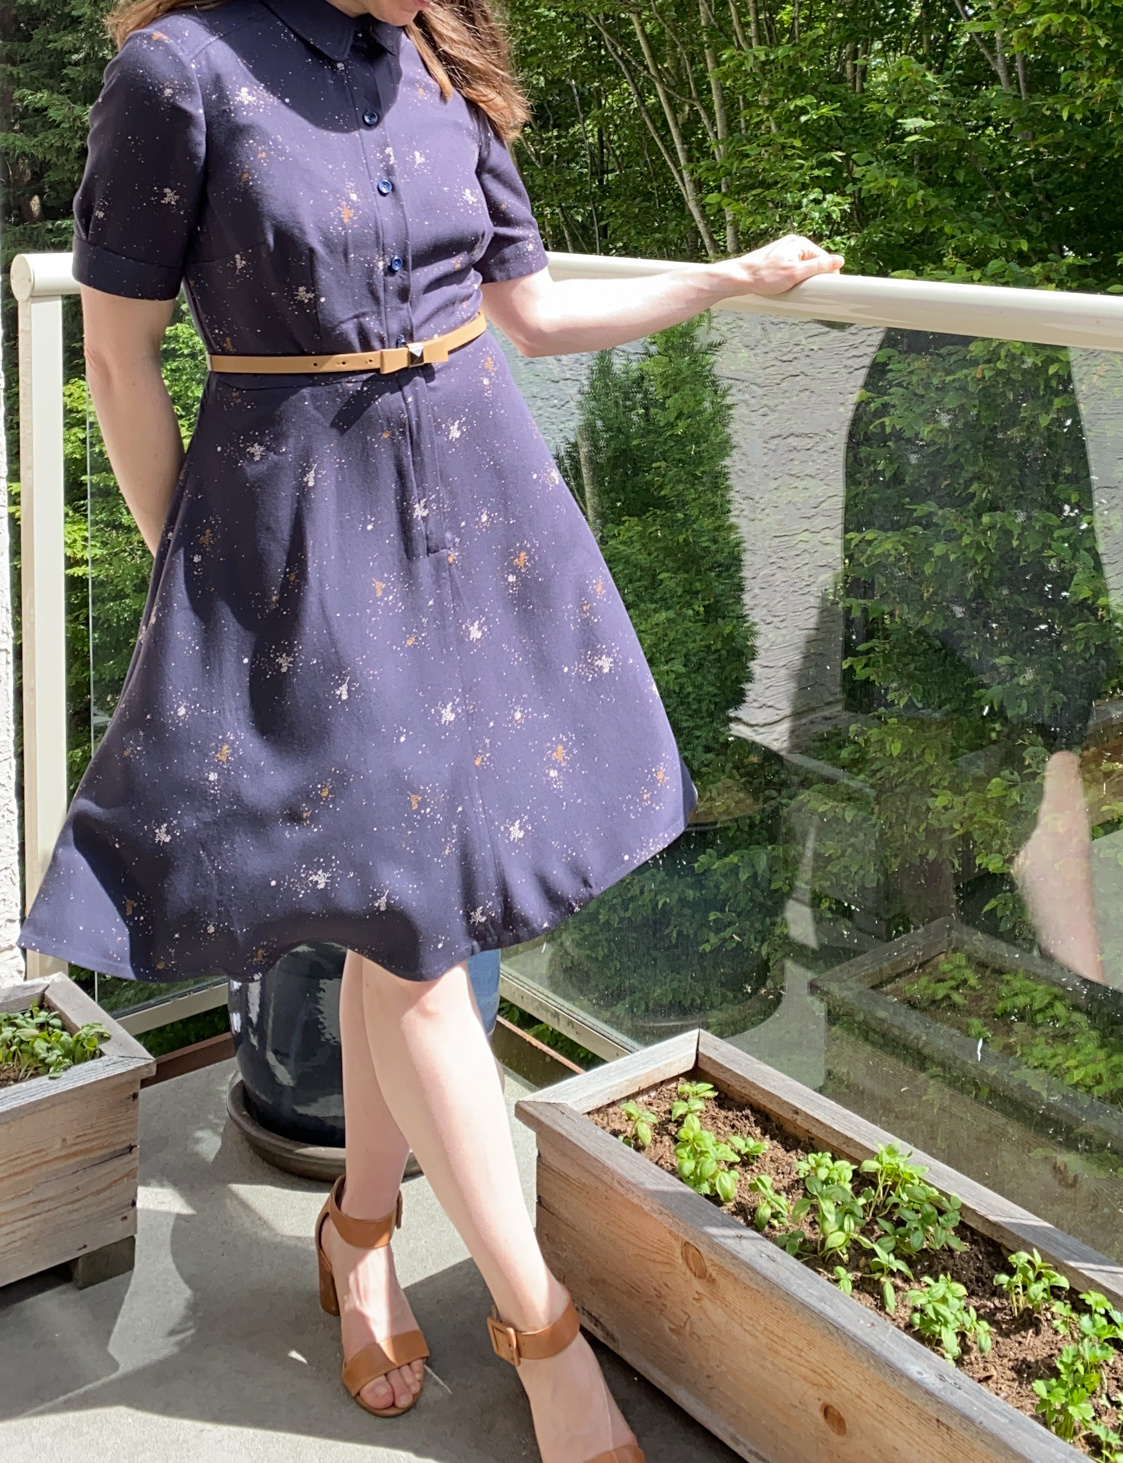
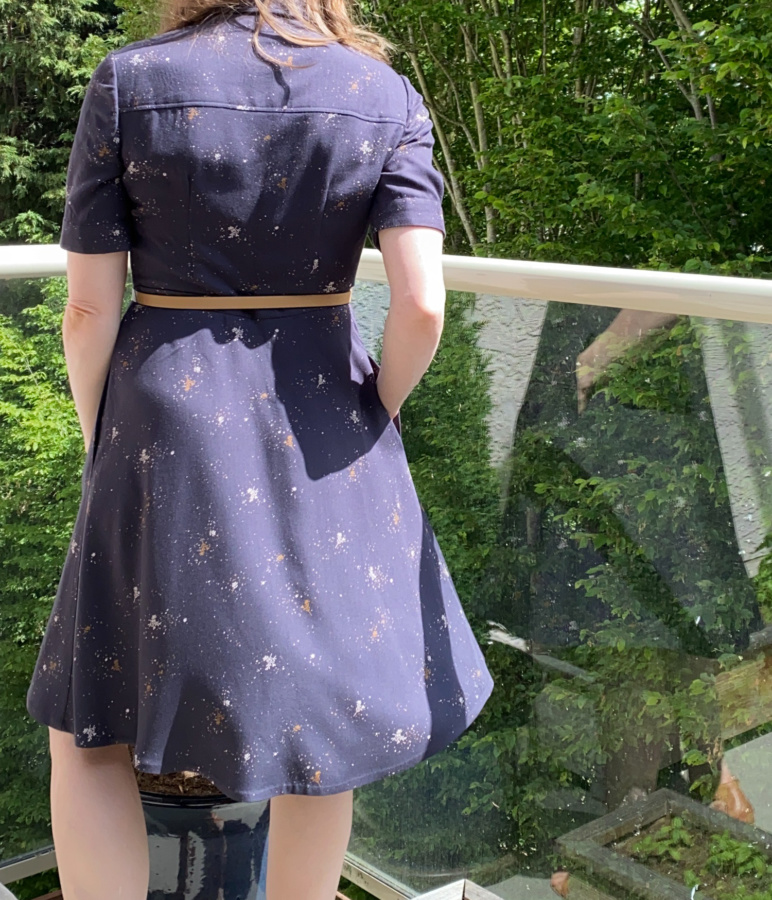
For this version, I wanted to wear it with a belt I already owned so lengthened the bodice by a half inch at the back, tapering to a quarter inch at the front and added a one inch, self-lined waist band. I also decided to line the skirt with Bemberg rayon because I wanted to give it a little more structure. Everything was going well to start with. I french seamed the top again and was taking my time with the construction. Once I had attached the top and bottom to the waistband, I tried it on for fit, and somehow the waist seam ended up about an inch too low.
WTF.
I was so confused and disappointed! I didn’t know if it was the weight of the skirt lining so I removed it but the bodice was still too long. To make matters worse, I’d already graded the seam allowances of the bodice down to almost nothing so didn’t have a straight edge to work with if I were to unpick it. I also didn’t know if the fabric would survive unpicking without damage.
So I resewed the waistband to the bodice with a wider seam allowance, effectively moving the seam up by about a half inch while reducing the waistband to a half inch. This saved the fit but the waistband is a little wonky. Thankfully the belt hides it.
I was trying to be so careful with this make. I french seamed the bodice and was extremely careful with the collar construction. Then a pin caught and pulled a thread from the fabric on the inside of the bodice and it nearly made me cry. This fabric is so delicate. By the time I got to the hem, I couldn’t bear the thought of trying to machine stitch it so I stitched it by hand. And I’m so glad I did. It’s really a lovely hem. One of the best I’ve ever done.
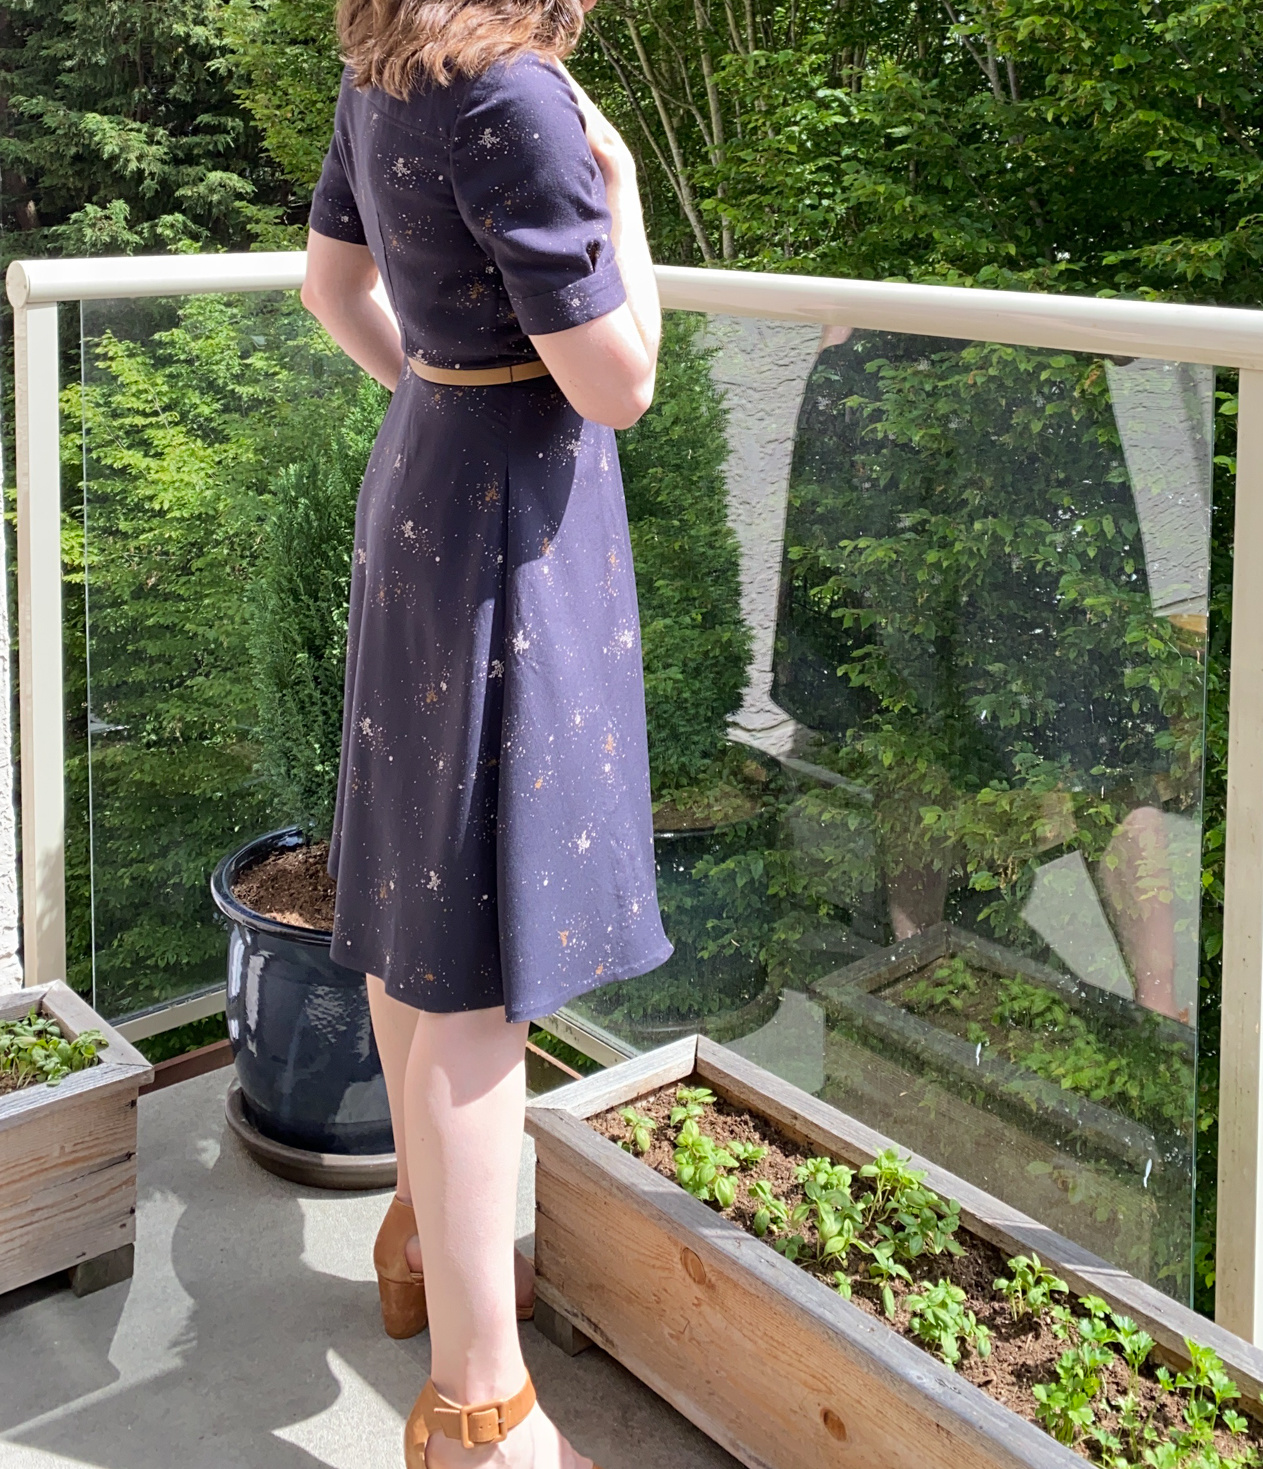
It’s difficult to see in these photos but I also changed the sleeve cuff on this version. I didn’t like the construction of it on my first one so I drafted a simple solid cuff. Instead of gathering the sleeve into it, I made a small box pleat in the centre. I far prefer it to my first version.
Overall, I learned a lot with these two makes. I learned about appropriate fabric choice. I learned that two similar seeming fabrics can still yield totally different results with the same pattern. I learned how much I like hand-hemming with a felling stitch.
I’ll find a way to save the first one of these and I’ll enjoy the second one as is, and next time I’ll pick more structured fabric… if I ever make this pattern again.
Thanks for coming on this journey with me!
~ Lindsay