It’s been quite a while since I blogged one of my makes. I’ve still been making over the past few months. It’s been primarily Basic Instinct Tees and Lander Pants for me and a number of gifts for others. I’ll put up a new Lander Pants post soon, but first, my newly finished Pauline Alice Serra Jacket. Get yourself a cup of tea – this is a long one.
I’d originally had a mind to make another Kelly Anorak this year in dark grey. I love my last Kelly but the cotton twill I used is light-weight, not very warm, and not structured enough to properly support the welt pockets that I added to it. Along with a heavier weight fabric, I wanted it a bit shorter and with more room around the hips for wearing when I ride my bike. Then I thought: “Why not try another pattern to see if I really love the Kelly as much as I think I do?” (TL;DR – I do love the Kelly Anorak as much as I thought I did but I’m still glad I gave this pattern a try).
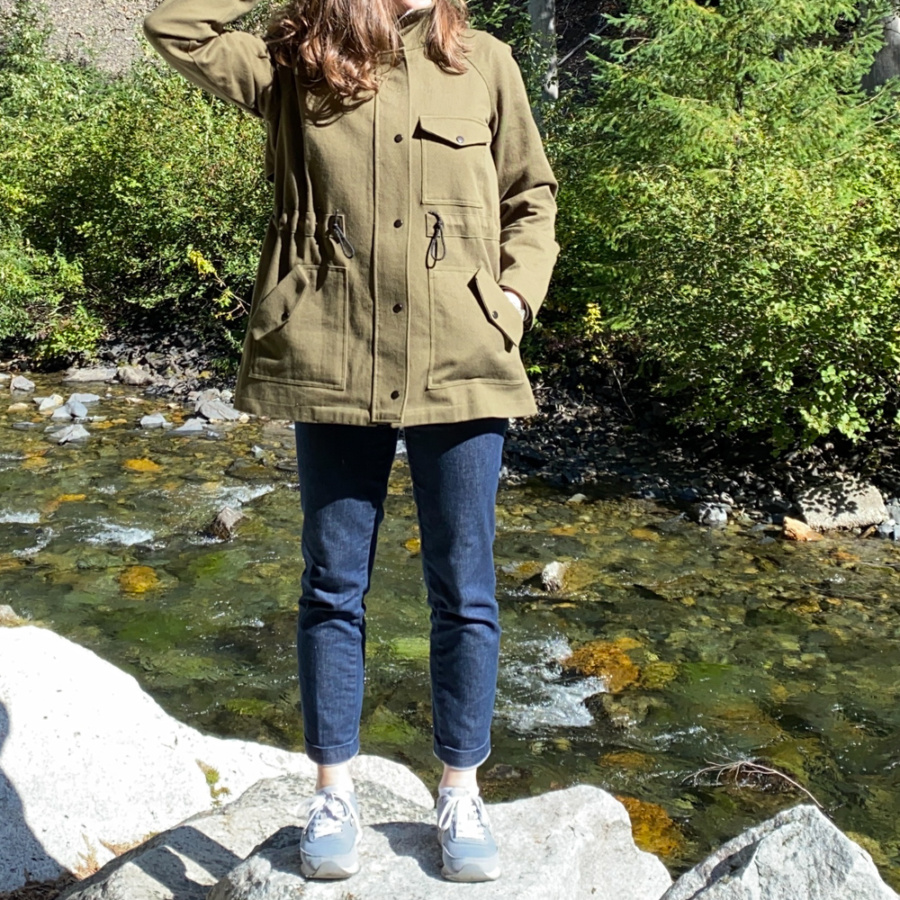
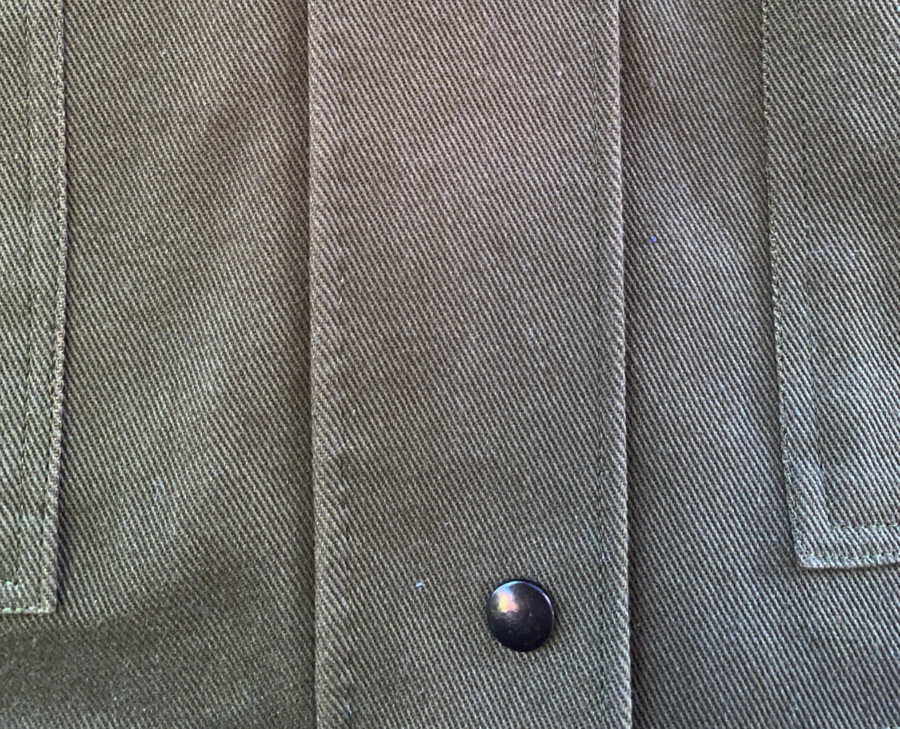
I decided on the Serra Jacket because the pattern is wonderfully versatile. It is unisex and comes with three very different variations ranging from long coat to cropped bomber with multiple pocket types, hood and collar variations. It’s a raglan sleeve, which isn’t my usual choice, but I decided to give it a try because of past success with a Pauline Alice Coat (I’ve previously made the Pauline Alice Quart Coat, which remains my favourite winter coat, years later). The fabric, Robert Kaufman Ventana Twill was perfect for this make and will be a go-to fabric for jackets like this, if I can figure out the colours for online ordering (more on that at the end of the post).
The end result of this make is quite nice but I did have a number of issues with this pattern and the construction. Read on if you want all the details but first, the specs and mods:
- Made a XS, though my measurements put me at a size S (I did not want excess armpit fabric that can be caused by raglan sleeves)
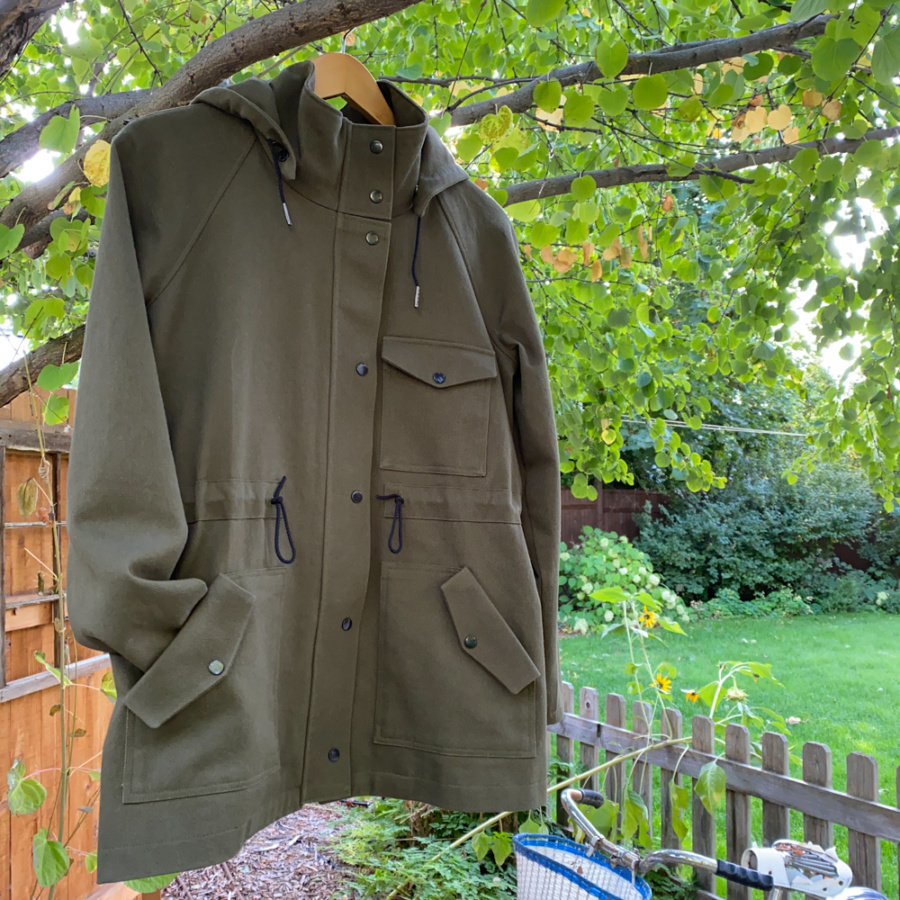
- Scrapped the pattern’s pockets and went with a modified Kelly Anorak pocket (slightly smaller and 2D rather than 3D)
- Revised the breast pocket flap to better match the Kelly Anorak pocket flaps
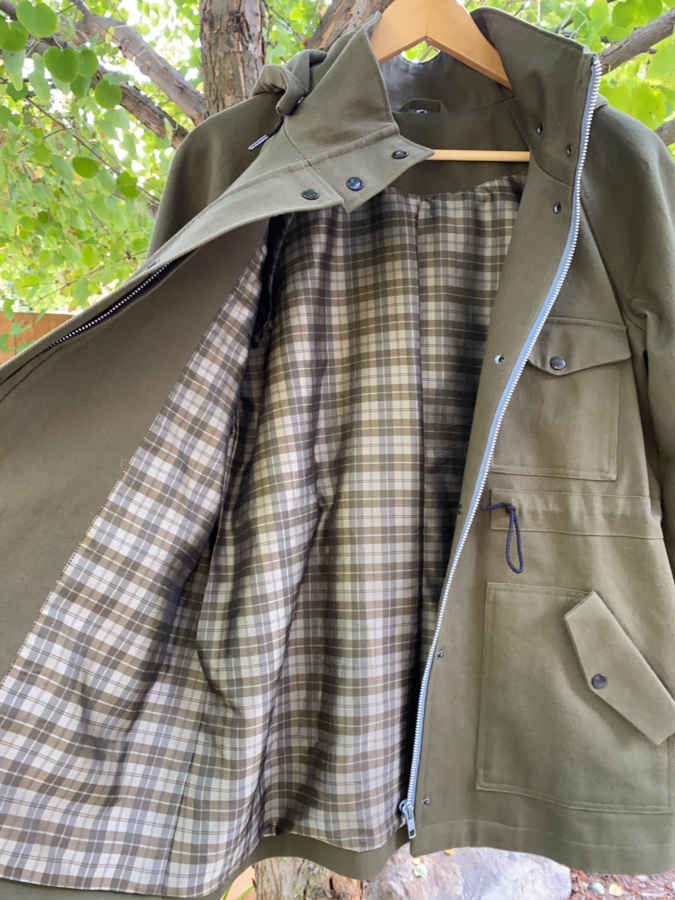
- Lined all three pockets
- Moved the waistband and lower pockets up from their suggested placement on the pattern
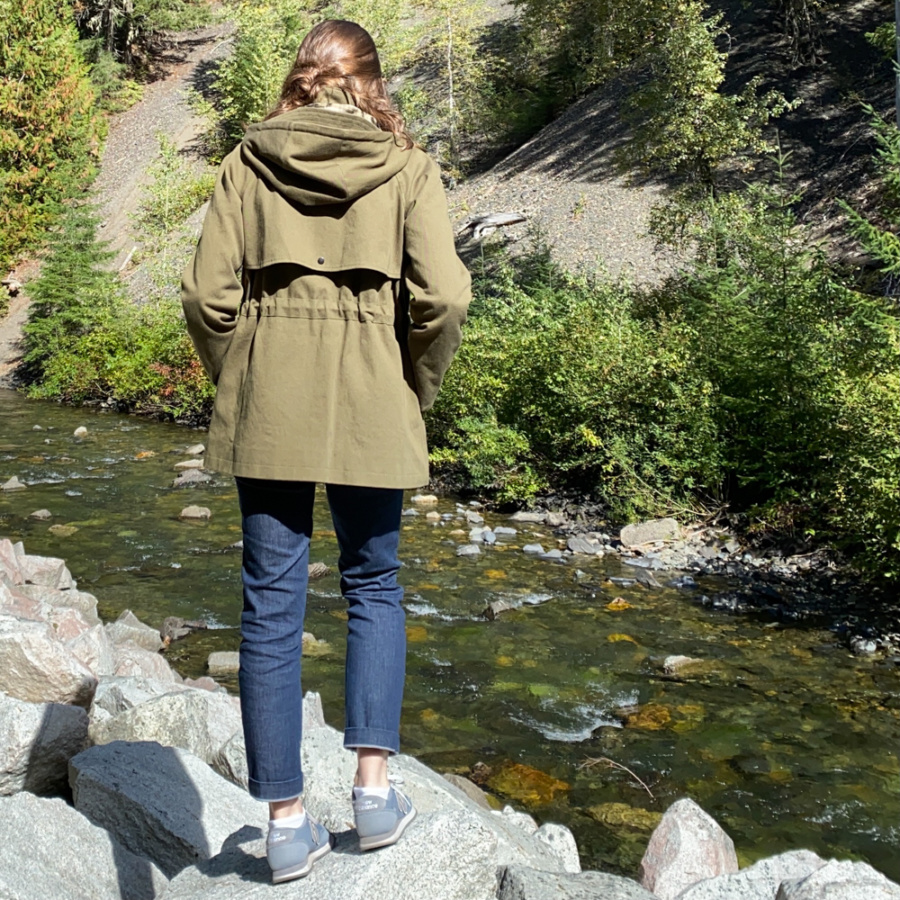
- Reduced the size of the hood by flattening out the curve of the hood side piece (photo below)
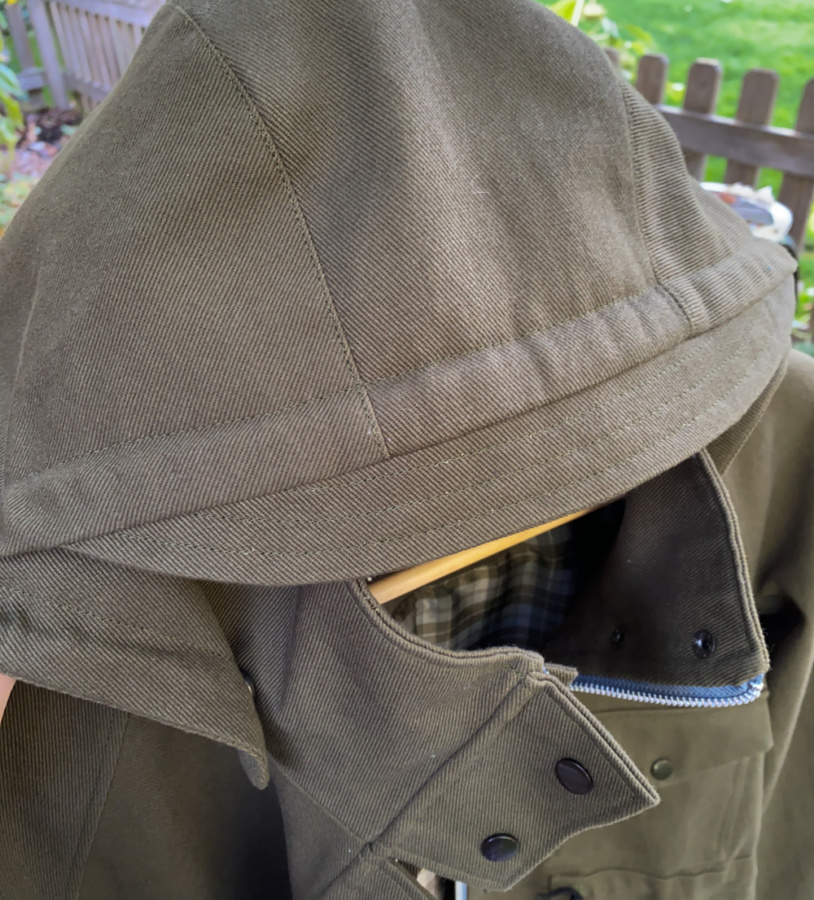
- Hand picked the front placket rather than top stitching as indicated in the pattern
- Interfaced the hood visor
- Interfaced and reinforced the lower pocket attachment points
- Interfaced the left centre front seam
- Added a cord to the hood
- Extended the waistband casing so that it lined up with the edges of the lower pockets
- Flat felled the front and back shoulder seams for added reinforcement

Now about the construction. My main issue with this pattern is the construction of the zip guard and placket. On the Kelly Anorak, the zip guard is attached on the left side, beneath the zip and the placket is on the right side. On the Serra Jacket, both the placket and the zip guard are on the right and the construction is far more fiddly, especially given the lack of detailed instructions or a sew along. I consider myself an experienced sewist and it challenged me in ways that seemed odd and just not well thought out with basic information not included – I sorely missed the amazing Closet Core instructions while I was making this one. As an example, I could not find anywhere in the pattern instructions that said what the hem allowance was and ended up having to measure up to the notches, which was tough because I’d already trimmed them off when I was finishing the seams. This is just one of many head scratchers I found in the sparse pattern instructions.
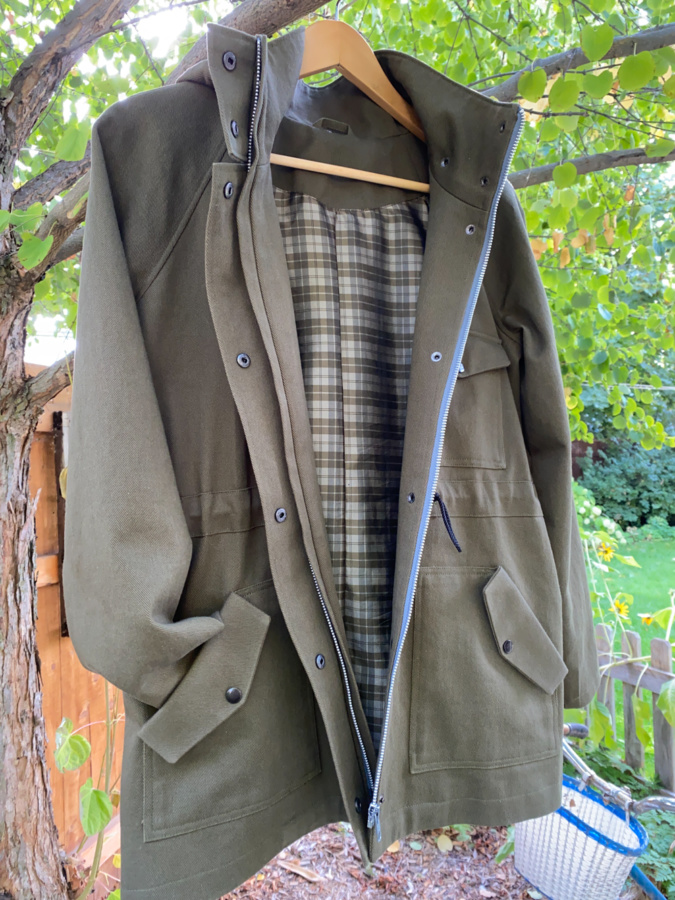
I think I understand why Pauline Alice has constructed the plackets this way. It makes for a much simpler collar attachment than the Kelly Anorak (and I do really like the split placket on the Serra). One issue with constructing it this way though aside from the bulk it creates on the right side of the zip,, is that the zip catches the un-interfaced zip guard when I zip up the coat. Every. Single. Time. In hindsight, I should have followed my gut and interfaced the zip guard so it had more structure. I don’t know if that would help with the catching but it might. I think that it’s not interfaced in the pattern to help reduce the excessive bulk around the zip seam on the right side of the coat. It’s VERY thick because everything is attached on that side. When I make this pattern again, I’ll likely adopt more than just the pocket from the Kelly Anorak. I’ll also take the Kelly placket and zip guard construction. It’ll require a change in the collar construction, but after having done both, I’m firmly in camp Kelly.

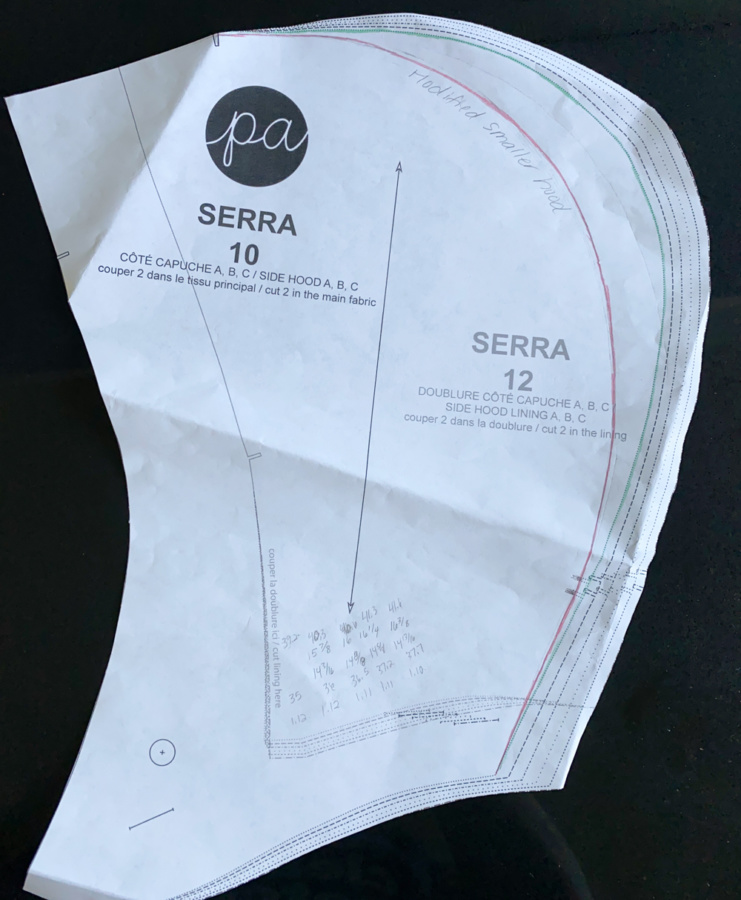
Along with the split placket, I also like the relaxed fit, the stand collar and the hood visor. The neck opening is quite wide and the hood on this pattern is excessively large. I didn’t do anything about the wide neckline, but I used the Kelly Hood to redraw the side hood pieces and reduce the depth of the hood. I also took one inch from the length of the centre hood piece to match this new curve. The hood still ended up quite large, particularly on the sides – not a big deal because I always intended to add a cord and the extra volume works when I have my hair up in a bun. It would have been comically huge if I had not reduced it though.
Other than the placket and some of the missing information in the instructions, this was a relatively smooth make and it came together well. The instructions, diagrams, and notches are sparse so I definitely wouldn’t recommend this for a beginner maker (the Kelly Anorak is a much better choice if you want to have a first go at a jacket this style with lining). The fit ended up pretty good after my mods. The curved dart at the shoulder of the raglan sleeve helps with shaping but be aware, the instructions don’t tell you to curve the dart. Only the tiny diagram shows it sewn curved (and it doesn’t work to sew it straight). I’m still not sure on the raglan sleeve over all. I like having a sleeve head and a raglan sleeve doesn’t allow for that. I’ll also add a few centimetres to the sleeve length next time because they are a bit short when I reach my hands forward (like I will when riding a bike). I might still add sleeve cuffs to this one, but I’ll wear it a bit first.
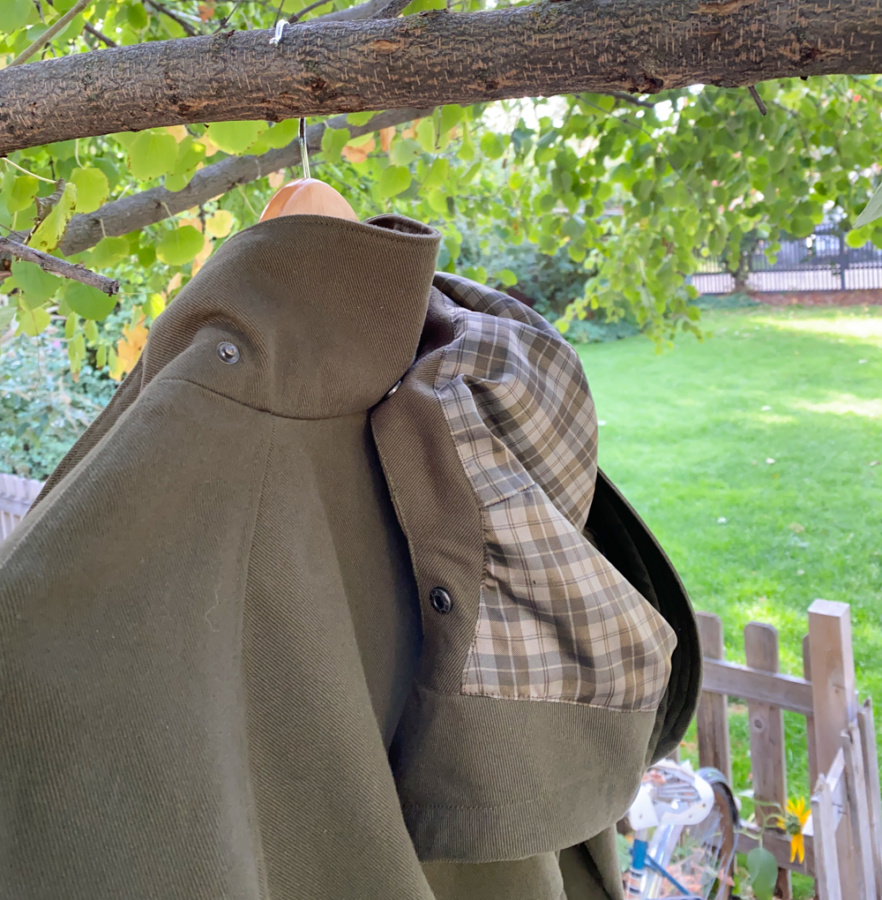
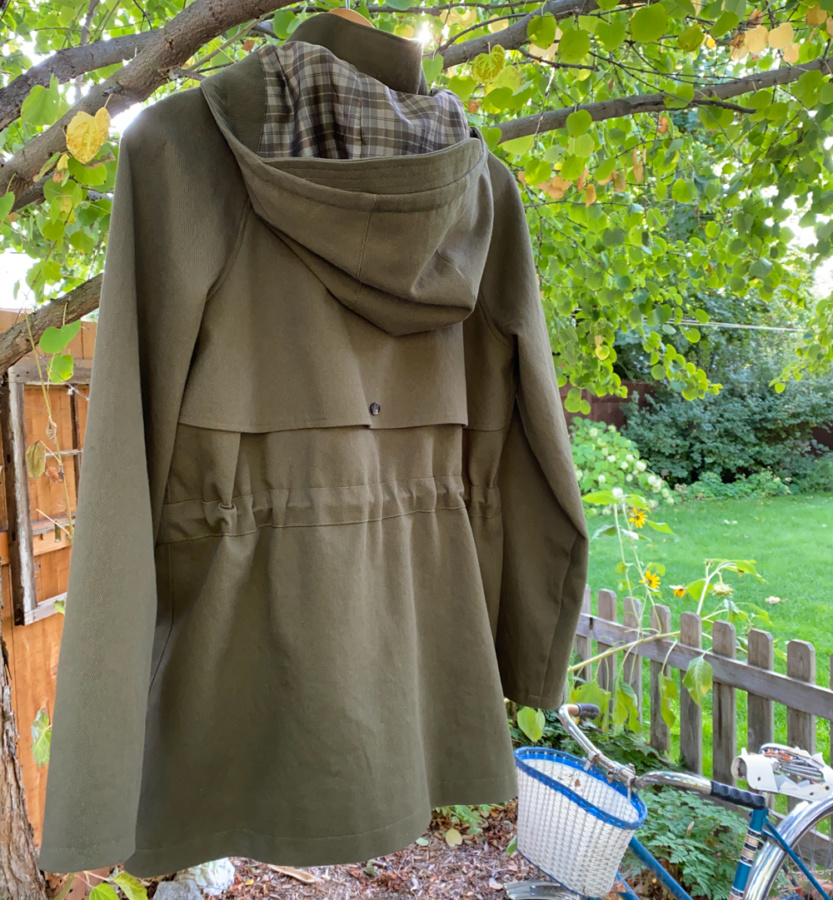
You can also see that this is not grey. I decided on teak/brown because grey would be too close to my existing black light-weight Kelly. You’re probably now saying “Lindsay, this isn’t brown” and you’re correct. I wanted to make this out of Robert Kaufman Ventana Twill and (long story) I found that the colours online don’t even come close to matching the colours in person so I wasn’t confident purchasing it online. The only place I could find to buy it in person was Spool of Thread in Vancouver. Luckily my husband and I were passing through Vancouver on our way to the interior on a vacation/sewcation (during which I made this coat). It’s a good thing I shopped for the fabric in person because the lovely teak/brown colour I had my eye on online was orange in person. So I decided on a nice muted olive green. The fun rayon plaid lining was a purchase from Gala Fabrics in Victoria before I picked up the main fabric and I think still works even though I changed the coat colour.
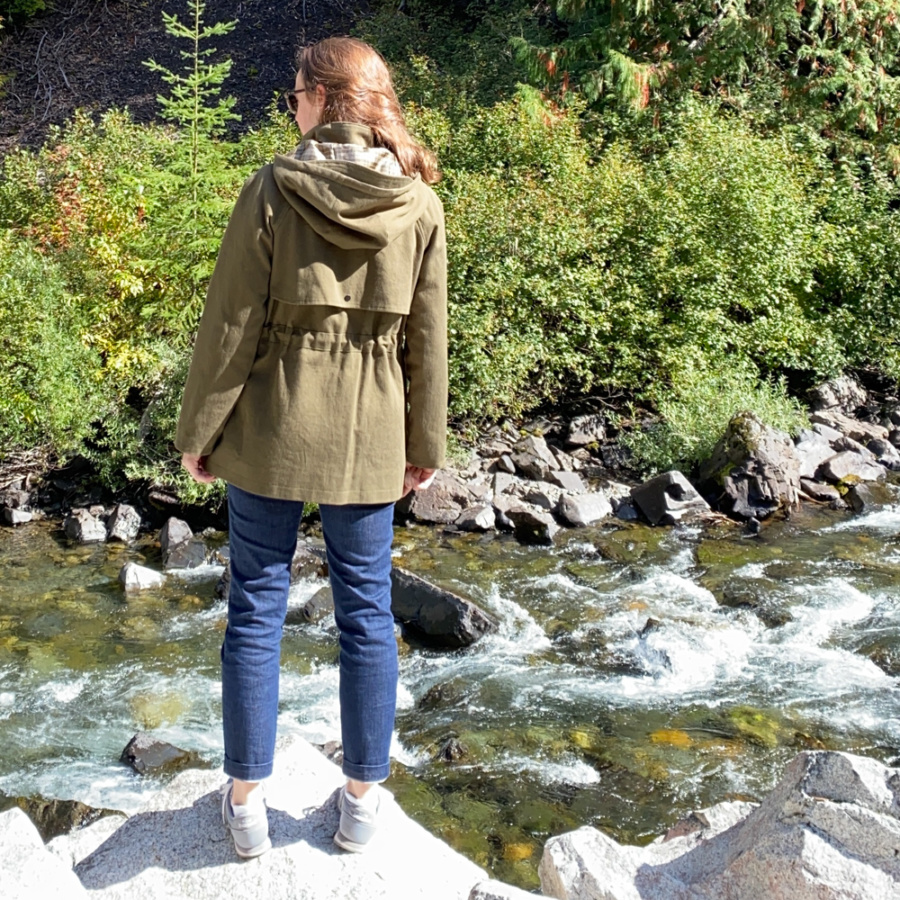
It’s good that the end result doesn’t show the difficulty that went into this jacket. I learned a lot about what I like and don’t like in coat construction. It’s added to my experience and there are many things I’ll take away from this project to improve my making. And this will get lots of wear this fall and for many falls to come because, despite my difficulties, it did turn out rather well and I like it.
Thanks for stopping by!
~ Lindsay