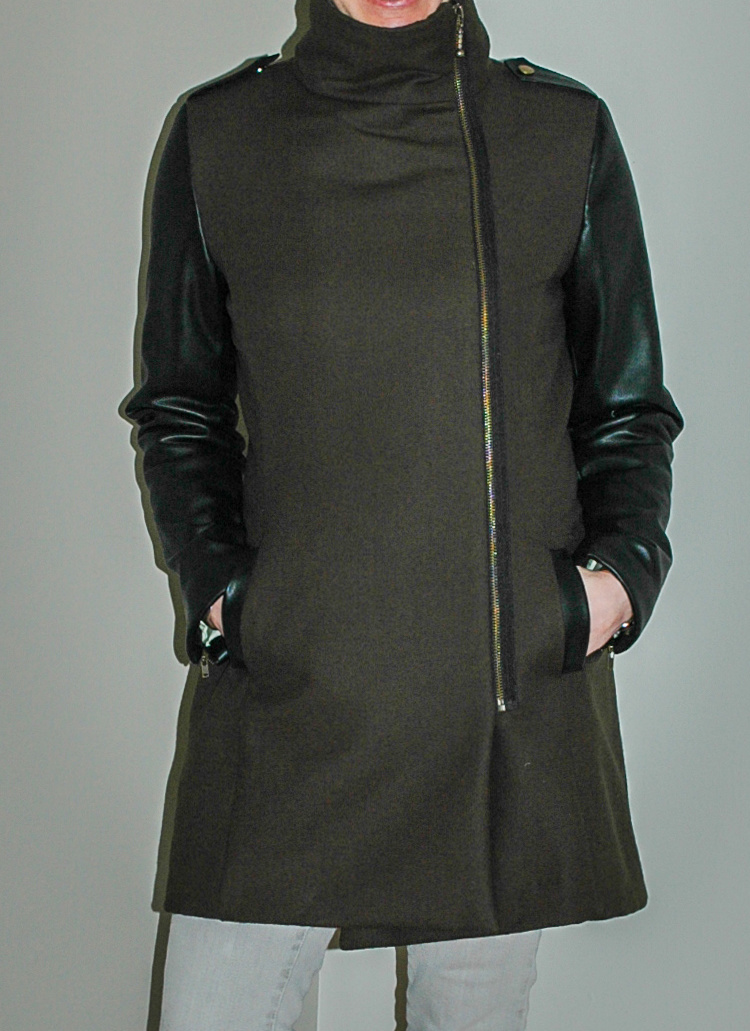
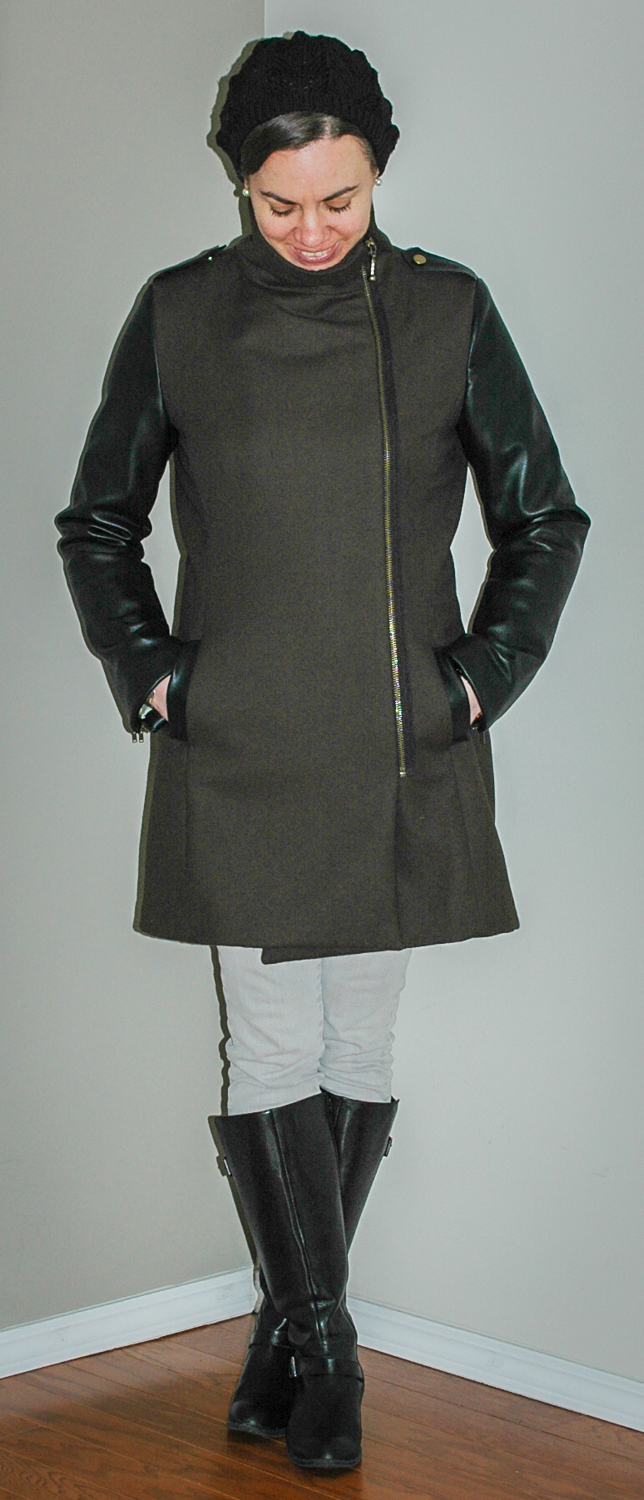
This coat has been a vision in my head for well over a year. Green wool. Black faux leather sleeves. Double breasted. I bought the wool from Gala Fabrics last winter but I just couldn’t find the right pattern for it so it sat waiting in my stash. Then I found the Pauline Alice Quart Coat. It wasn’t perfect but it had the right basic shape and I knew I could probably convert it into the image I had in my head. I bought the pattern right away and ordered some buttery soft faux leather from Fabricville.
This pattern comes with so many measurements that it was fairly easy and straightforward to make edits right on the pattern. I decided, perhaps foolhardily, to go ahead without a toile. Luckily, it worked out well for me. Here are the changes I made to the Quart Coat Pattern:
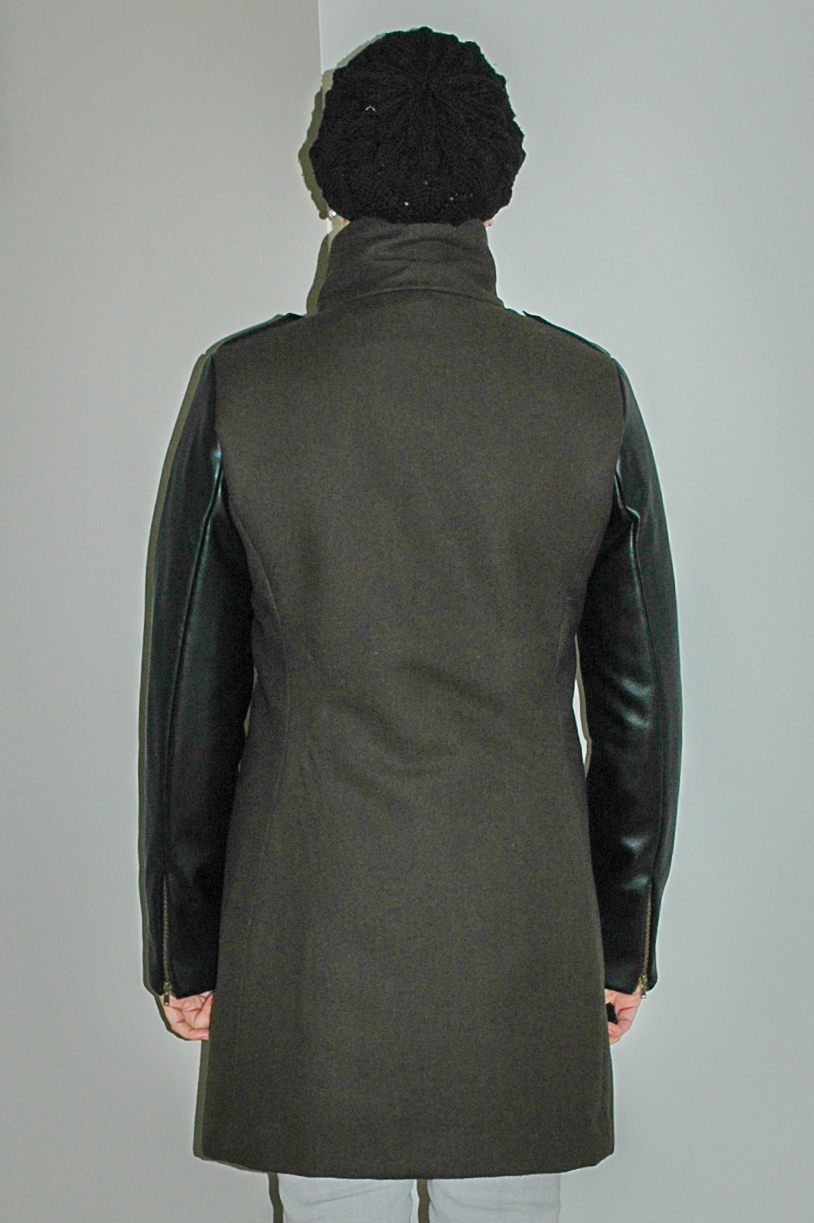
- No pleats – I got rid of the pleats at the sides. It was easy, I just lengthened the side panels by the length of the pleats.
- Longer – I lengthened the coat by two inches. I would have done more but two inches was all the room I had on my pre-bought fabric.
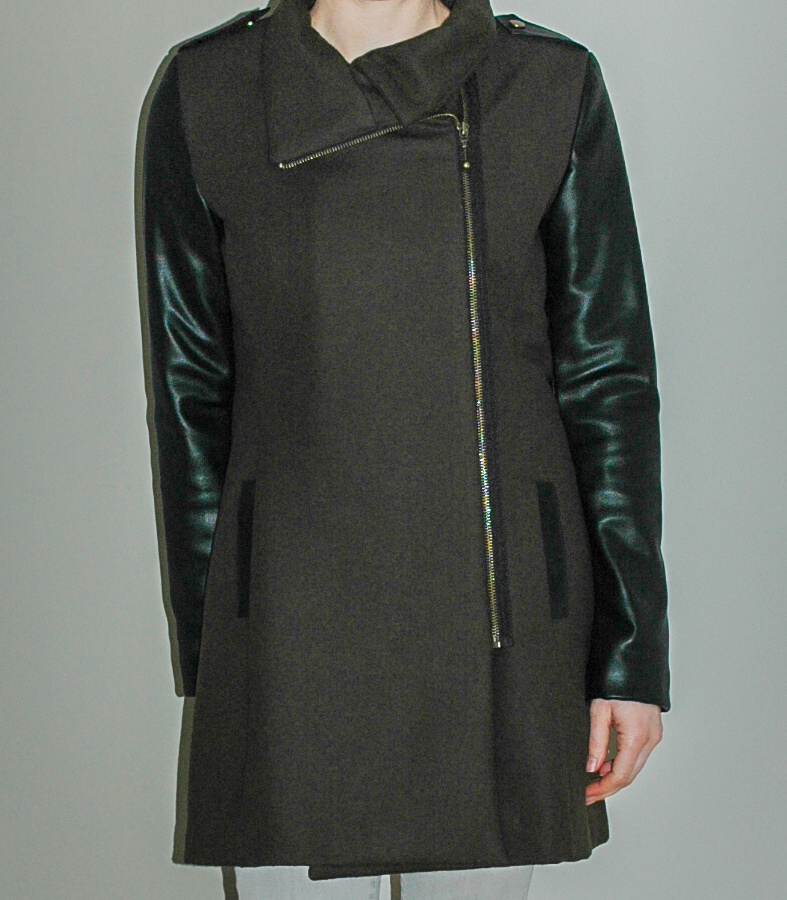
- Two tone – My vision had faux leather sleeves so I decided to do the epaulets in faux leather as well and the pocket openings
- Welt pockets – In order to bring some faux leather further down on the coat, I added welts to the princess seam pockets.
- No buttons – With the faux leather, this coat was screaming for an exposed zip, so I obliged.
- Snaps – Without the buttons on the coat front, snaps seemed a better option than buttons for the epaulets. I almost ruined it all though. more on that below!
- Less fitted – I reduced the shaping around the waist by about .5 cms on each side of each piece giving me an extra 3-4 cms around the waist for a slightly straighter fit.
- Higher waist – I brought the waist up by about 1 cm on all of the pieces.
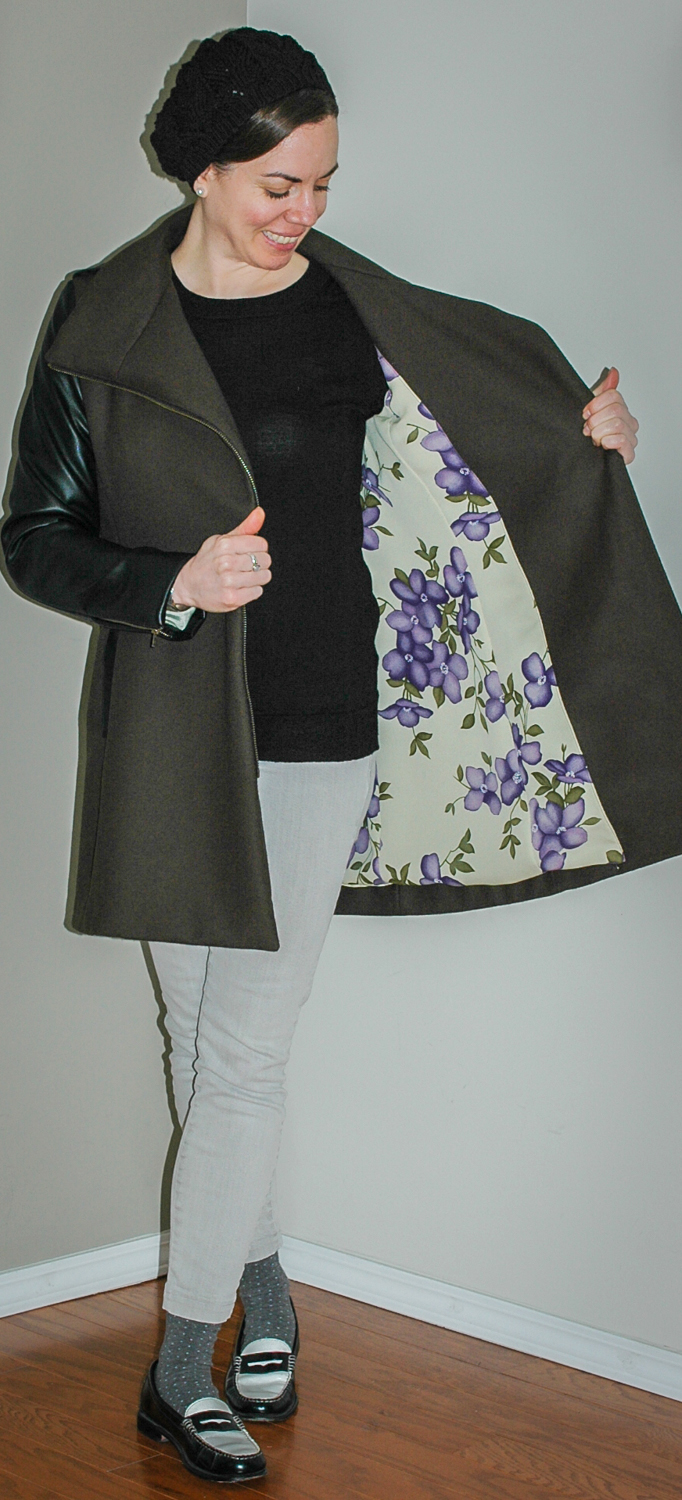
I also underlined this entire coat. The wool wasn’t full winter weight and didn’t feel substantial enough so I doubled every piece with the exception of the fronts because they were already self-faced and interfaced. I underlined the sleeves as well with one layer of wool blend. For the lining I used a thrifted silk skirt for the bodice with french seams throughout (and I love the secret flowers) and Bemberg rayon for the sleeves. With the main pieces, the underlining and the lining, there was a lot of cutting in this project!
To say I’m pleased with how this coat turned out, especially with all of my changes, would be an understatement. I almost ruined it all with one big mistake right at the end though. I hammered the wrong side of the snap onto one of the epaulets. I was devastated but after I unpicked the shoulder, made a new epaulet and closed it all up again, I breathed a huge sigh of relief that it had been the epaulet and not the part of the snap attached the the shoulder of the coat!
Unfortunately, I really don’t think these pictures capture this coat very well. Black and dark green are difficult to photograph in low light and the lighting conditions in our condo in the winter are, I’m learning, rather poor for photos. I think 2018 is going to be the year I invest in some actual lighting equipment… or maybe Santa will bring me some….
Thanks for stopping by!
~ Lindasy