If you arrived here from my Instagram, you’ll already know that I was compelled from somewhere and I know not where to make something wearable from my copious linen scraps. Finding these five colours sealed the deal and the Pauline Alice Ayora Jacket seemed a good fit for what I imagined and merrily on my way I went – all the while wondering if this would become something I could see myself wearing. I had to try it though, so here goes.

Sizing and mods:
- size 38 (one down from my measurements and will go down to 36 next time probably)
- reduced length by one inch
- adjusted armscye (more details below)
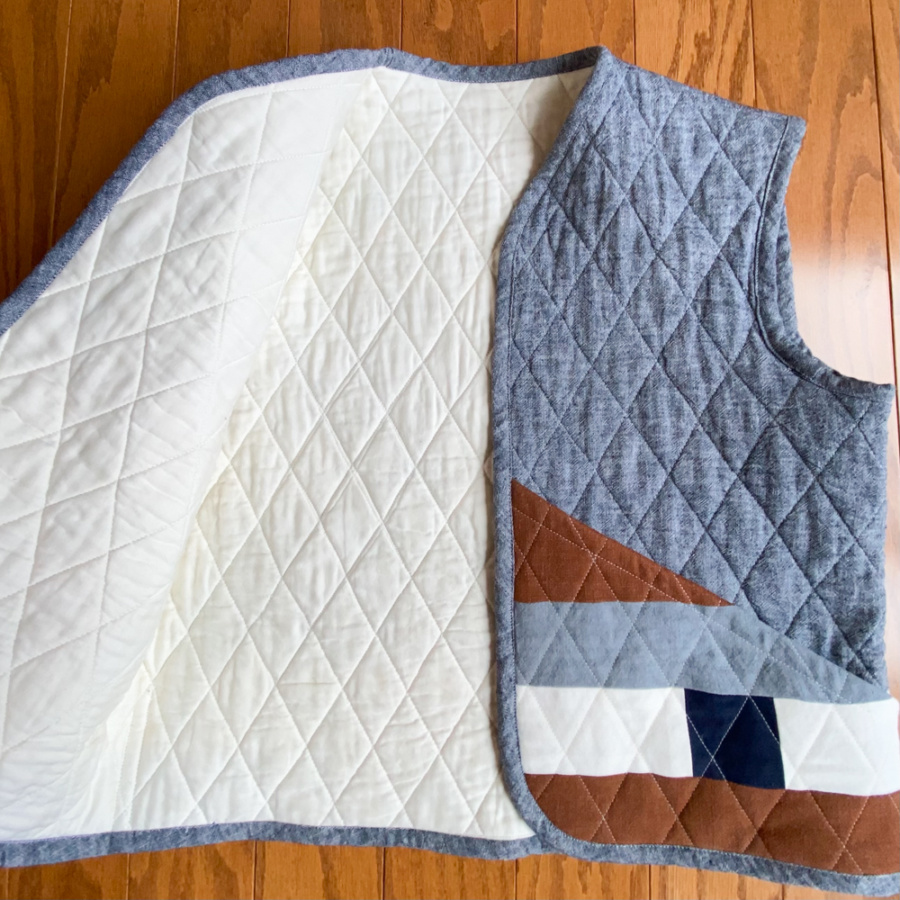
- bias bound edges instead of using the facing
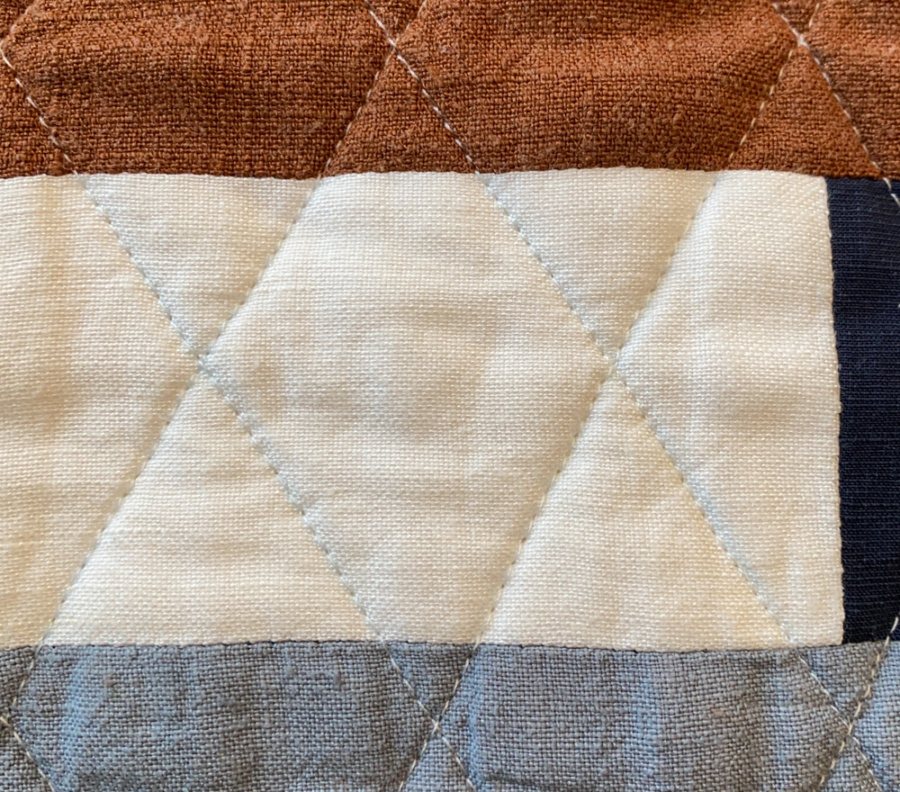
- 30-degree diamond quilting
- adjusted the pocket opening to have a more steep and straight diagonal (so it is easier to get my hand in)
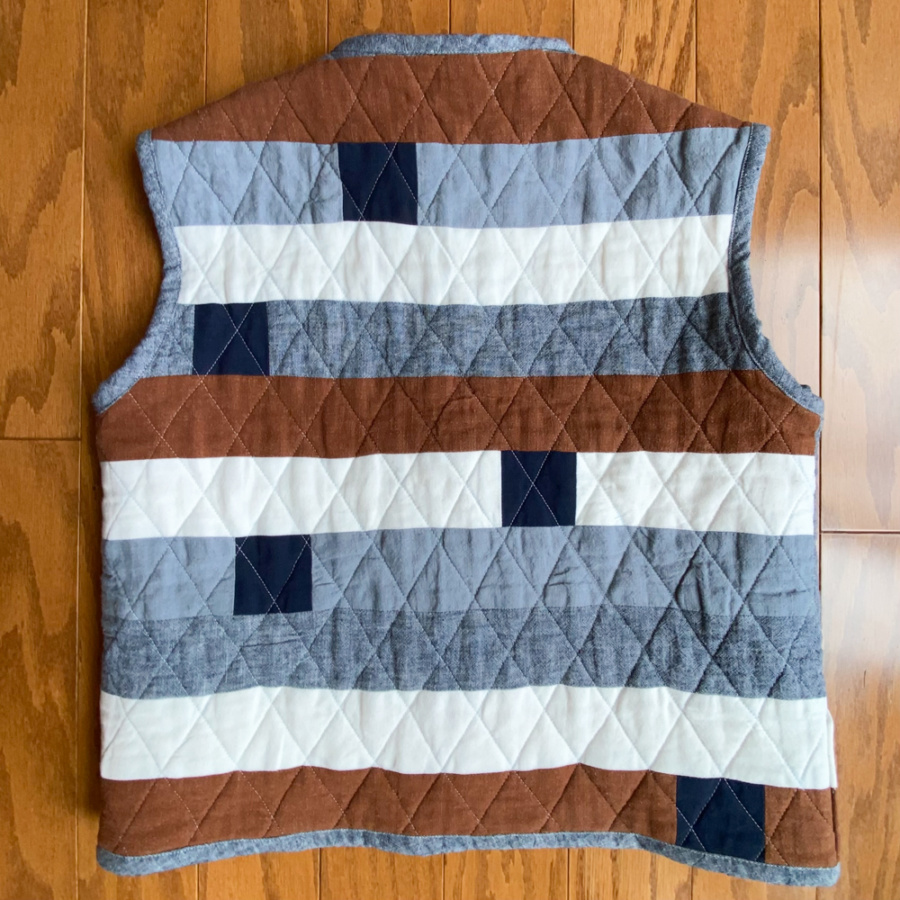
I used only scraps and items from my stash for this make. Pieced linen scraps for the main, an old bedsheet for the lining, scrap cotton batting from my first and only quilt project that I only posted to Instagram and did not blog about and leftovers from re-padding my ironing board. I was determined to just use what I had on hand. Even the thread was from my stash.

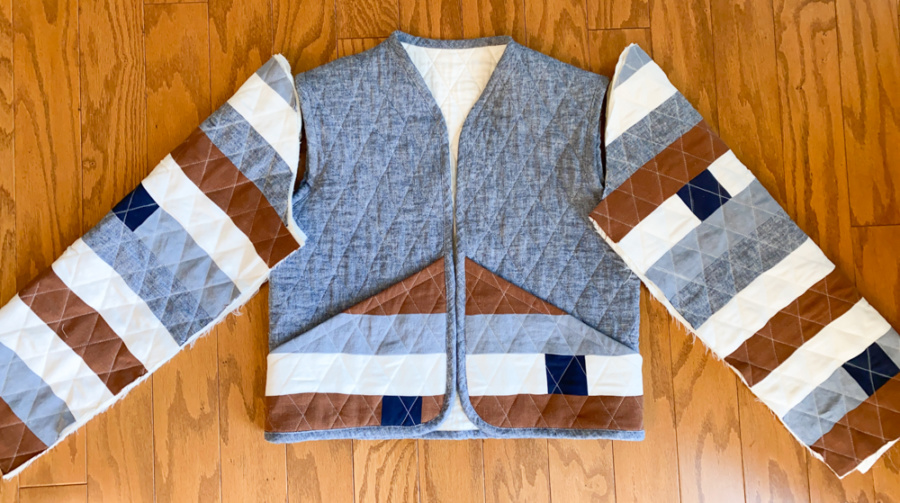
My original idea was a pieced back and pockets with solid fronts, sleeves and facing from the same material. I didn’t end up having enough of my main colour though so decided to also piece the sleeves – a decision that ultimately led to this becoming a vest.
After piecing, which went quite well, I moved on to quilting. First, I pad stitched the three layers together to hold them in place. Next I marked the pattern. I started with the body (fronts and back combined). Yes, I started with the biggest, most obvious piece. This was my first mistake. To mark the fabric, I used a Clover chalk pen. A blue one, because most of the fabric is blue, I thought. This was my second mistake. Thankfully I only marked the body to start with, not the sleeves or pockets. It was while I was quilting that I realized the blue chalk was embedding itself deeper in the fibres of the white silky linen viscose every second. I tried brushing it off and it wouldn’t budge. I tried a hand wash and scrubbed the seams with an old toothbrush but it had little effect on the blue chalk embedded in the white fabric. I ended up spraying it with stain remover and putting it in the washing machine.
This improved the situation, but not to the extent I’d hoped and I should have serged all the edges first. The blue chalk line was still visible on close inspection and the piece came out so tattered, I thought it was ruined. I should have taken a picture but I was distraught. The edges had frayed, some as much as an inch and it was matted and soaking, even after a fast spin cycle. I didn’t want it to shrink more than it had to so I hung it to dry, stretching it out periodically. It took days. Thankfully, the pattern is intentionally oversized and is meant to be trimmed down to size after quilting. After ironing and more stretching, I was able to cut a useable piece from the tattered mess. Lesson learned, I switched to a piece of white chalk to mark the pocket and sleeve pieces.
Quilting was challenging. I used a walking foot, which helped, but it was difficult to maintain the horizontal stripes while quilting diagonally, particularly on the less structured white and brown viscose-blended linens. I ended up going back and redoing some of the quilting on the back after I’d finished the vest. By the time I got to the sleeves, I’d vastly improved my technique for holding the stripes taut horizontally while moving the fabric through the machine on a diagonal. I should definitely have started with the pockets instead of jumping straight into the full body piece. Lesson learned.
It wasn’t until after I’d pieced and quilted everything, that I decided the sleeves would be far, far too much. At that point I pivoted to a vest. I reshaped the armscye, taking some width off the front and lowering it by about a half-inch. It was plenty large enough in the body so I also decided at this point not to use the facing piece I’d already cut out (thankfully just from main and not from interfacing or lining). Instead, I scrounged up enough scraps to bias bind the neck, hem and armhole edges. I managed and there are over 30 seams in the bias binding. Thankfully the heathered linen cotton that was my main fabric makes them mostly invisible. And I finished my first quilted garment!
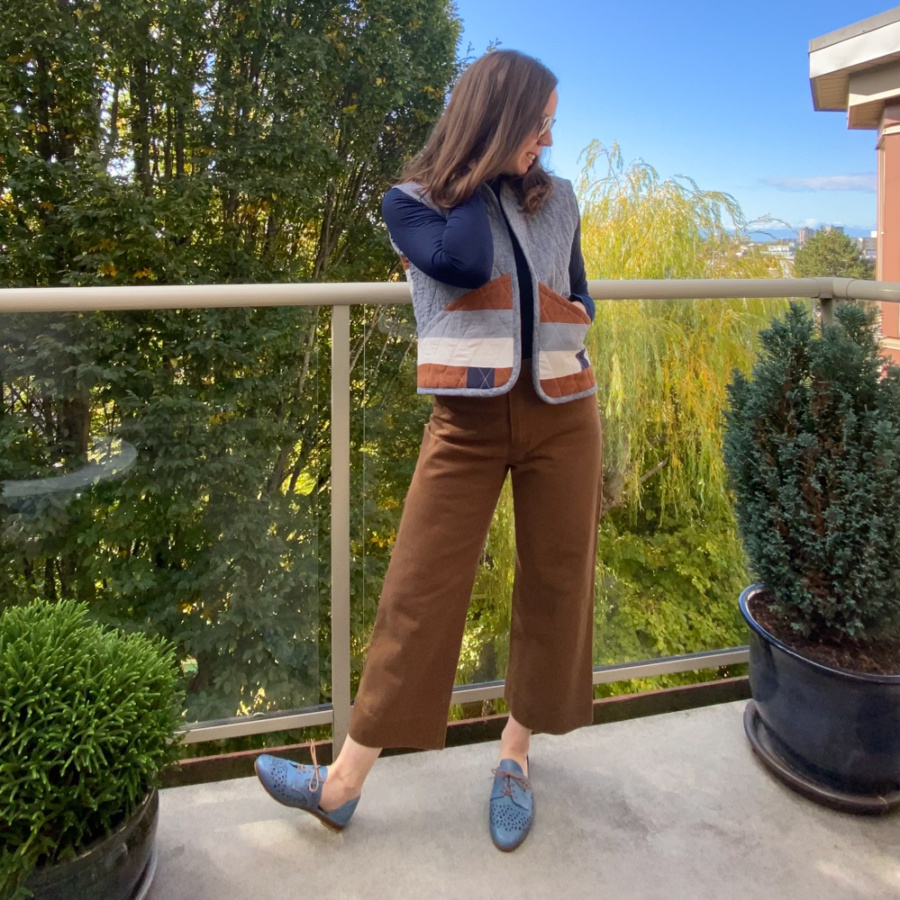
It actually turned out well. I was surprised after the trials and tribulations I’d experienced. It’s totally wearable though and maybe kind of cute? I can’t tell – but it sure does coordinate with a lot of my existing me-mades.
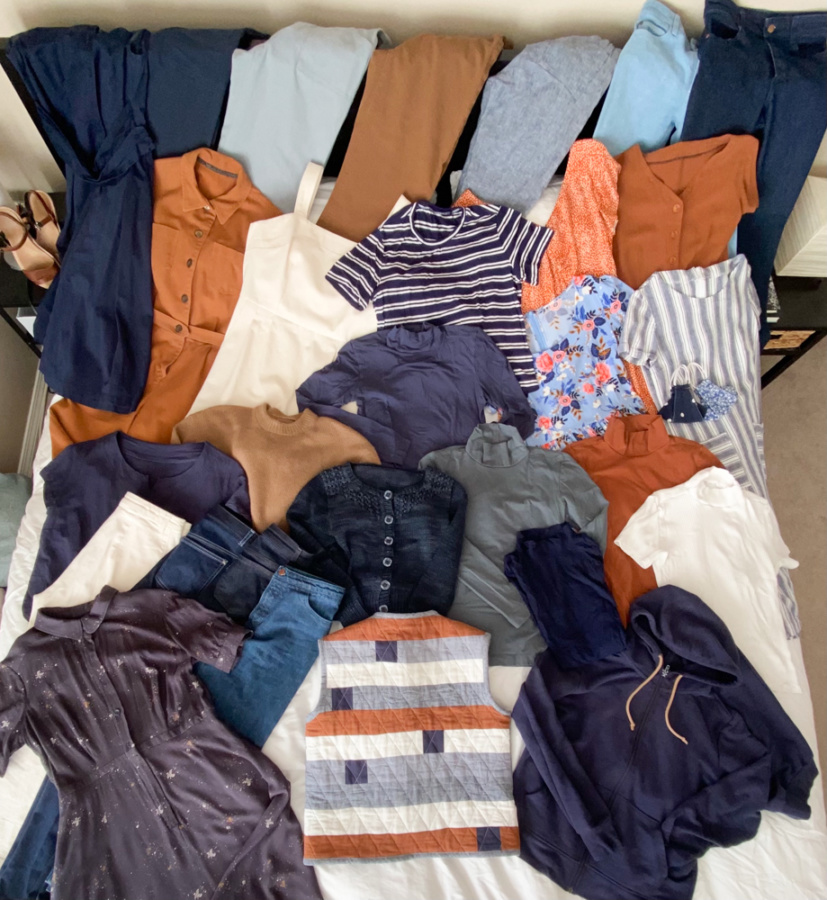
While making this, it dawned on me that I didn’t just have these colours in scrap linen. I have slowly, unbeknownst to me, been amassing a wardrobe of blue, white and brown items. My recent three pairs of Lander Pants, five of my self-drafted turtlenecks, four out of five pairs of Ginger Jeans, six dresses, two jumpsuits, two hand-knit sweaters, two pairs of sandals, multiple masks and t-shirts, and more – I’ve even been acquiring shoes that fit this colour scheme. Most of these makes have been since 2019 but a few are earlier. The shoes have been acquired more recently, in the last two years. I’ve been heading here without even realizing it.
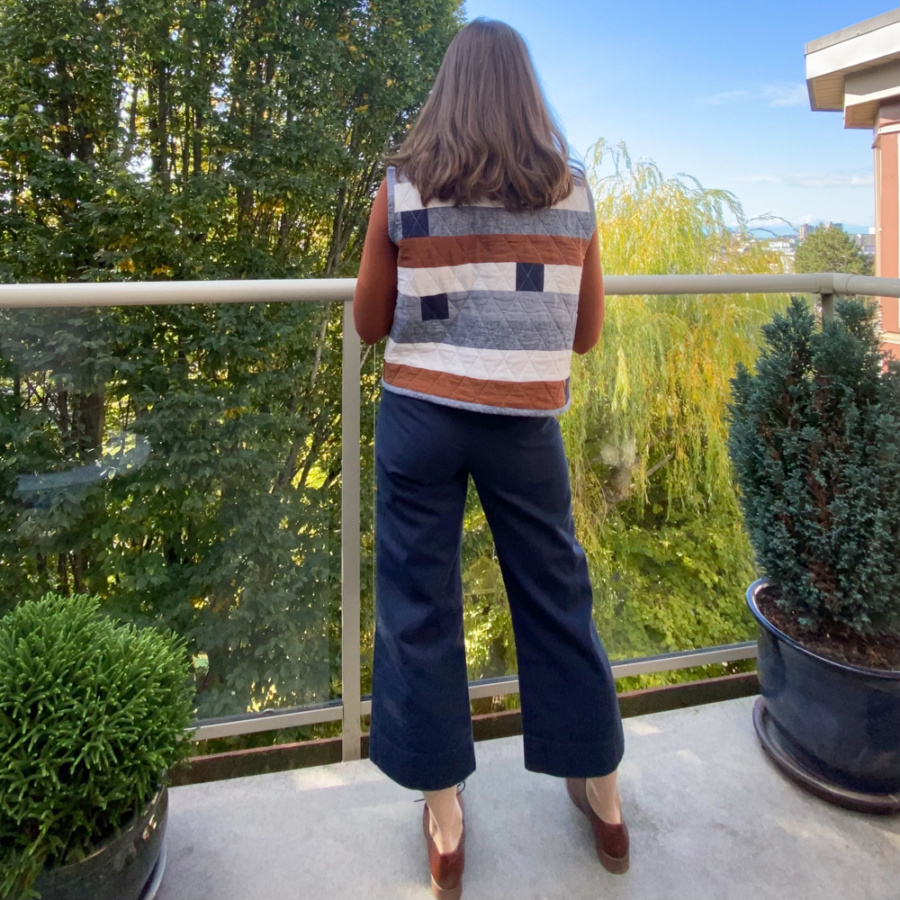
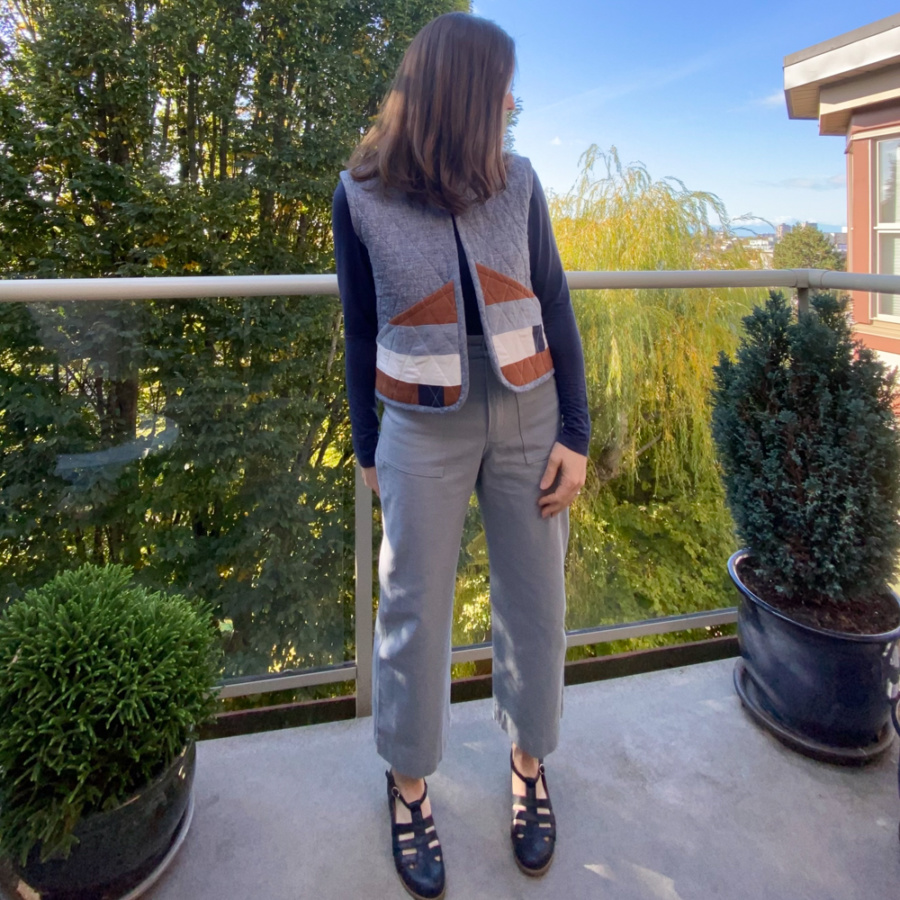
Back to this garment – this won’t be my last Ayora Jacket. The fit of the vest is great. It’s nice and high at the back neck, even without the facing and it’s well constructed. I think I’d still like to make the whole thing, including sleeves and facings. I’ll likely size down to the 36 because there is more than enough ease built in. I’ll maintain the one-inch crop and may increase it to two inches since the facing will add some length. I’ll also use a solid colour. I’ve known for a while and it’s evident from the photo above, I prefer solid fabrics. My more adventurous patterned or multi-coloured fabric is only summer dresses because I usually feel overwhelmed by print and multiple colours in one garment. So my next one will be solid. Should I double down on this colour pallet? Or diversify? I’m in no rush to quilt again any time soon, so I’ve got some time to mull it over.
Will I wear this one? Only time will tell I suppose. I intend to start this week as a coverup over my turtlenecks while I work from home.
Thanks for stopping by!
~ Lindsay