One of the skills I want to develop this year is draping. I purchased a new dress form last year for this purpose. It’s not a perfect fit but I’ve padded it out close enough that I think I’ll be able to use it. This first project – a plaid, box pleat skirt – was a test of some of the techniques I’ve learned from Draping: The Complete Course Second Edition (Karolyn Kiisel) and an opportunity to check the fit of my dress form.

This project was 100% inspired by the fabric – a deadstock plaid wool that I picked up on a whim from Blackbird Fabrics because the vision for what it would be popped into my head the moment I saw it. I used cotton muslin to drape the waistband and I draped the skirt pleats based on the width of the plaid repeat.

After I had draped the waistband, I took it off the dressform and tried it on myself and it felt way too tight. My dressform is about an inch smaller than me in the waist so I decided to let out the waistband by that amount. It seemed to fit so I cut out my plaid version and interfaced it and then moved on to the skirt.
I wanted the horizontal lines on the plaid to be straight at the hem but bodies aren’t rectangles. To figure out how much I would need to reduce from the top edge of the front panel to achieve an even hem, I pleated equal length rectangles of the skirt fabric and pinned them to my dress form at the base of the waistband. Then I measured how much lower the hem was at the front compared to the back and reduced the height of the front panel at the top edge by that amount (sorry, I didn’t take any photos of this process). I’m pretty proud of the perfectly flat hem that resulted from this process, though it could have used a good press before I took these photos.
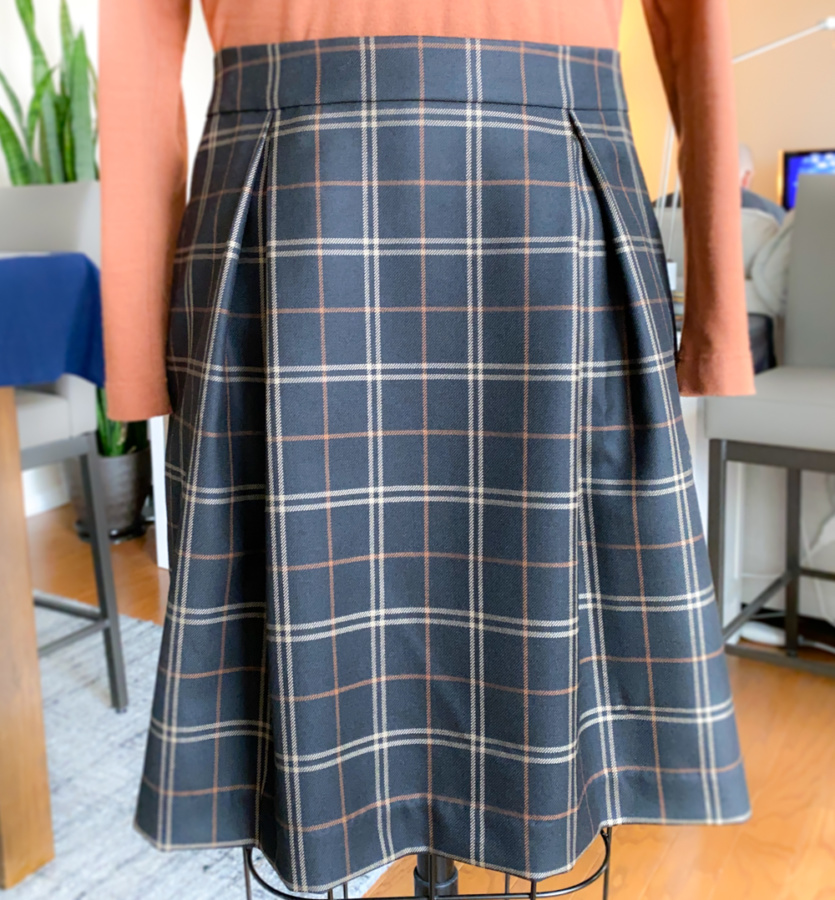
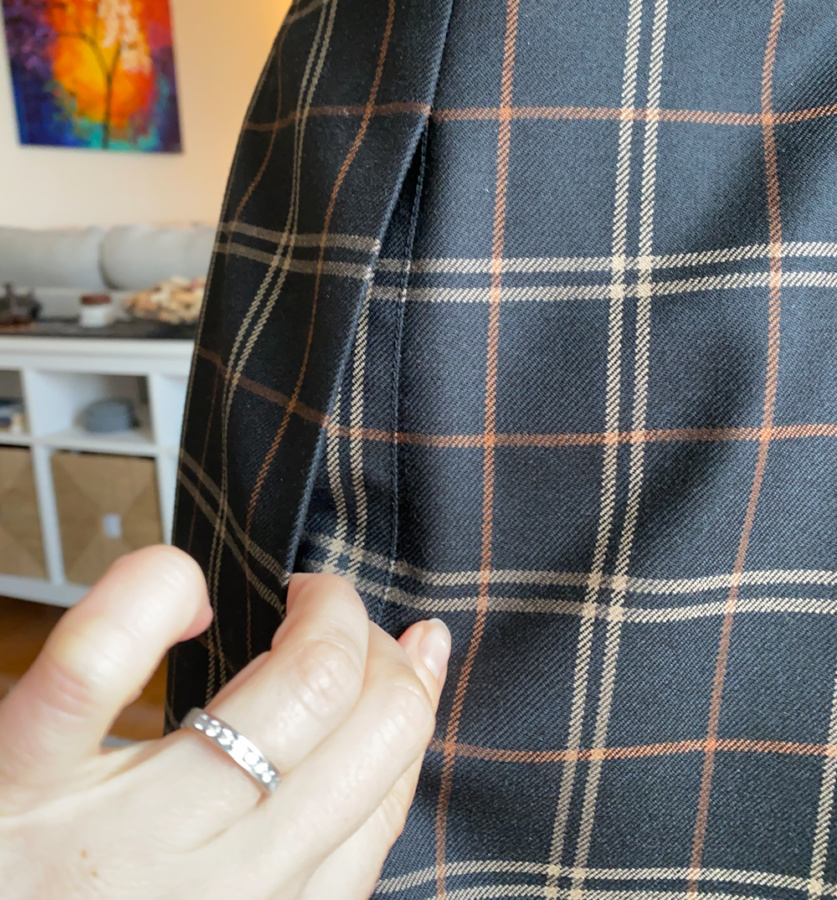
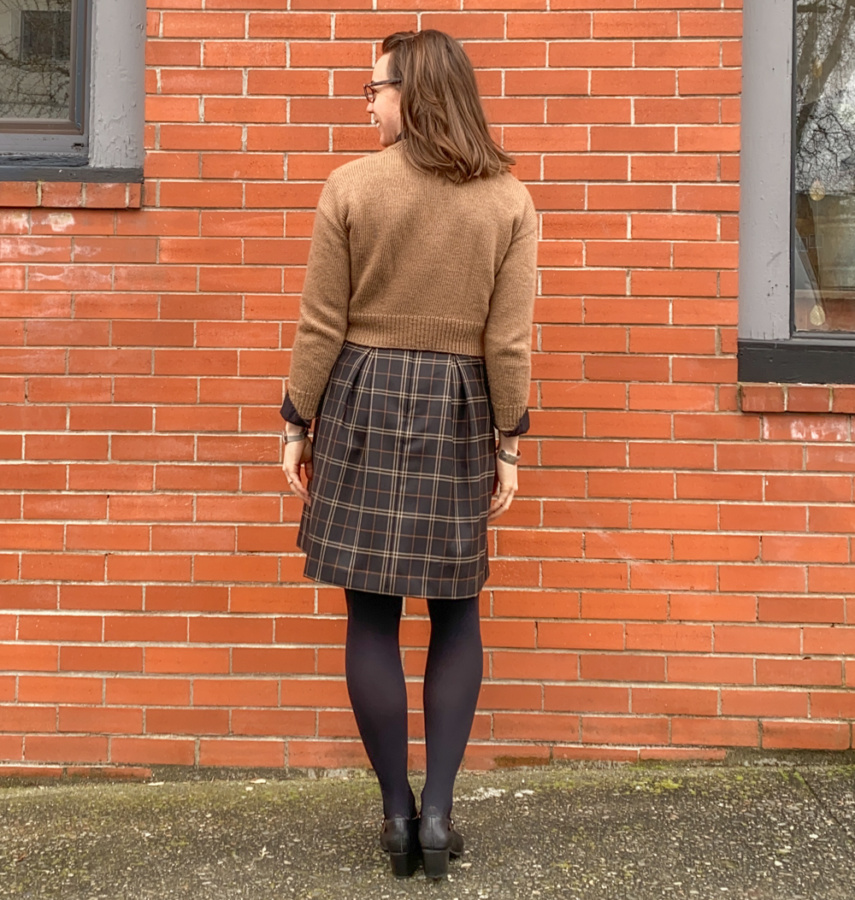
I had great plans for plaid matching on this make. I nailed it on the waistband and inside the pockets, two areas that wont really be seen when I wear it. My side seams turned out decently as well (I gave them a very minimal angle to give the skirt a slight A-line shape).
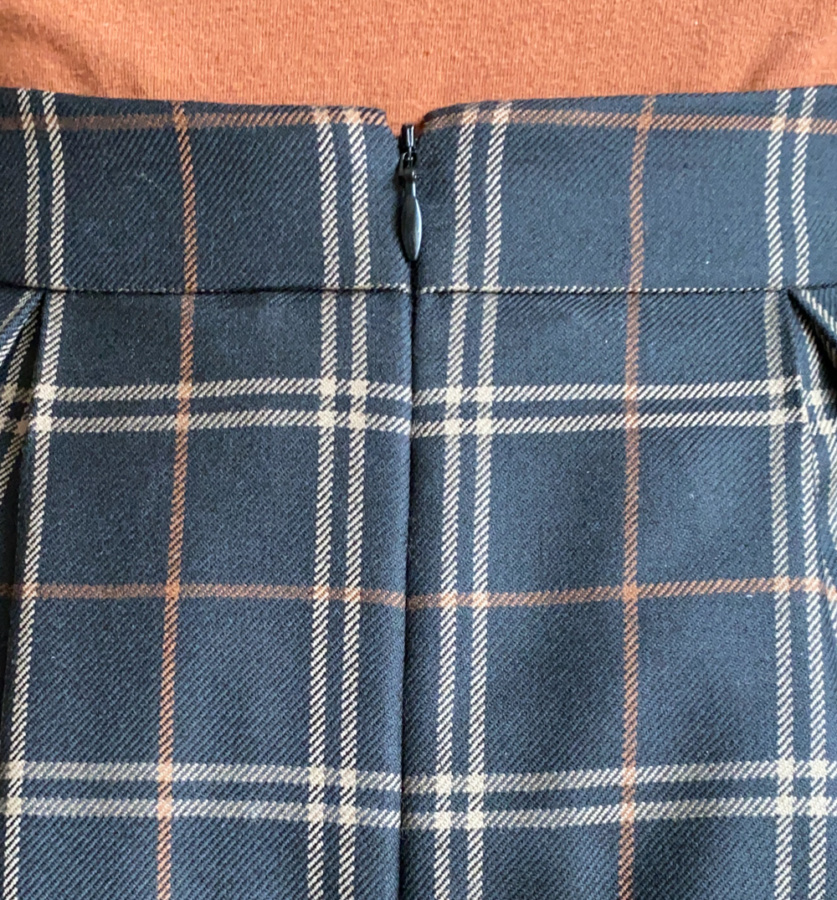
My plaid matching didn’t turn out quite as hoped everywhere though. I had intended to have the darker single stripe running vertically at the centre back and centre front. I planned everything around that stripe. Once I had everything draped, I cut it all out and sewed it up (including adding lining), leaving the centre back open. In hindsight, if that centre back seam was hugely important to me, I should have sewn it first and saved the fitting for the side seams. I wanted to add pockets tacked to the front waistband though, so I did the side seams first, which left any fitting to the centre back.
When I inserted the zip and tried it on, it was MUCH too large. I could pinch out about an inch of fabric. I was gutted. I had no choice at that point, after already having installed the pockets and finished the side seams, but to take in the centre back.
I don’t know why this happened after having carefully fit the waistband at the beginning, but this isn’t the first time I’ve had this issue. When I fit something to my measurements, it often ends up feeling too big when it’s on my body. My hypothesis is that the weight of the skirt must have altered the fit of the waistband and that my body in motion is possibly slightly smaller than measurements indicate. Regardless, I had to fix it to make this skirt wearable.
I was able to save it by abandoning my desired plaid matching. It turned out fine. And I’ve learned a valuable lesson for my next draping project.
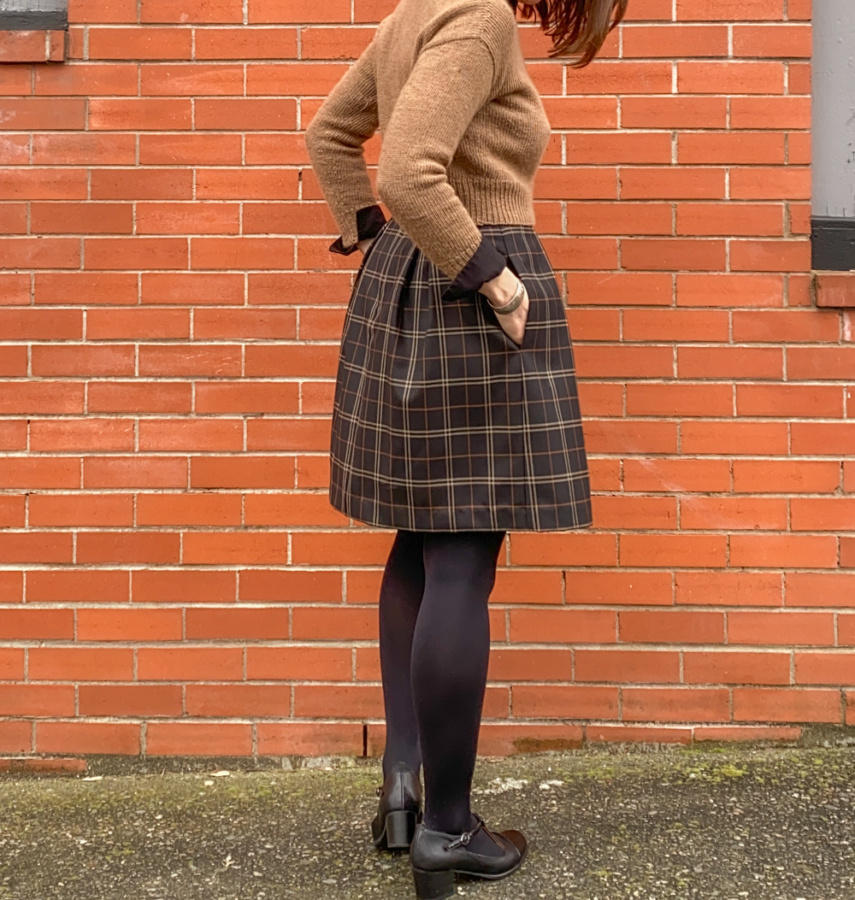
This skirt coordinates with so many tops in my wardrobe, which is main reason I picked this fabric. It’s going to be so easy to wear. I lined it with black Bemberg rayon, tacked to the side seams with thread loops, and hand stitched the hem for a clean finish. I also left the extra large seam allowance at the centre back so that I can easily let this skirt out if and when I need to.
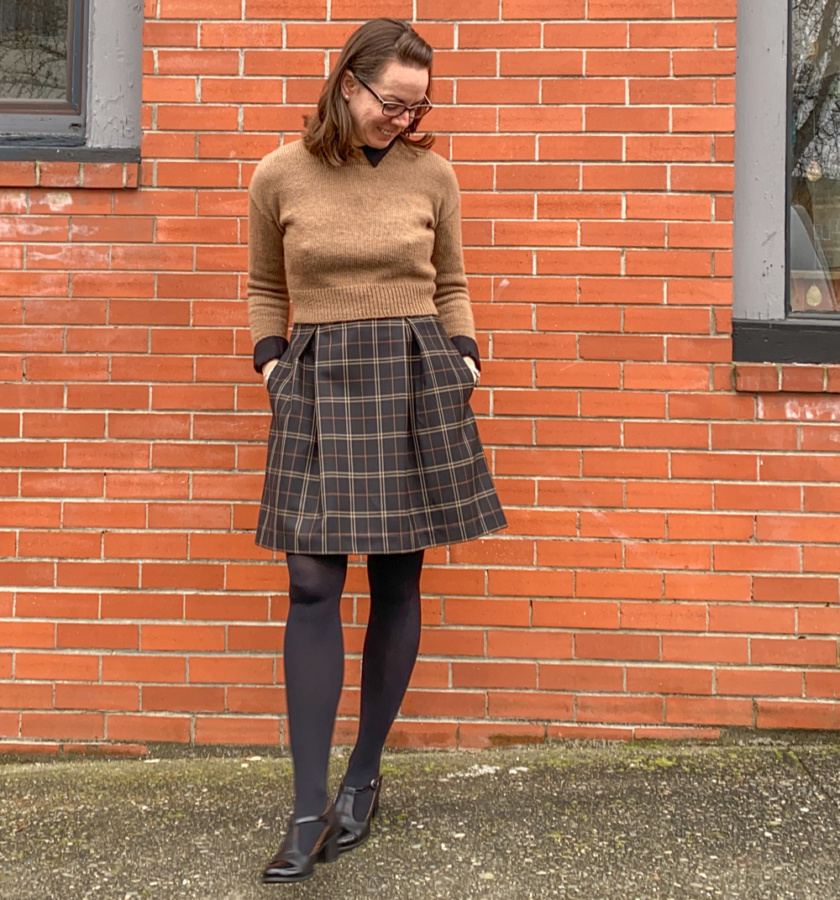
All in all. I’m pretty pleased with my first attempt at draping. It was more of a mind bender than I thought to sew something completely without a pattern (except the pockets, because there is no need to reinvent everything). I sat and stared at the pleated fabric pinned to my dressform for hours, contemplating the number and placement of pleats. In the end, I’m happy with the placement I landed on. The four pleats give the skirt a nice full A-line shape but provide plenty of room for comfortable movement. This is also one of the makes on my Make Nine 2021 list so it checks a lot of boxes for me.
I’m wearing the skirt with my first Petite Knits Stockholm Sweater and my new custom Mary Janes from Etsy seller Julia Bo. Margot, the dressform, is wearing it with a me-drafted turtleneck in cotton modal jersey knit from Sitka Fabrics.
Thanks for stopping by!
Lindsay