Now that I work from home and will be for the long-term, I’ve noticed a lack of comfortable, professional tops in my wardrobe that look good on webcam. V-neck blouses don’t work when you only show from the clavicles up and all my button down Kalles with grown-on sleeves make me look like a wide rectangle on camera.
So I’ve entered a fall/winter top-making spree that has begun with creating a perfect-for-me button up for wear on its own or under light sweaters. I started with the Grainline Archer with the full intention to modify, modify and modify some more.
For my first version, I didn’t make too many changes. I wanted to see how it fit out of the box. I cut a size 6, took one inch off the sleeve length and tapered the sleeve to a size 2 cuff. The fit isn’t bad, but I don’t like where the shoulder seam sits and I’m not into the box pleat in the back. As drafted, the under collar piece is far too wide for the upper collar (when it should have been smaller), and the collar stand is too wide at the back. The sleeve are also way wide (but their length was spot on with my mod). Oh, and I took 1cm off the length and width of the pocket.
After taking these photos, I chopped three inches off the front and 1.5 inches off the back length so I could wear it in a half-tuck. As shown, it is tucked much too far into these jeans to be comfortable :P
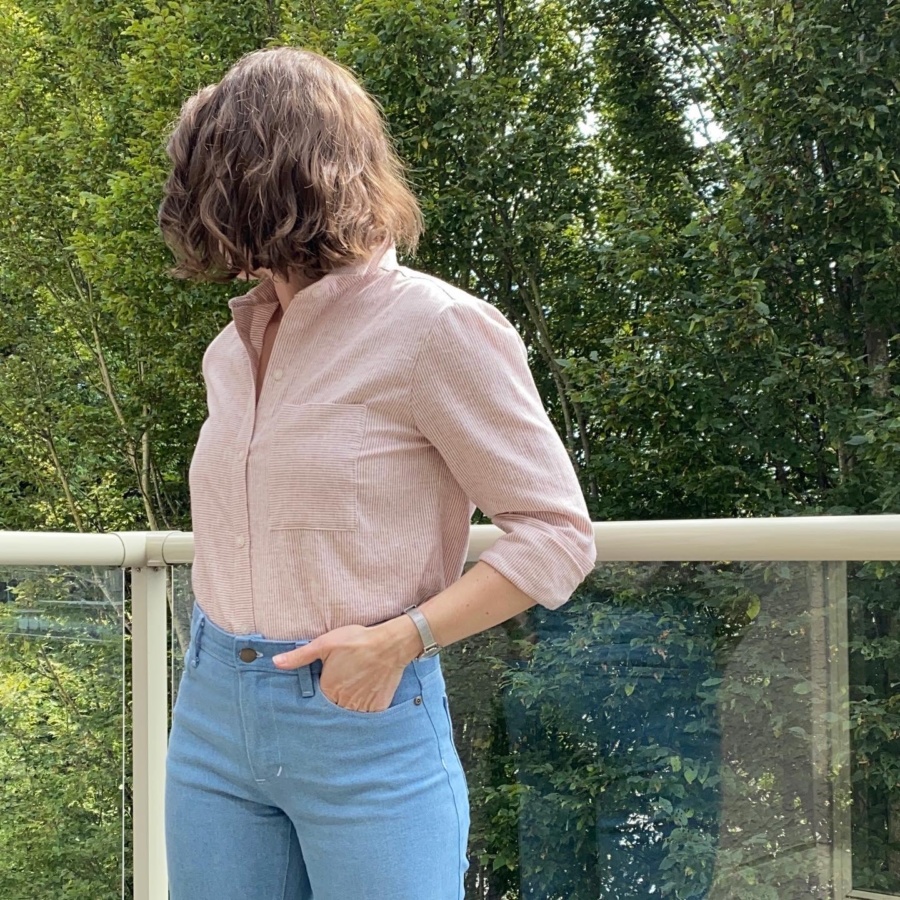
I made this version in a hemp/cotton blend from Blackbird Fabrics. I didn’t realize until it arrived that it had some cross-grain stretch so it probably wasn’t ideal for the two-direction stripe I planned… but I did it anyway. It may not wear well in the long run but it turned out to be quite a casual shirt so I’m not too fussed.
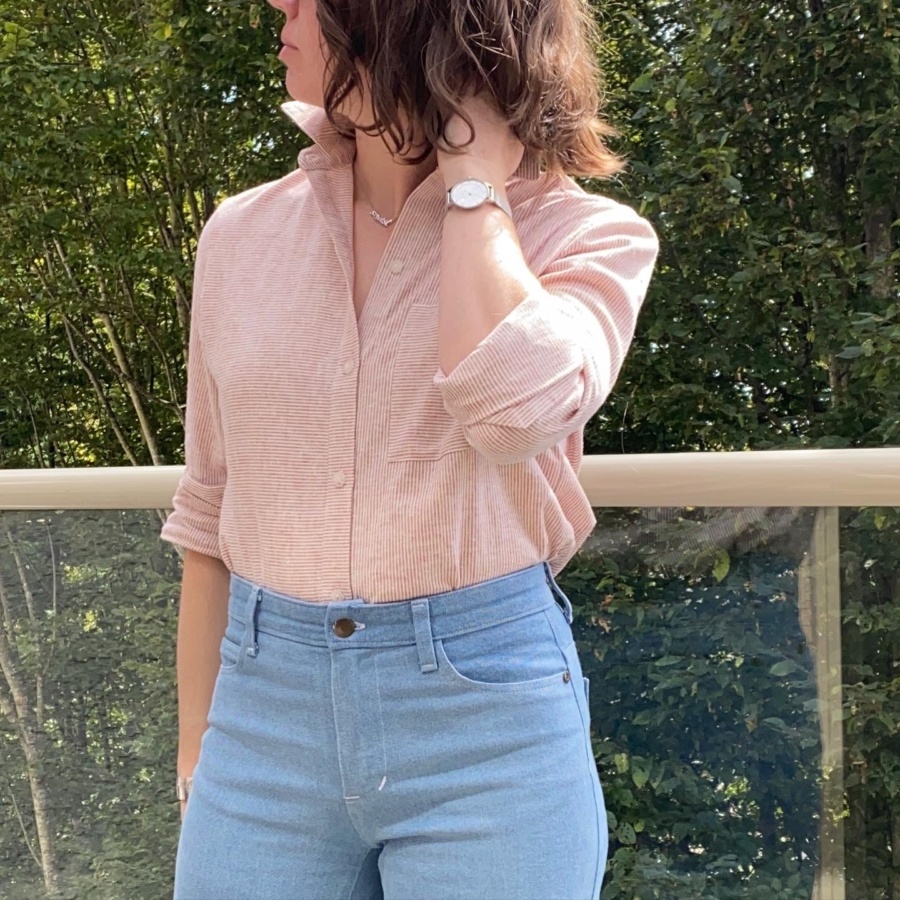
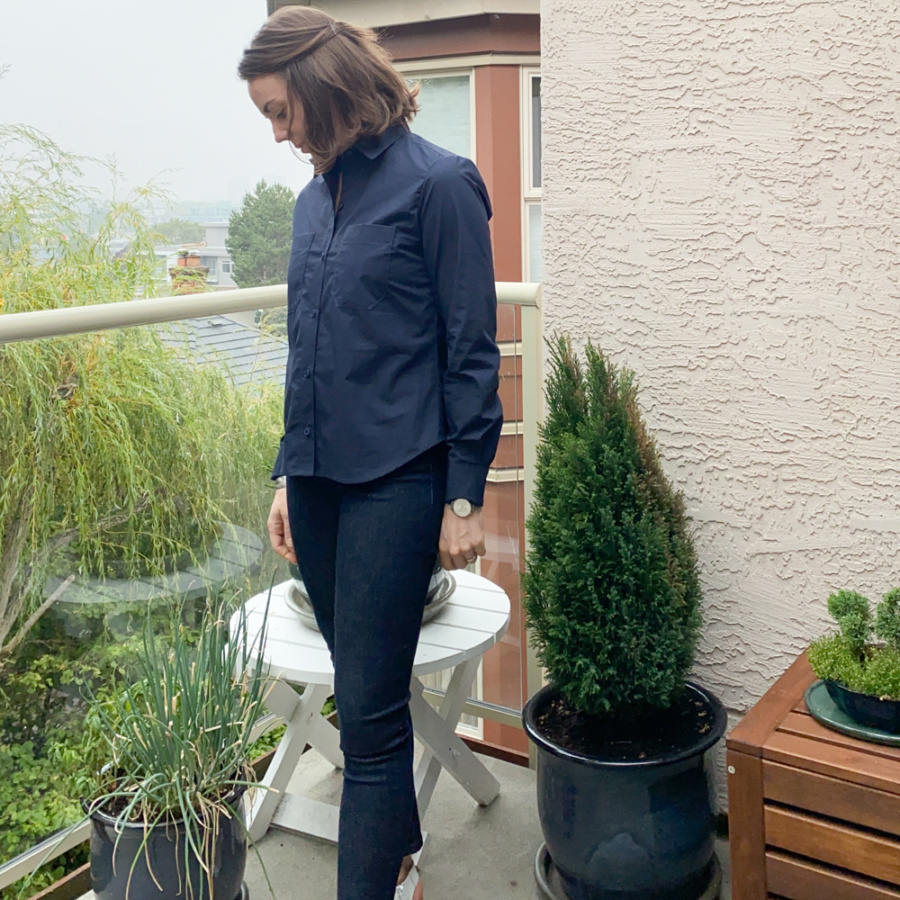
For my next version, I wanted to make a real “work-shirt”. One that I could wear on it’s own our under a light sweater. I used a lovely light-weight but super densely woven shirting cotton (also from Blackbird Fabrics). Here is the list of mods I made before cutting:
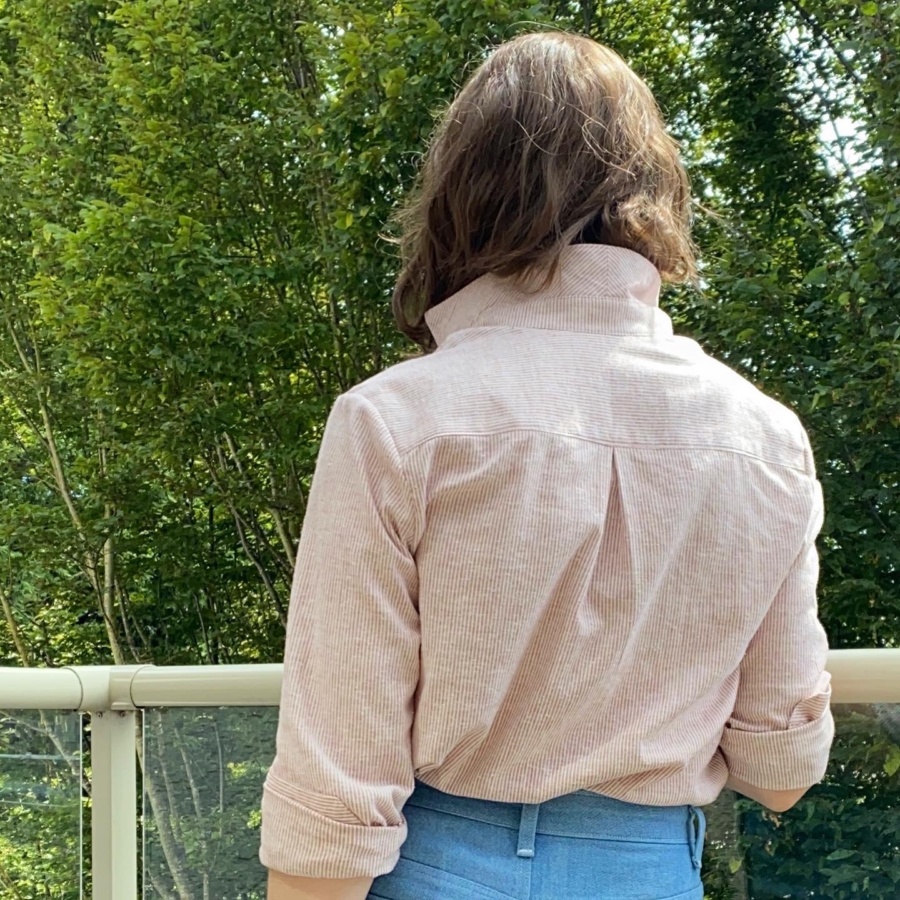
- Omitted the back pleat
- Reshaped the side seams to account for the removed pleat at the hips and give more shape at the waist
- Kept the 1″ shortened sleeve of the size 6 but cut a size 2 sleeve width tapered to a size 0 cuff
- Added a small amount of width to the sleeve cap
- Cut a size 4 collar stand and size 4 under collar with size 6 upper collar
- 1/4″ high back adjustment in yoke piece
- 3/8″ reduction to shoulder slope at neck edge (in hindsight I should not have made this mod)
- Recurved the armholes to reduce some width at the front and reduce width by approximately 1cm at shoulder
- Curved outside edge of back piece downward by 1cm at the arm hole
- Took length of body up 2″
- Curved front neck line down to the size 4 line
- Brought lower edge of arm hole up by 1cm on front and back pieces
- Reduced the pocket length and width by 1cm and reshaped the bottom
- French seams throughout and used a proper set-in sleeve construction
- Proper sleeve plackets using the Angela Kane Sewing TV method that I love and have saved as a YouTube playlist
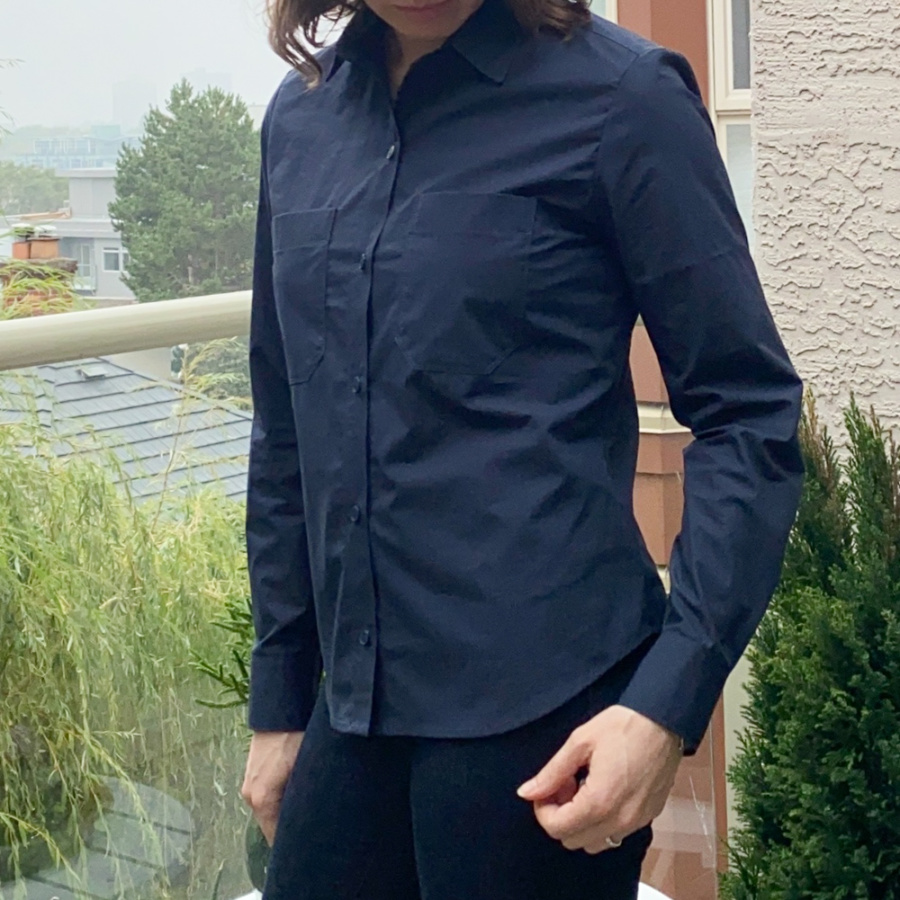
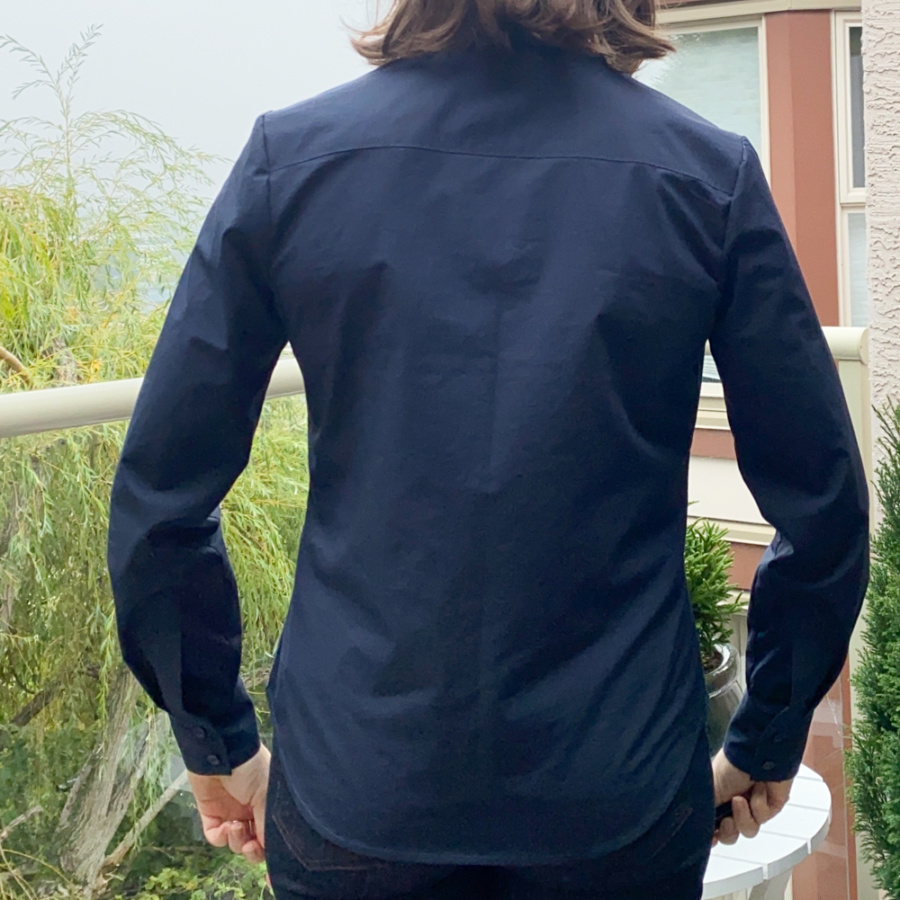
You can see from these photos that I still have some arm hole fit issues, especially at the back. Otherwise, I’m pleased with most of my mods. The sleeve length and width is perfect. The shoulder sleeve seam sits in a much better position. The body fit it also pretty good, though I may add some fish eye darts to the back to take up some of the excess. The length is much better and I like it a lot more without the pleat. The collar fit is much better than my first version as well and is comfortable both buttoned up and left open.
For my next version, I’m going to do a forward shoulder adjustment and will have to do some trial and error fitting of the back arm hole because I’m not at all sure how to fix those drag lines. I think I’ll start with adding back the slope that I removed from the shoulder seam…

I need to pat myself on the back a bit for this quality of this make. I used a double row of stitching throughout and it really is some of my best work. The photos don’t show it unfortunately but I’m not at all into sharing my makes on social media right now so feel no sense of urgency to finish things (or photograph them well), which gives me more time to make them extra nice for no other reason than to satisfy myself.
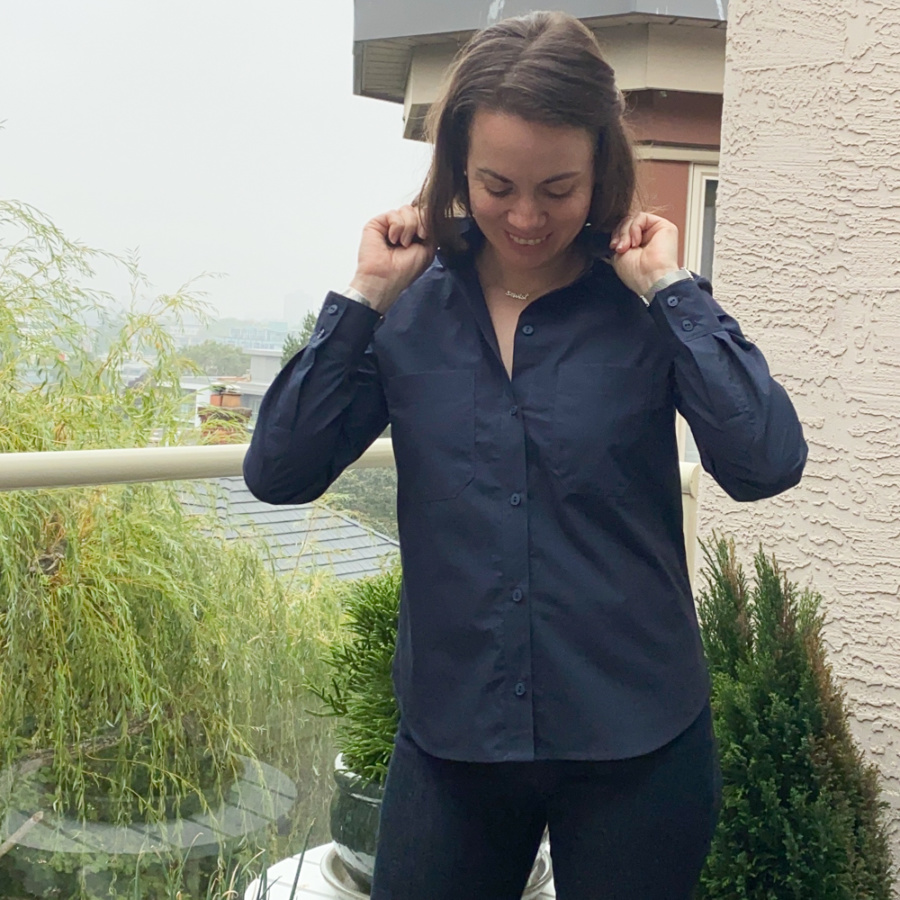
Next up at the sewing machine, a new shirt for my husband using the same cotton shirting in the colour ‘pecan’. This fabric is really lovely but very densely woven. His version will definitely require a fresh needle on the machine. But it will all have to wait until I finally finish the sweater I’ve been knitting for him for over 9 months, because fall is finally coming and I’m all here for it. When nothing else seems to be changing, the changing season brings me some amount of joy and I’ll take whatever I can get these days.
Thanks for stopping by.
~ Lindsay