It got cold this month and I realized last week that I didn’t have a coat that would work with my wedding dress if I ended up needing one. Everything is done for our wedding. We are fully prepared. So of course I decided the weekend before to make myself a new coat. Luckily I already had the fabric and the pattern so it wasn’t as last-minute as it seems…. at least that’s what I’m telling myself now that it’s finished.
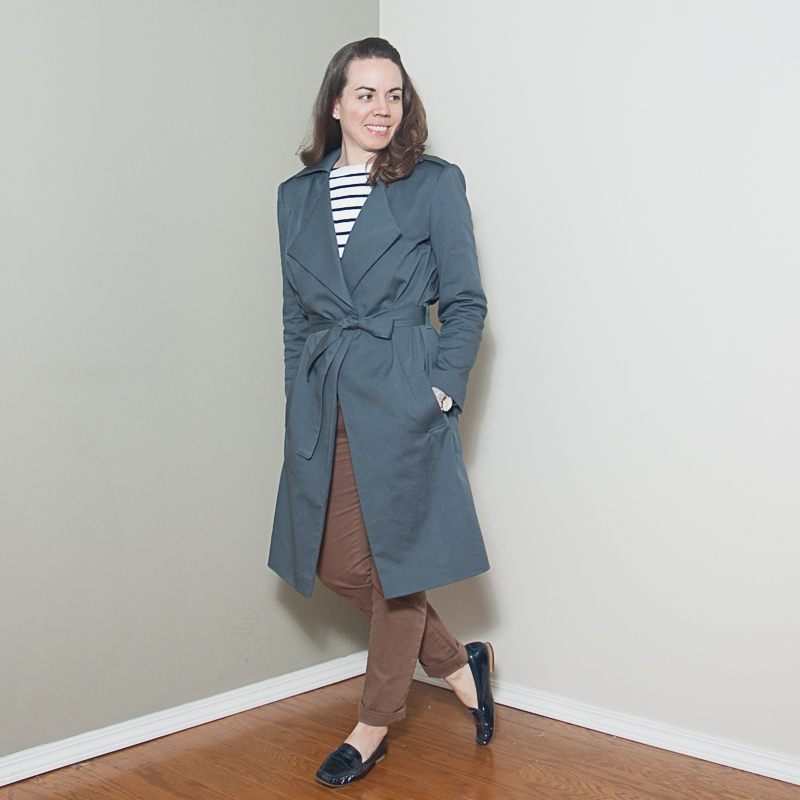
This is the Orageuse Londres, a simple, unlined trench coat that I included in my 2018 Make Nine (#2018makenine on instagram). I made my size based on the size chart but I raised the hem by 4″ to bring it up to knee length and also modified the kick pleat to work with the new length. I was short on fabric and time so I also omitted the shoulder flap and the sleeve bands – which worked better for the simple look I wanted anyway.
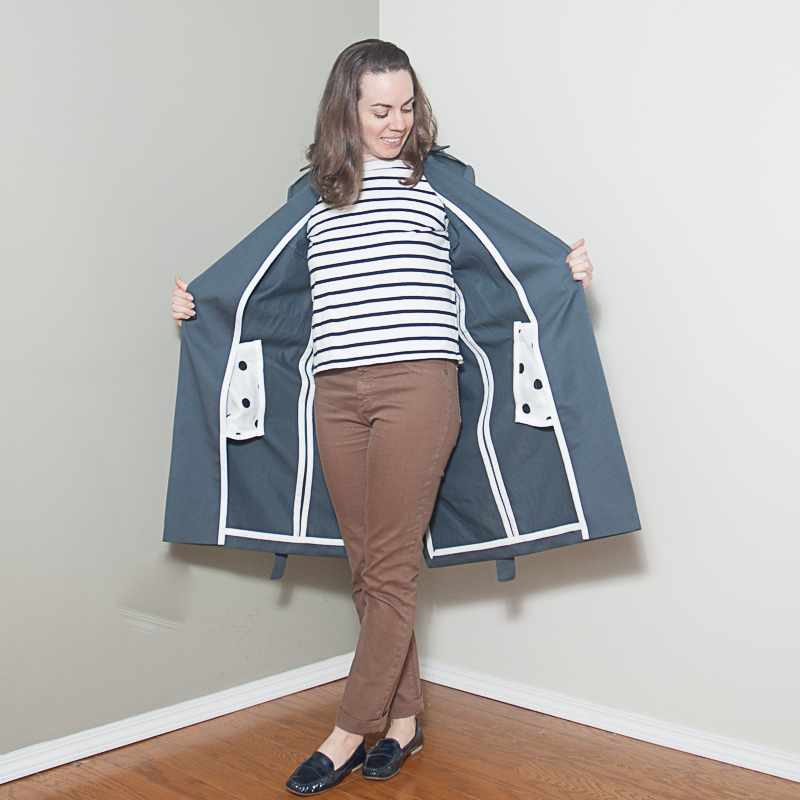
The main fabric is a dead stock Robert Kaufman cotton twill purchased from Match Point Fabrics. It is blue-grey that is wonderfully difficult to put completely in either colour category. Because this coat was to be unlined, I decided to bias bind the interior. It took a LONG TIME. It was the biggest time-suck on this project by far but I love how it turned out. I used a polka dot silk from my stash for the pockets and I am quite amused by the little bit that just peeks out when the coat is open.
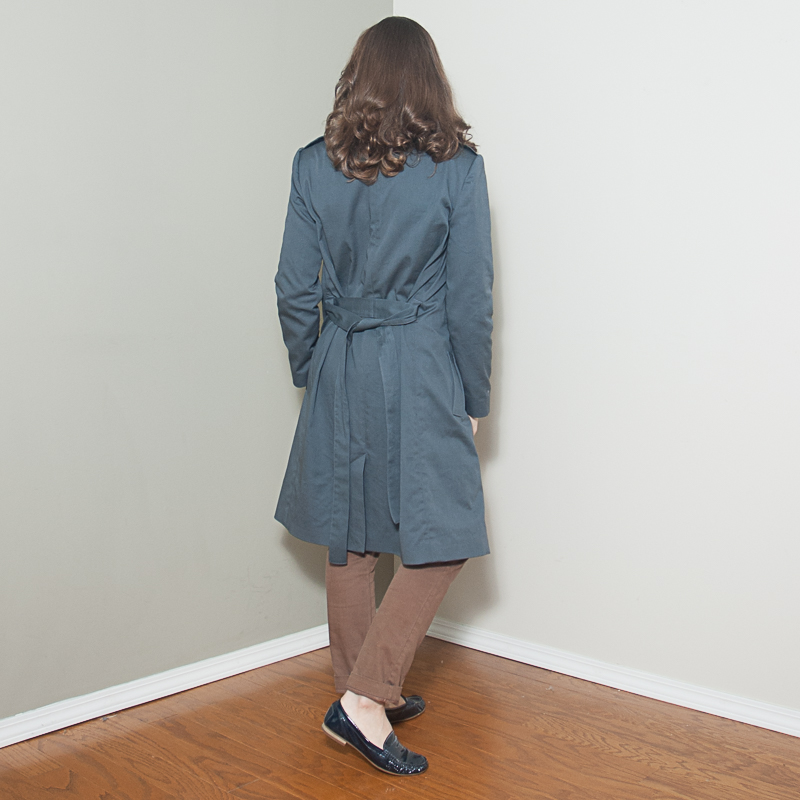
The back of this coat is completely straight with no fitting. The front has bust darts which, I find, sit a bit too high. There is no other shaping in the pattern. The sleeve are one-piece sleeves and the collar design is quite simple as well. My favourite thing about his coat it the way the front collar is shaped. It falls perfectly with no effort at all and is the key focal point of the coat.
Speaking of effort – once I finished the coat, I decided it would be better and more versatile if I lined the sleeves. Yup. I decided AFTER I was all done. I didn’t want to take the sleeves off so I sewed the lining sleeves on at the arm holes and then used bias binding to finish off the raw edges of the inner arm holes. Sorry I don’t have photos, you’ll have to trust me that it came out looking decent (or decent enough for armholes that hopefully no one but me will ever see. The last thing I decided to do was sew the waist belt to the centre back seam to keep it from slipping off.
I’m pretty pleased with how this coat turned out. I would have made a few changes to the fit if I had more time (and had made a toile) but I think it will work perfectly over my wedding dress if the day ends up being cold. After that, it will probably have to wait until early fall before I have a chance to wear it more and see how will it fits into the rest of my wardrobe. NOW I’m ready for our wedding, unless I think of something else I need to make in the next 2 days…
Thanks for stopping by!
Lindsay