One day, in the not too distant future I hope, I plan to expand my creative repertoire to include making furnishings for our home. Yes, I’m going to become a person who works with wood – a wood worker – eventually, when I have the space to. So, of course I need the outfit waaaaay in advance of that. Right? Please don’t answer me, I know I’m right ;)
I’m going to need some overalls for my future endeavours (and a wool over shirt, but I’ll get to that later). I chose the Merchant and Mills Harlene Overalls because they are a classic design and so many people have made them that there were plenty of photos and reviews to peruse on the internets. My bust and seated hip measurements put me at size 10 but the finished garment measurements seemed huge to me. I wanted them roomy enough to move around in comfortably, but not so much that they overwhelmed me. The reviews I read all said to size down and many said they’d size down even further next time so I tried a one leg toile in size 6, two sizes down. It seemed good, even a little big still, so I went for it.
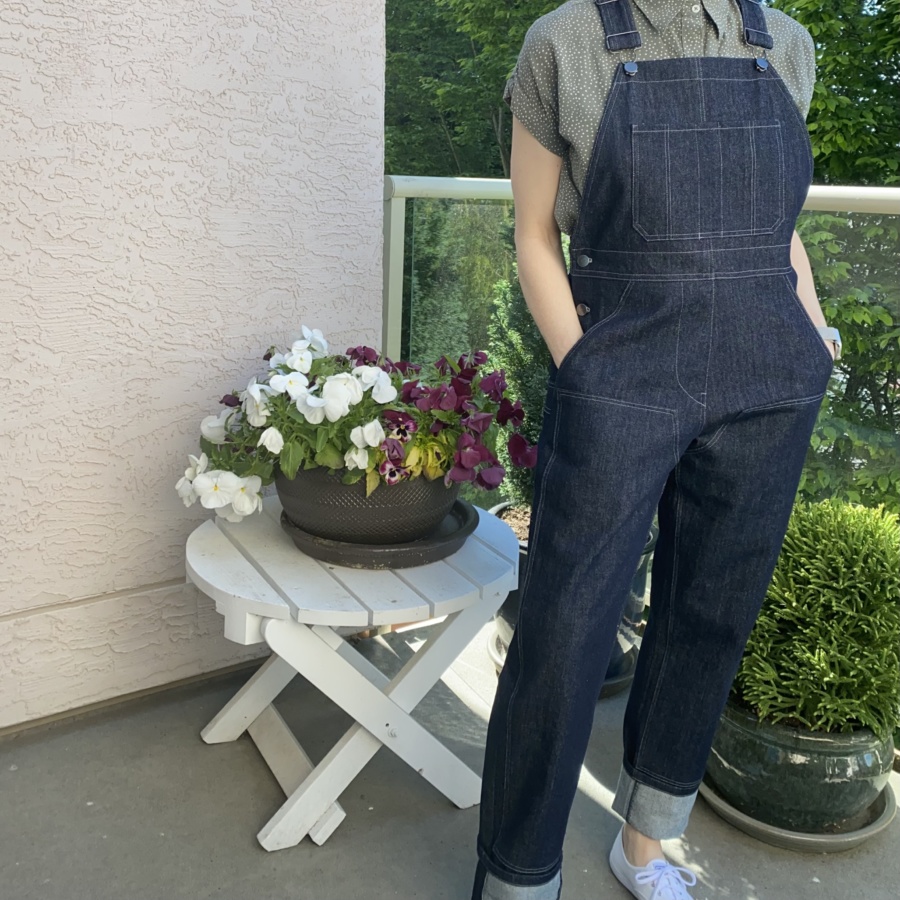
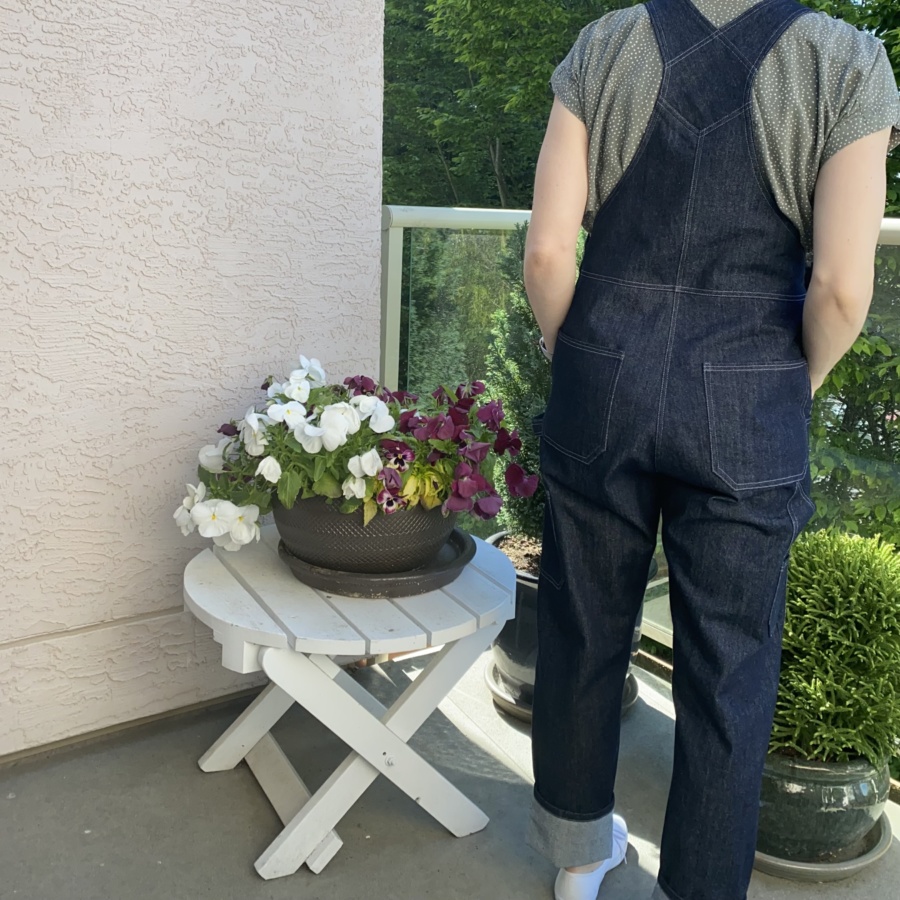
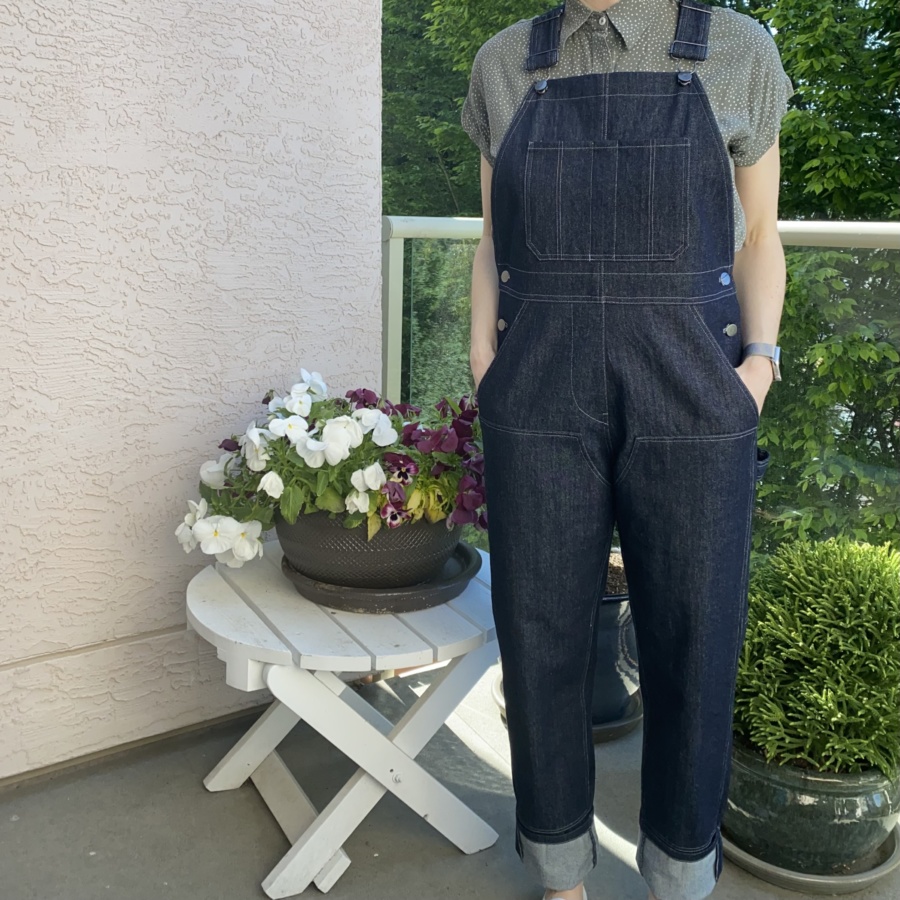
I used 11oz non-stretch raw denim and an overalls hardware kit, both purchased from Blackbird Fabrics. Some leftover Atelier Brunette twill from my Penny Dress worked well for the main pockets and interfaced for the waist and faux fly facings.
Here are the details and my mods:
- Started with a size 6 based on finished garment measurements (I’m currently B35/W29/H36, 5’3″ tall)
- Reduced 5/8″ from the rise, across both the front and back pieces, before cutting out
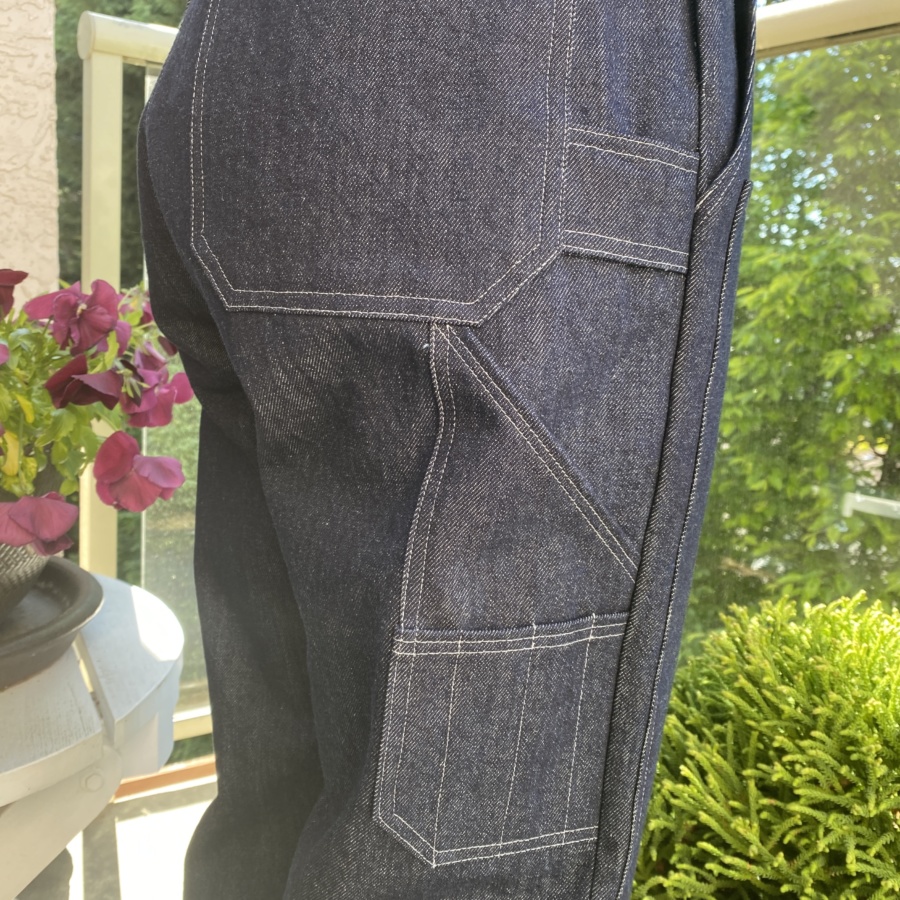
- Drafted a second layer for the front legs to give them added strength
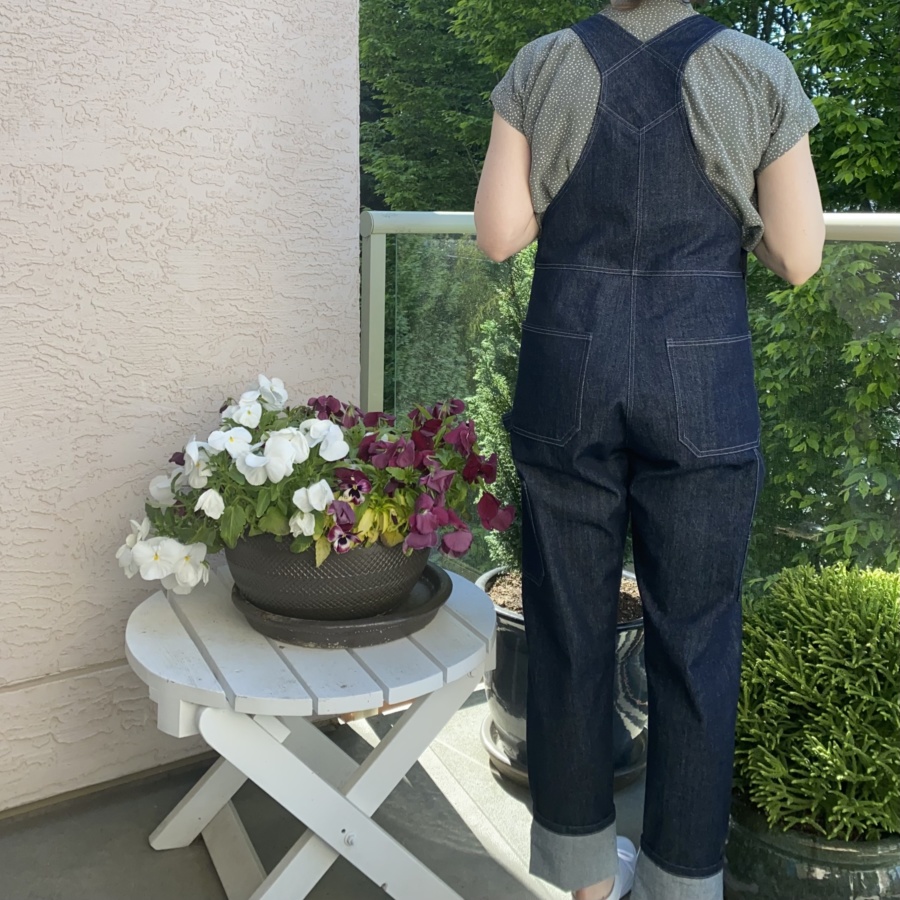
- Copied the back leg pocket and strap design from a photo of women’s Dickies overalls
- Cut 7.5″ from the finished length of the shoulder straps
- Added interfacing to all the pocket openings and bias cut edges
- Top stitched and sewed them with the same regular polyester thread (light grey)
And the result:
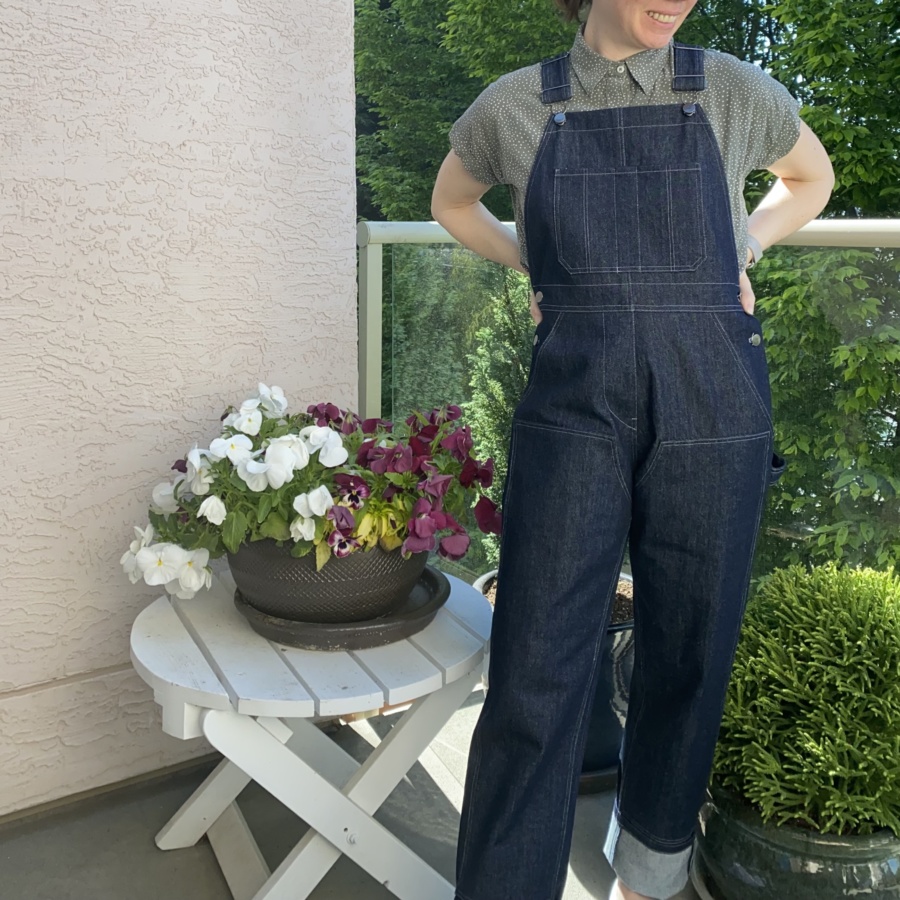
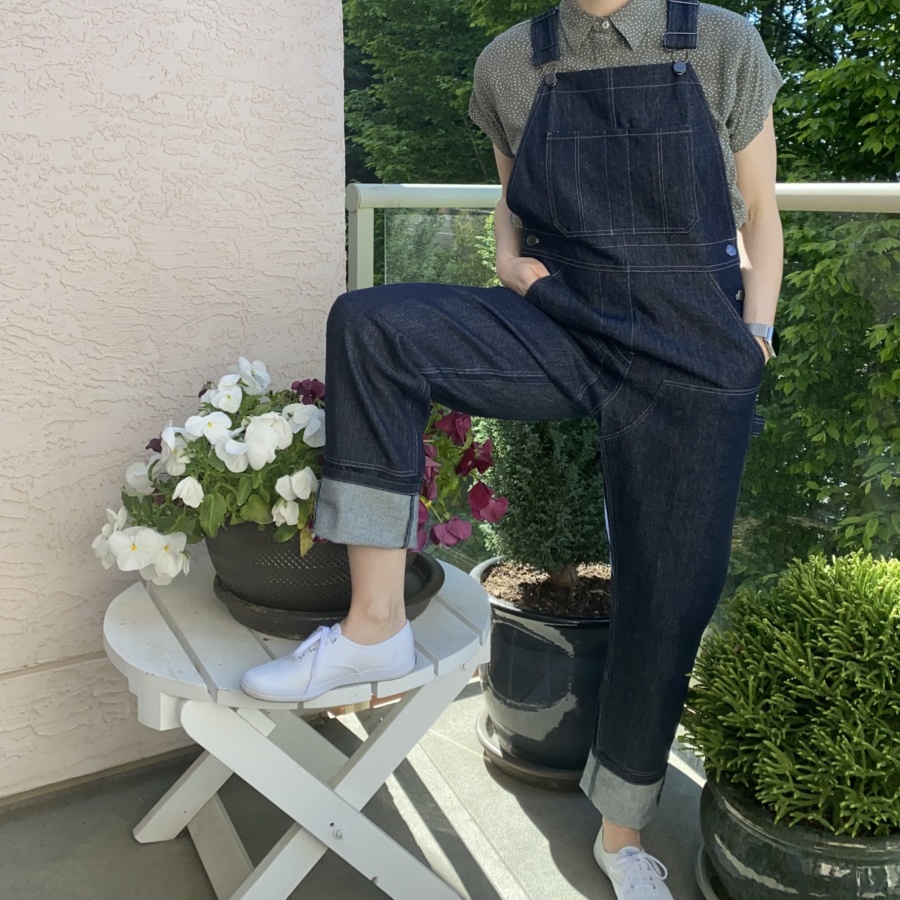
I think they turned out so well! They are plenty roomy. I can sit and kneel and squat no problem. I could easily wear some warmer clothes under them, if my eventual wood working space isn’t heated. But I don’t think they drown me. I don’t feel overwhelmed by them, as I worried I might. I didn’t modify the leg or bib length at all because I wanted them to sit high on my chest and be cuffed at the hem. I can move around in them and it doesn’t feel like any excess fabric gets in my way. Plus, they’re super cute, I think.
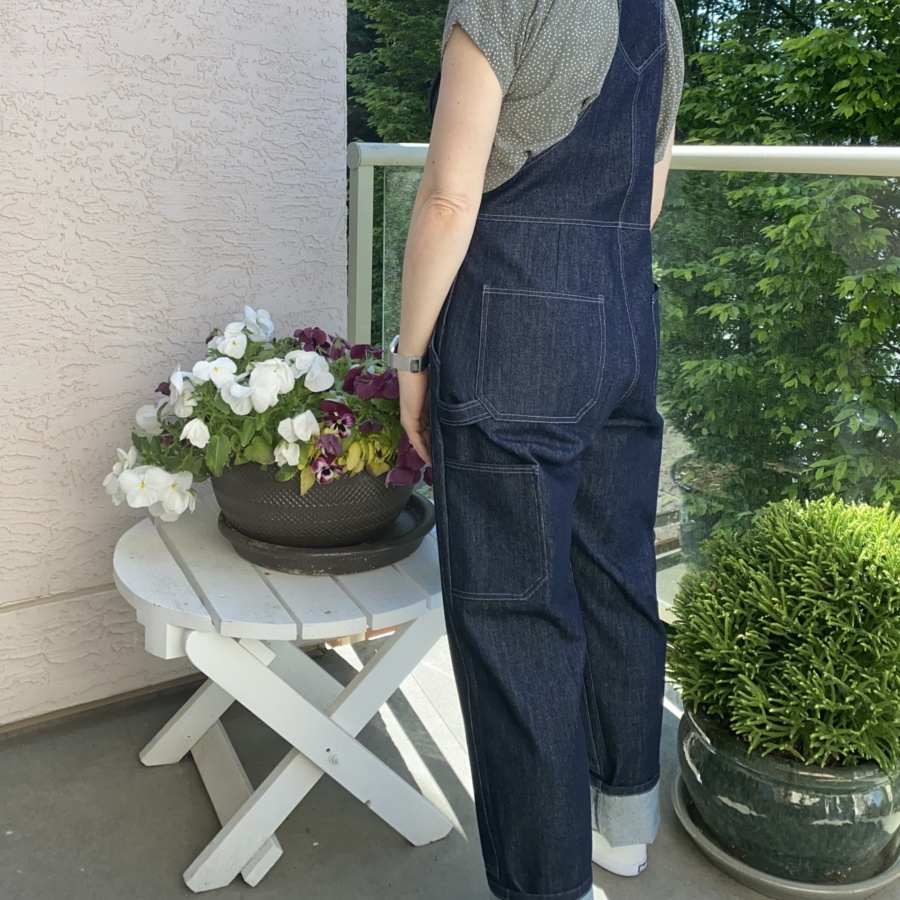
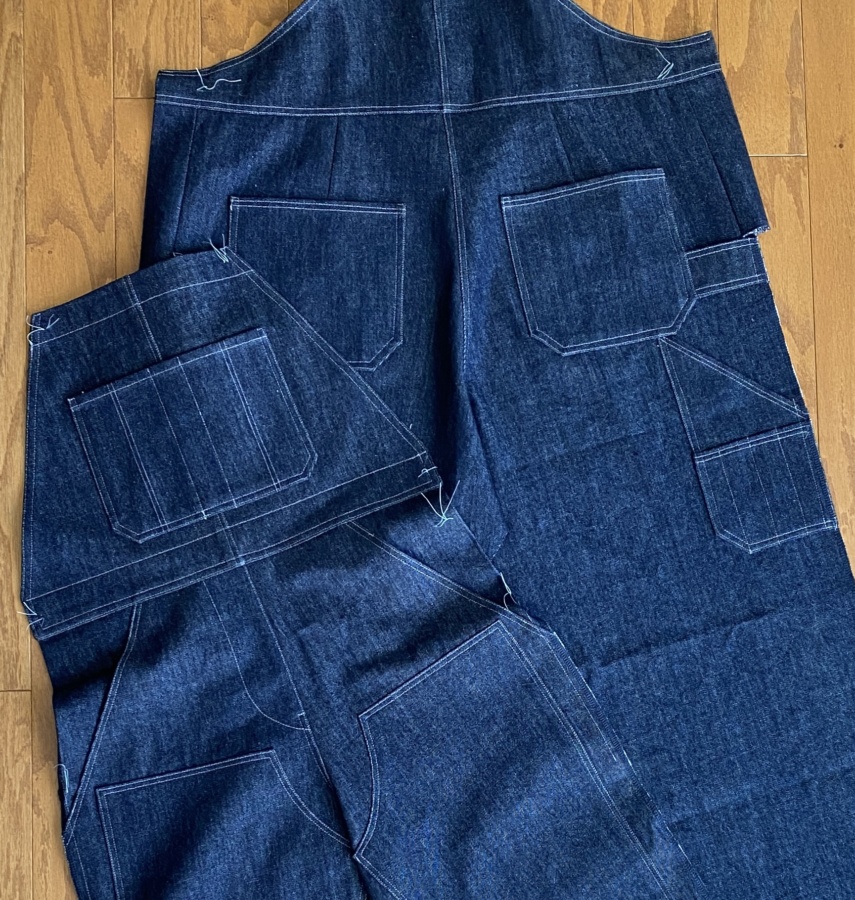
In total, I’ve got eight pockets and two hanging loops. Two of the pockets, the bib pocket and the lower right back pocket, are split into multiple compartments though, so does that mean I get to count them as unique? If so, that would be 13 pockets. That’s a lot of pockets. I can fit a lot of things in them… I think I’m going to get a tool belt though. Just because I can carry everything in my pants, doesn’t mean I should, right? Plus, a little tool belt will be hecking cute. Maybe I should make one…
Construction of these was fun. The instructions are detailed but I enjoyed them. The pattern drafting is precise and the tailor’s tacks are quite helpful, though aren’t well described ahead of time so I didn’t notice how helpful they were until I was putting it together and started noticing what they were for. I added all the pockets when the legs were flat and separate. Adding so many extra pieces took time at every stage – planning, drafting, construction – but it was worth it to get the functionality and look that I wanted from these.
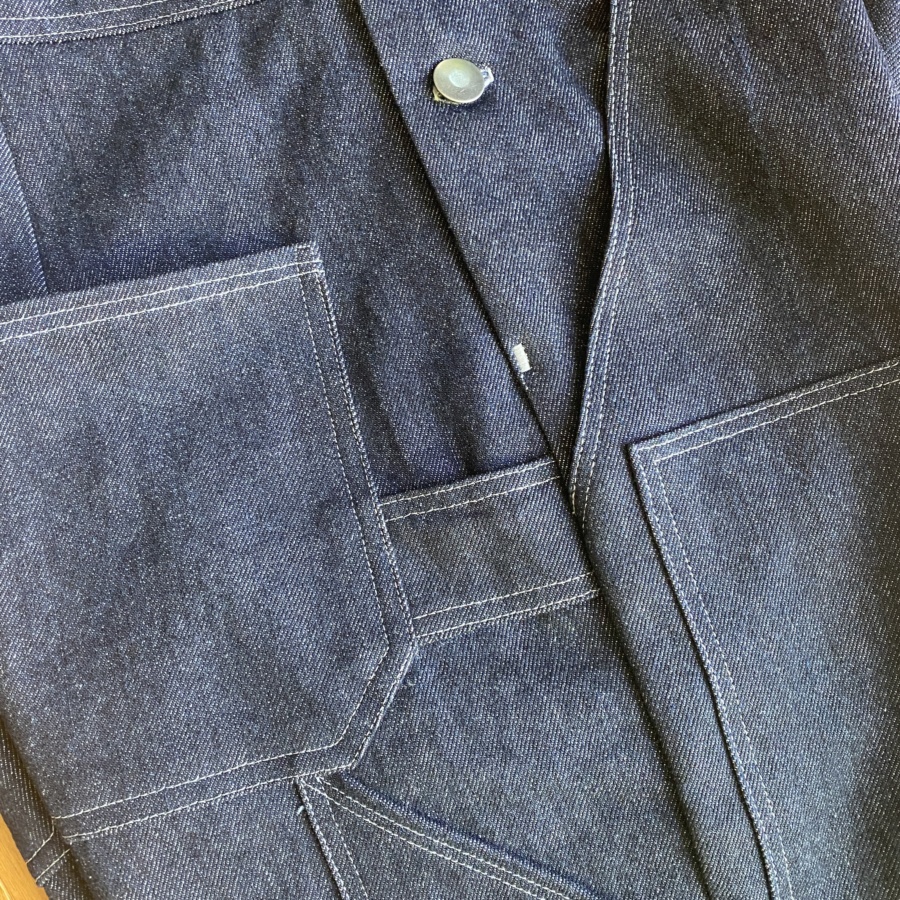
After I finished and photographed them, I went back and added some bar tacks to the base of the lower button opening because it didn’t feel secure. I may also still remove the top buttons, open the upper bib fold down and add some more reinforcement there. As made, it isn’t very thick and doesn’t feel very supportive of the jeans-style buttons. I’ll see how it wears for a while first though (and I need to buy two more buttons first).
Other things I’d do differently next time:
- Make the second front leg pieces smaller so it’s more visually obvious that they’re there.
- Reduce the leg length by an inch our two, properly, in the middle of the leg so the cuff is a little smaller.
- Add another lower button to the side openings (maybe – undecided on this one for now)
It’s a short list. They are what they look like and what I wanted them to be. They’re pristine right now, but I intend to mess them up eventually and cover them in sawdust, paint and glue. One day.
Thanks for stopping by!
~ Lindsay
P.S. I’ve turned off comments on my blog so the best way to connect with me is instagram or email. I have been inundated with spam for years and I finally got tired of moderating it and trying to sift through it for real people’s comments. It’s always lovely to hear from you though so please feel free to reach out.