Inspiration struck recently. It started with wanting to experiment with a pair of Lander Pants in stretch denim. I picked up some 9 oz. organic raw stretch denim (2% spandex 98% cotton, though it feels lighter and more stretchy than that) from Fabricana in Richmond but they didn’t have a suitable jean zip. I didn’t want to wait for a zip to ship and that’s when the inspiration arrived – sailor pants.
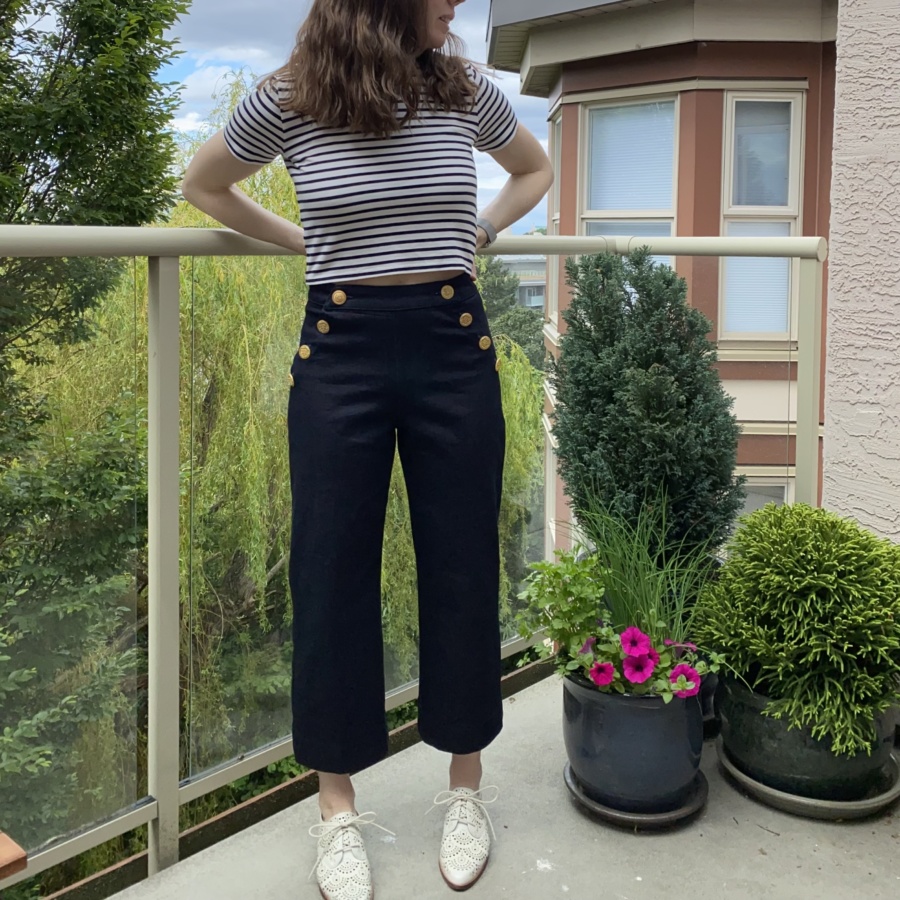
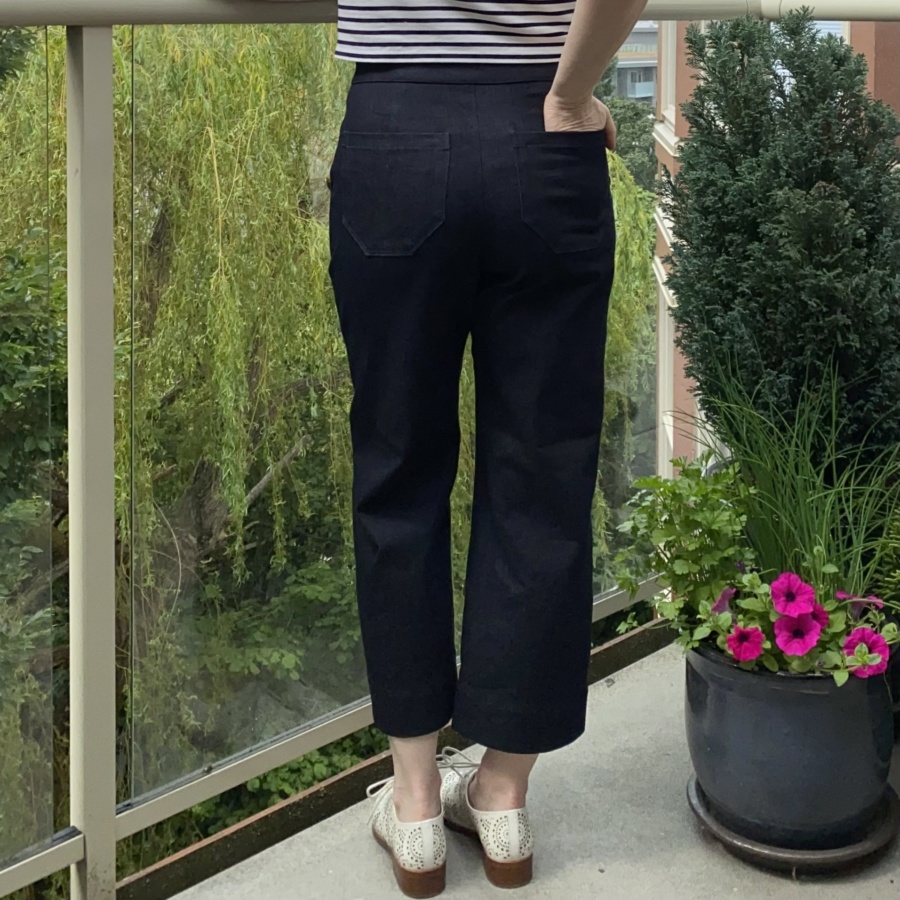
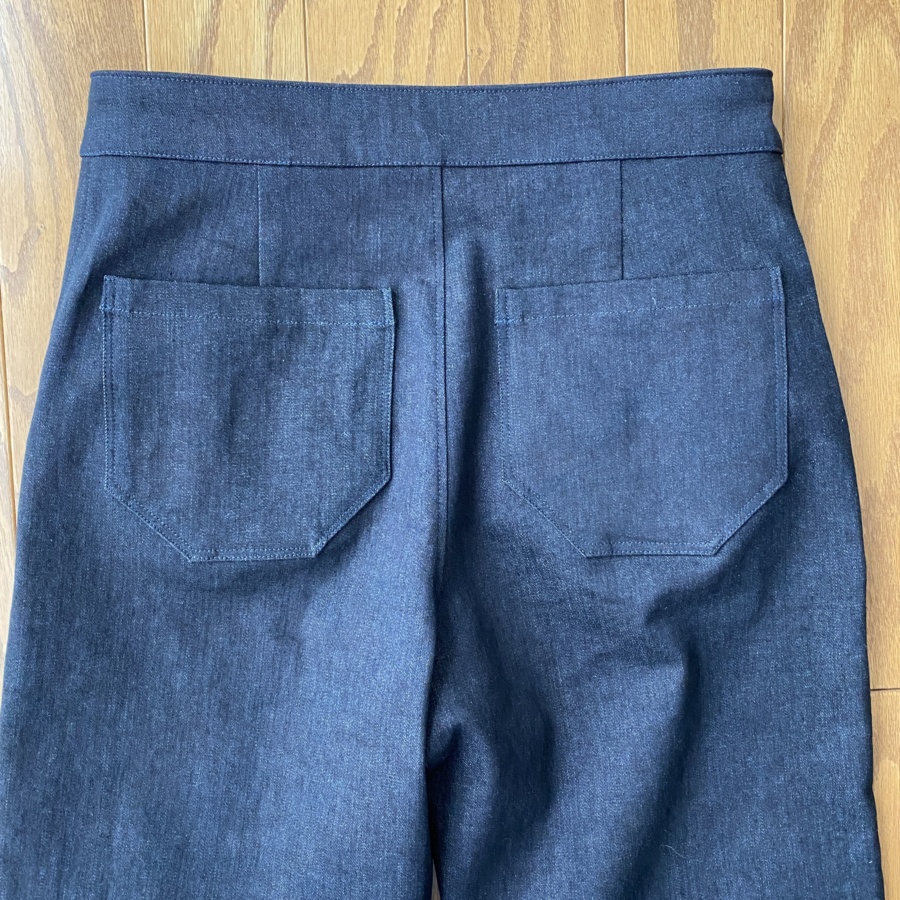
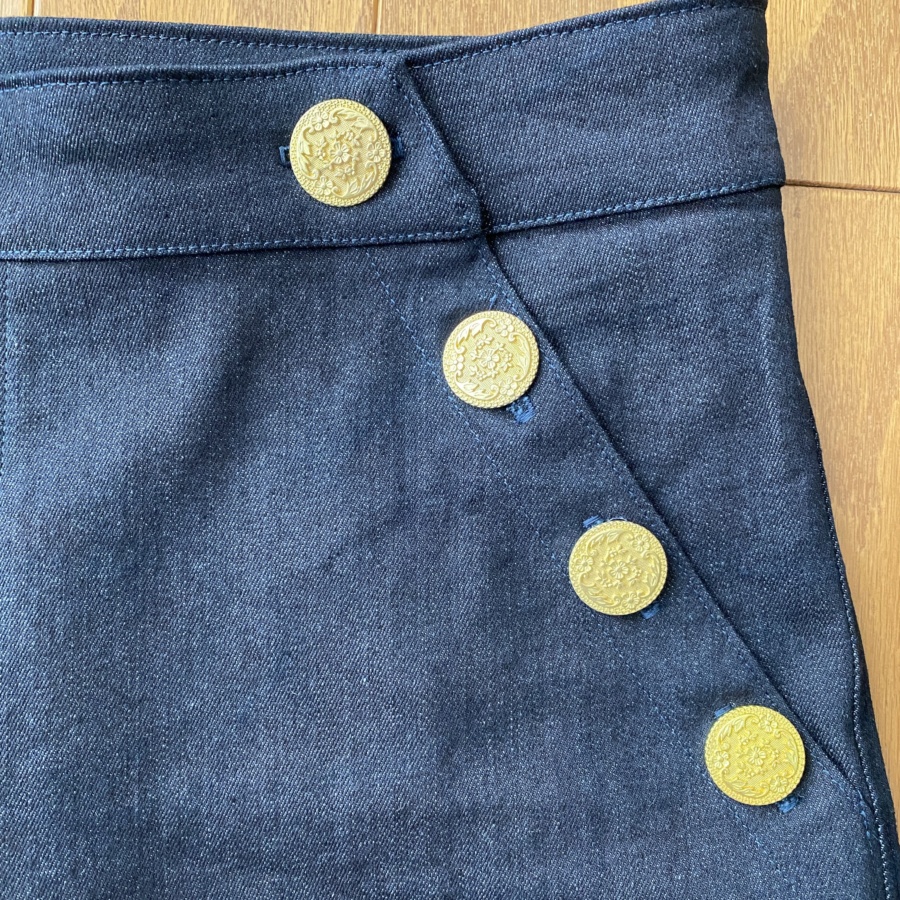
I found almost the right number of gold buttons in my stash and one passably similar to make up the difference, and suddenly couldn’t not make stretch denim sailor pants. After spending too long contemplating how to make it work with front pockets, I decided to just add back pockets and call that enough storage.
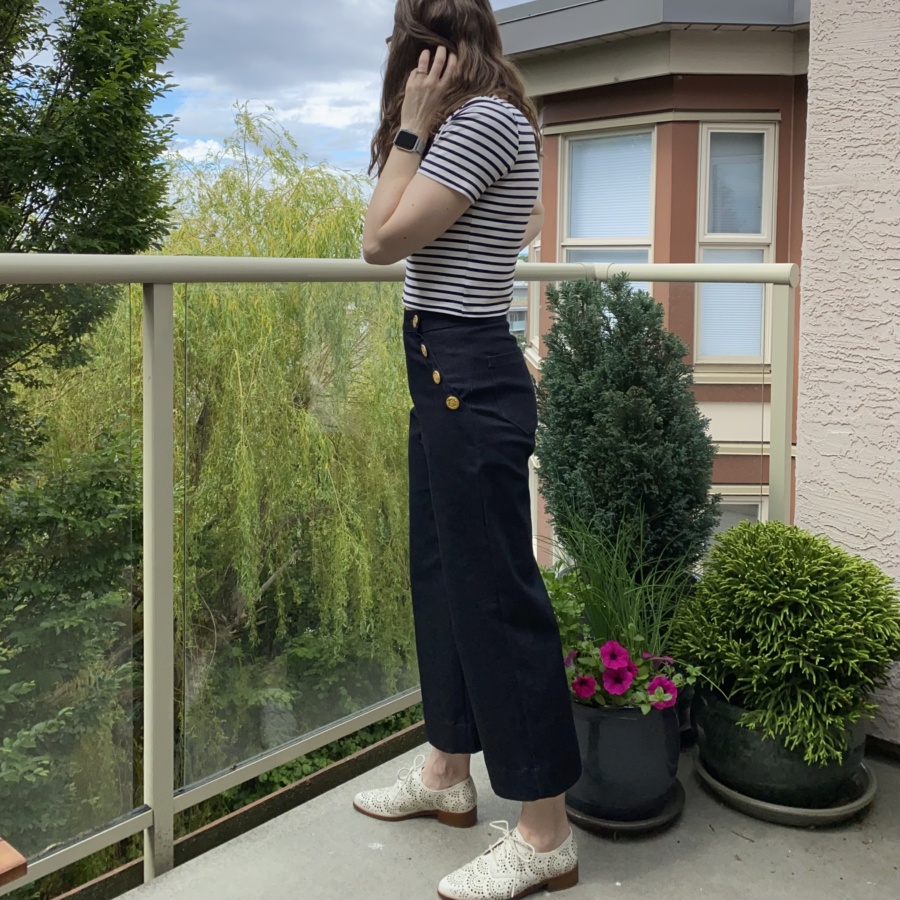
I’ve included all the steps for how I made these below. But first, let’s chat about how they turned out. I wanted to try stretch Landers to see if they’d be more comfortable and these are indeed comfortable. I used the same size that I did for my last pair, but backed out the half inch I’d added to the front crotch hook. Otherwise my only mod was, obviously, to completely change the upper front.
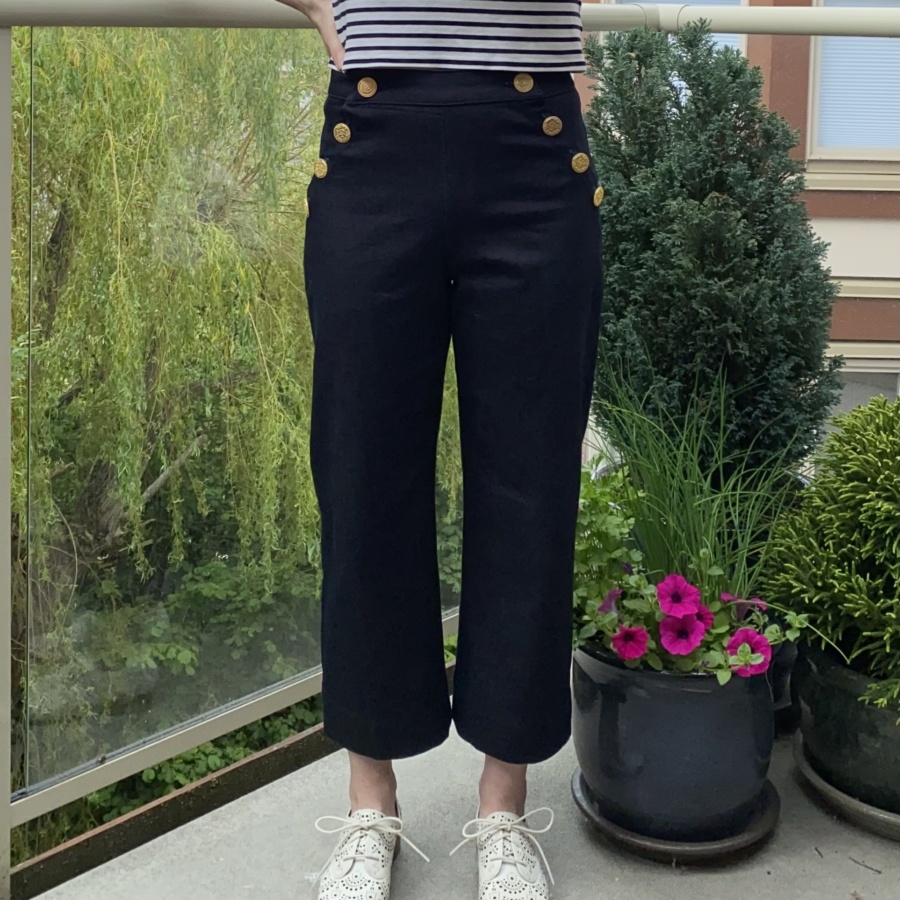
They’re a bit big, but not excessively. I should maybe have sized down but I didn’t want these to be skin tight. I ended up pulling the upper buttons in by about an inch on each side to tighten the waist. Otherwise, I’ll see how they wash and dry because they’re still likely to shrink up a bit. I used my normal straight waistband for these, cut into two pieces. It is interfaced with a stretch interfacing. I did my best to follow the angle and have the corners lay flat but the tight corners were challenging.
The front opening works great but I keep being tempted to put my hands in the pockets that aren’t there. I’m glad I left out the pockets though. It was enough to wrap my head around to transform these and the front is clean and simple.
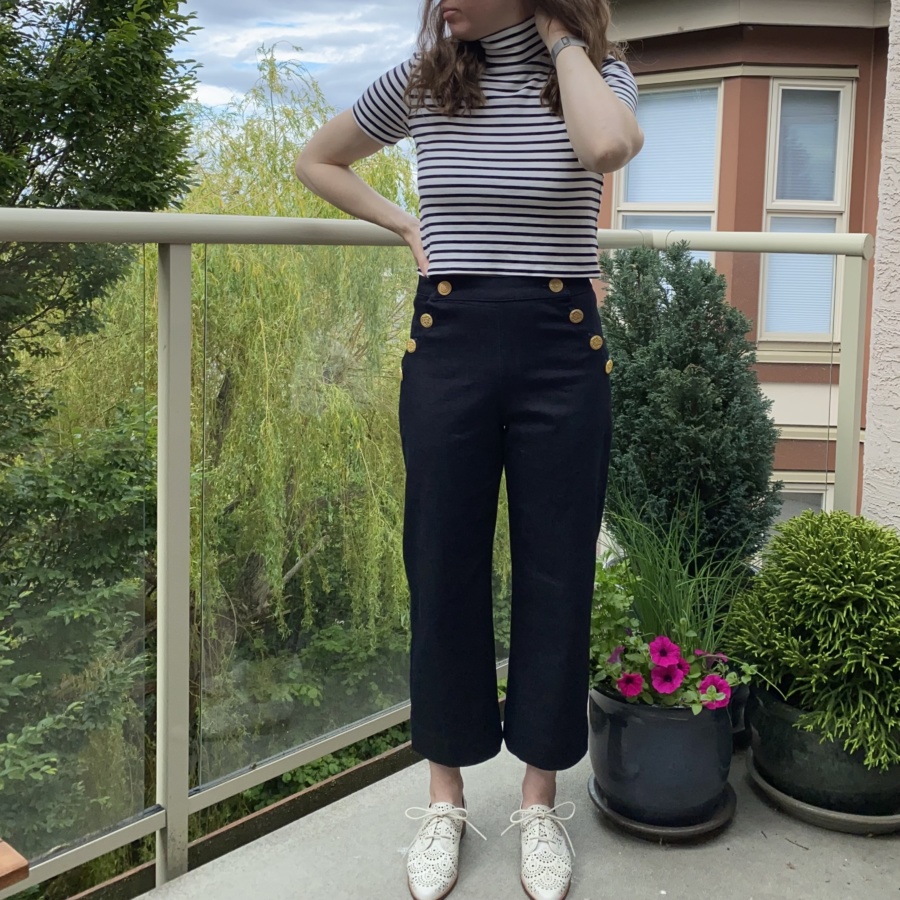
They’re full of wrinkles and creases in the front and the sides, just like all my other Landers. I think maybe it’s time to retire this pattern and look for a new high-waisted wide leg pattern that works better for my body. They’re comfy though and I’m not super concerned about a few wrinkles.

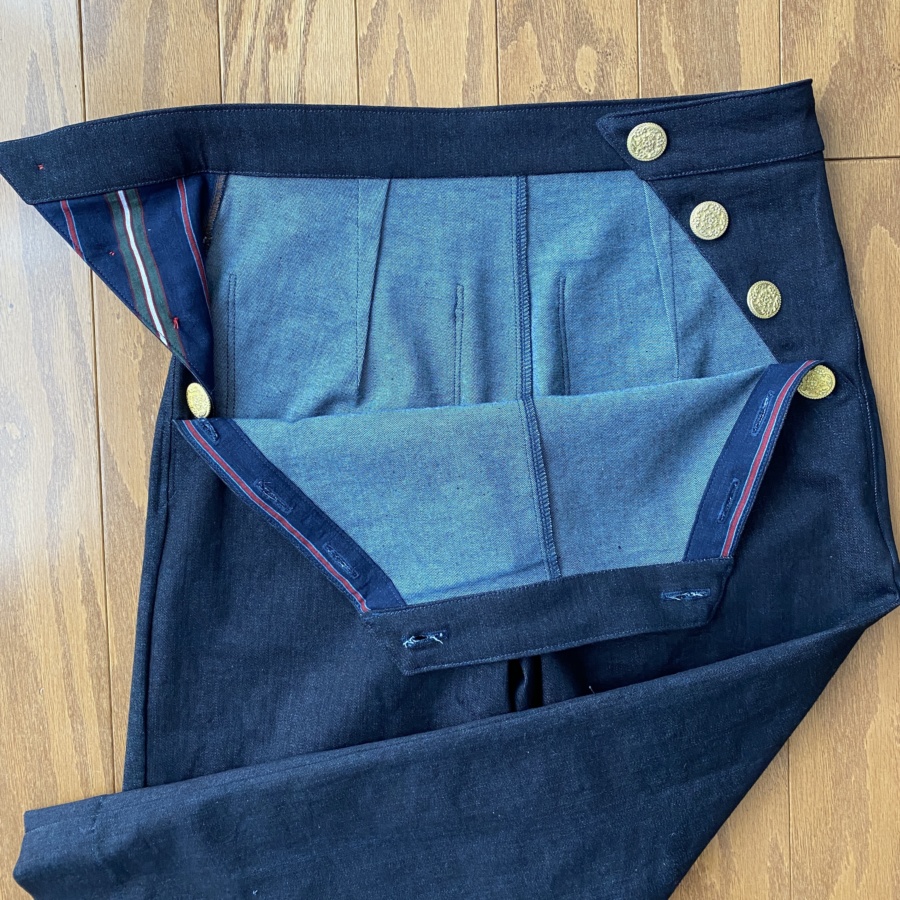
Now the details. Here is how to make the Lander pants into sailor pants. First, the front leg pattern piece has to be cut into two pieces, then an upper and under placket have to be made for each side. Let’s start with the upper placket (the one with the button holes). If you’re a somewhat experienced sewist, we’re just adding a facing to the cut edge to make the placket.
- Draw a diagonal line on the pattern from the hip notch to the pocket notch at the waist and cut the pattern apart along that line
- Reserve the smaller piece for the under placket
- Add half-inch seam allowance to the new angled opening on the main leg piece
- Trace the angled edge to make a two-inch-wide facing piece (for a final finished facing one inch wide)
- Cut this new facing piece from lining fabric on the straight grain and interface it so it’s strong enough for button holes
- Sew the interfaced facing piece to the angled front opening with a half-inch seam allowance
- Fold the other long edge of the facing under a half-inch and press
- Press the facing to the wrong side and top stitch it down along the edge and one inch from the edge, catching the folded edge of the facing (there’s a photo that shows this top stitching well a few photos back)
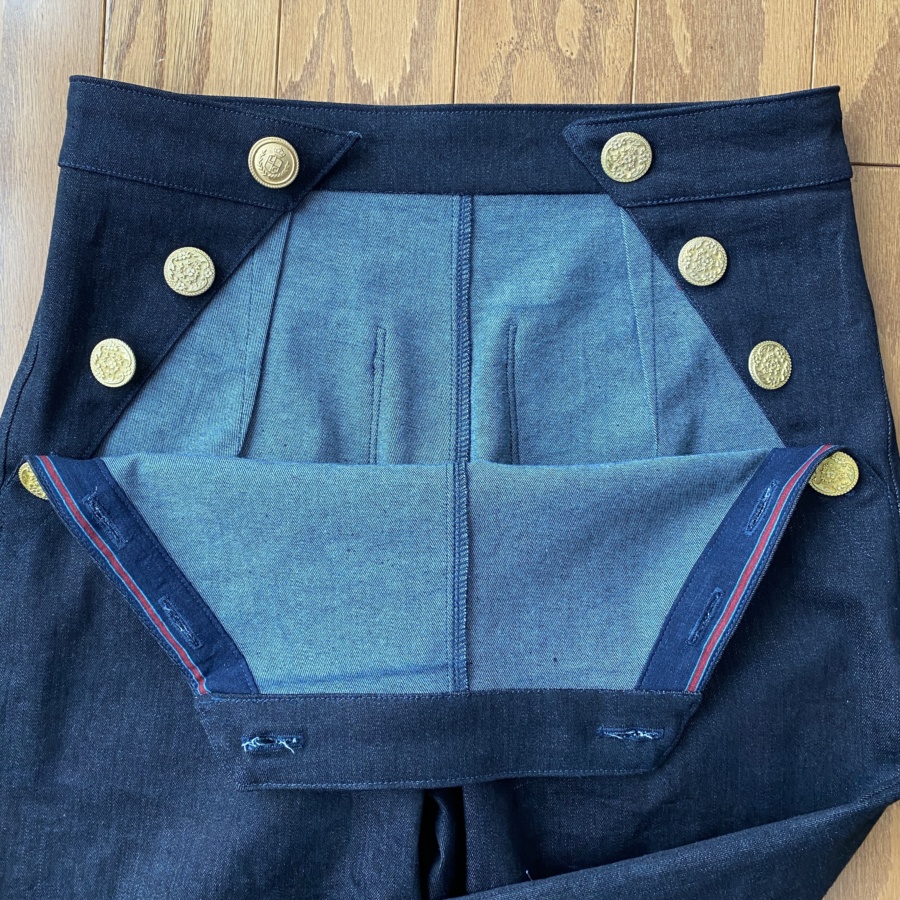
Now for the under placket (the one with the buttons). Bring back that small piece that we cut off previously.
- Add two inches to the diagonal edge
- Cut this new under placket piece from both main and lining fabric
- Interface the diagonal edge of the lining fabric to reinforce where the buttons will be placed
- Sew the main and interfaced lining pieces together along their diagonal edges, right sides together
- Understitch the seam allowance to the lining, turn and press them wrong sides together
- Baste around the side and top edges
- Pin this piece under the front leg piece to remake the shape of the front leg, baste the side edge if you like (I didn’t)
- Pin on the back leg piece to the front and sew them all together along the side seam
- Add the waistband and buttons (and button holes to the upper placket)
You’re done, assuming you’ve already constructed the rest of the pant seams and added the back pockets. If not, do that now and then you’re done!
This was a fun experiment. I’m pleased with the clean finish I was able to achieve and my placket construction worked out well. My only complaints are with the fit of the pants in general and have nothing to do with my mods. Regardless, they’re incredibly comfortable and pretty cute so I think they’ll get a lot of wear.
Thanks for stopping by!
~ Lindsay
P.S. I’ve turned off comments on my blog so the best way to connect with me is instagram or email. I have been inundated with spam for years and I finally got tired of moderating it and trying to sift through it for real people’s comments. It’s always lovely to hear from you though so please feel free to reach out.