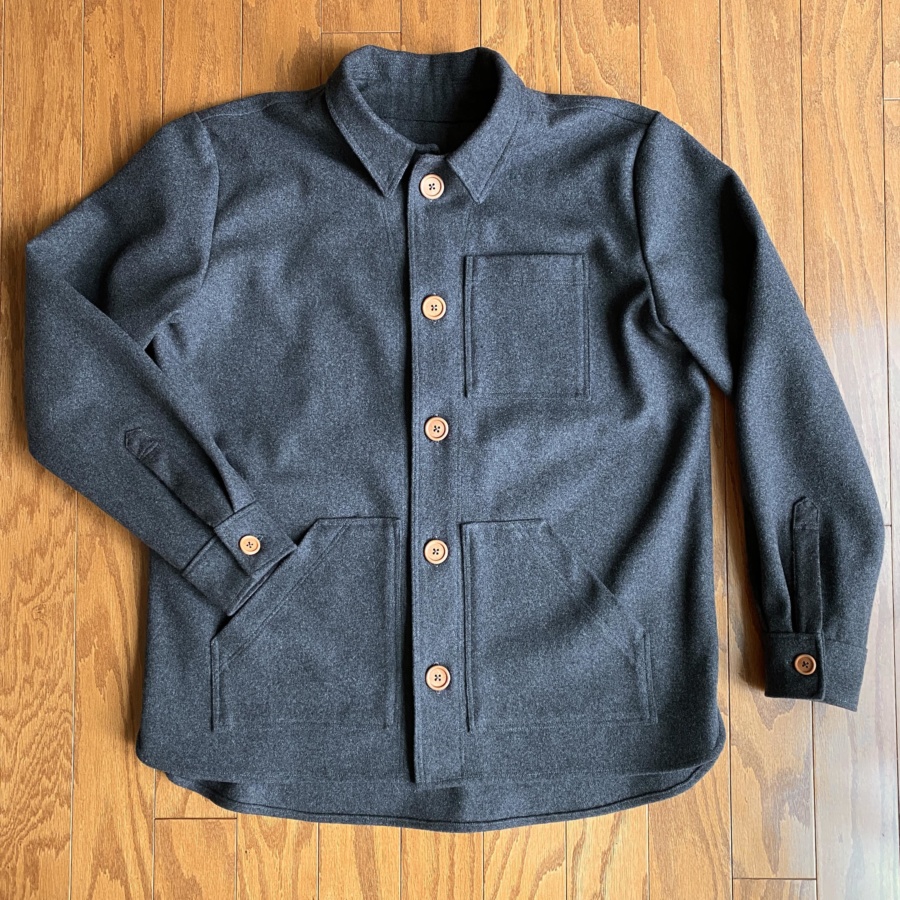
This year, for his birthday, my husband wanted a custom garment. His specifications were a heavy, dark grey wool over shirt with wood buttons that he could wear both inside as a house jacket and outside if needed. I looked around at patterns and decided to start with the free Paola Workwear Jacket from Fabrics-Store.com.
While he knew the general idea of what he wanted, I had to coax the details out of him over a few weeks and we continued to make changes as we went (he’s a very particular fellow). We eventually decided on the following mods:
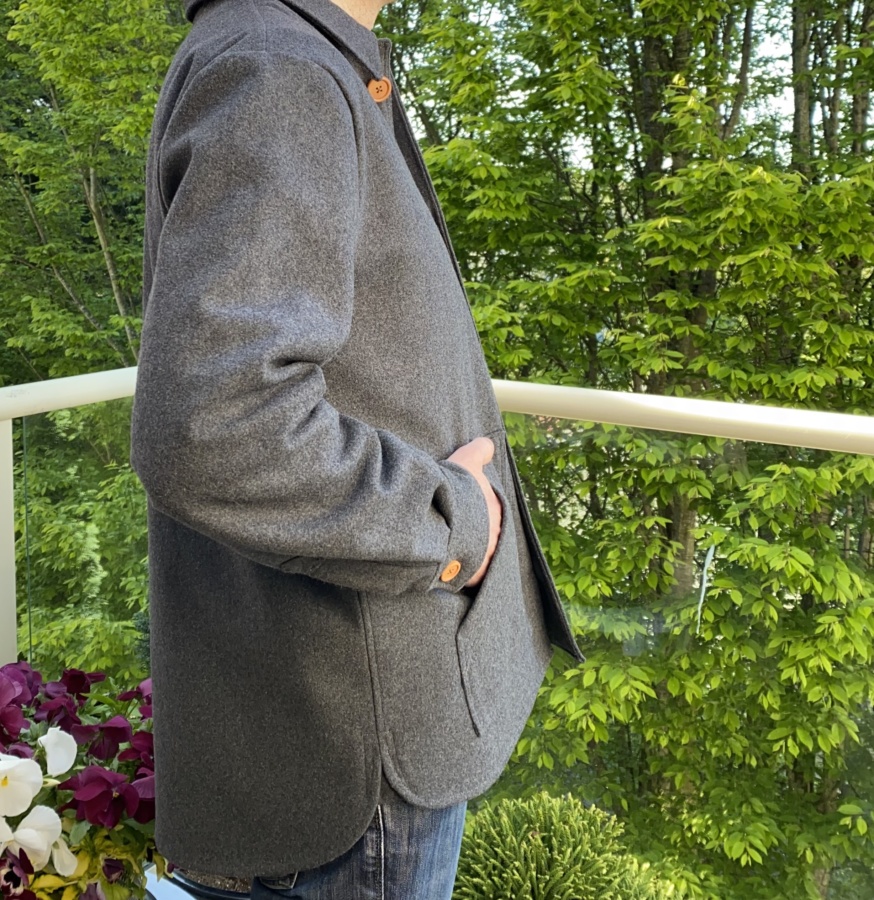
- Size L overall with XL width at the shoulders to ensure it was a drop-shoulder design
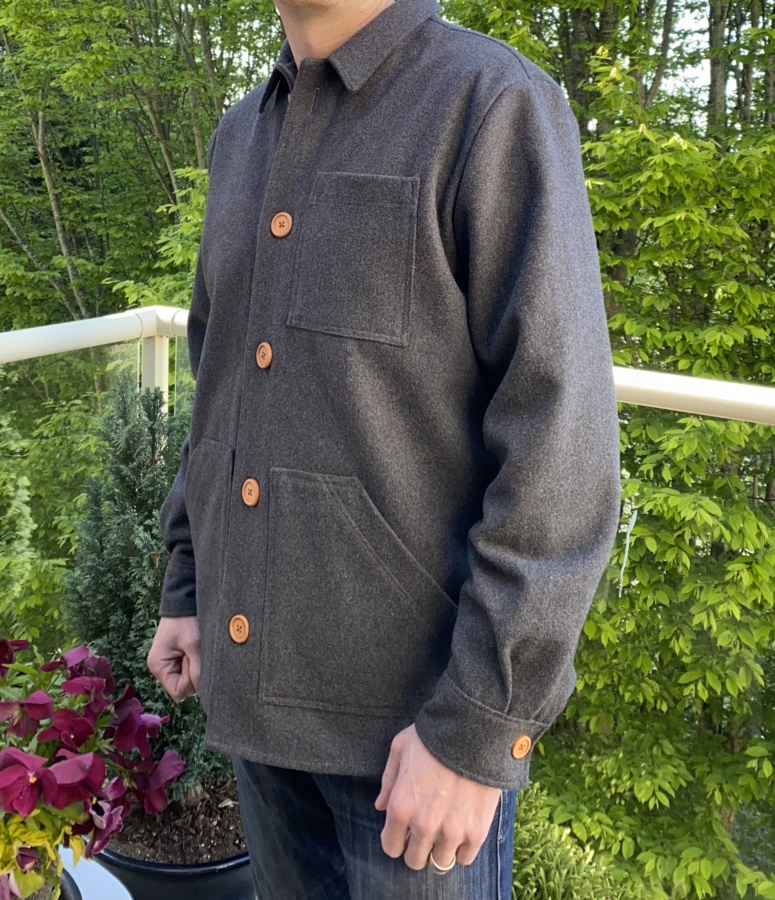
- Heavy 23 oz wool melton (more on that below)
- Lengthened and curved high/low hem
- Custom self-drafted lower pockets
- Shortened single breast pocket
- Lengthened sleeves
- Cuff, placket and pleated sleeve (added later)
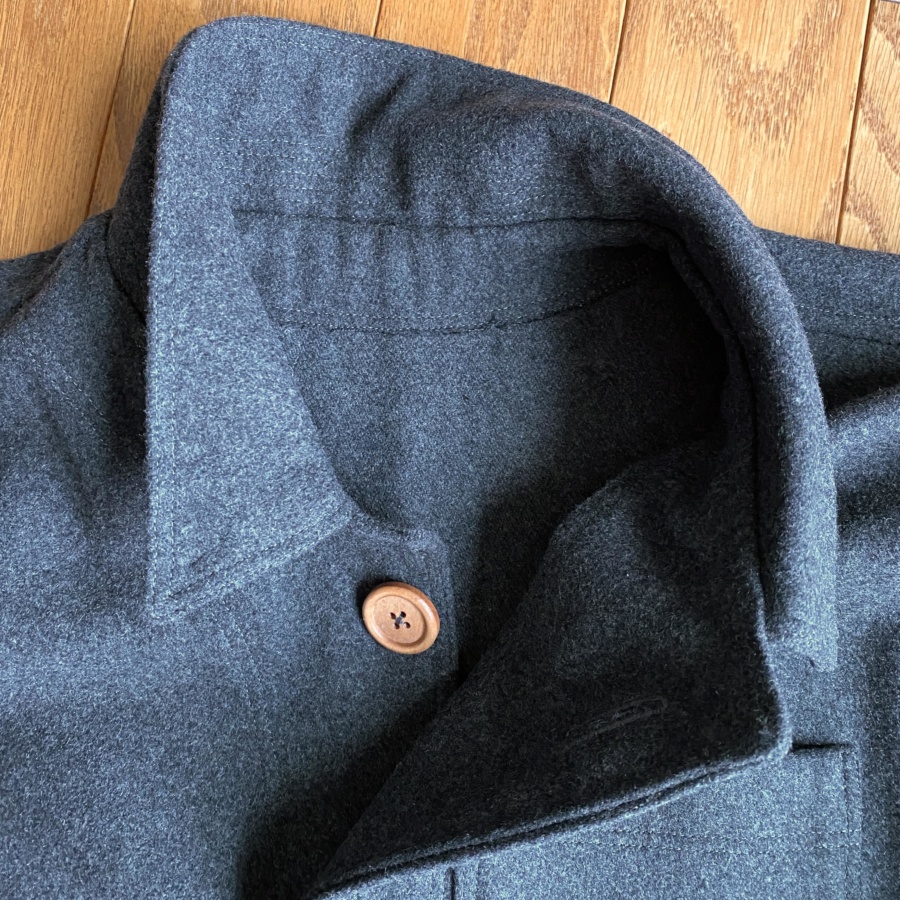
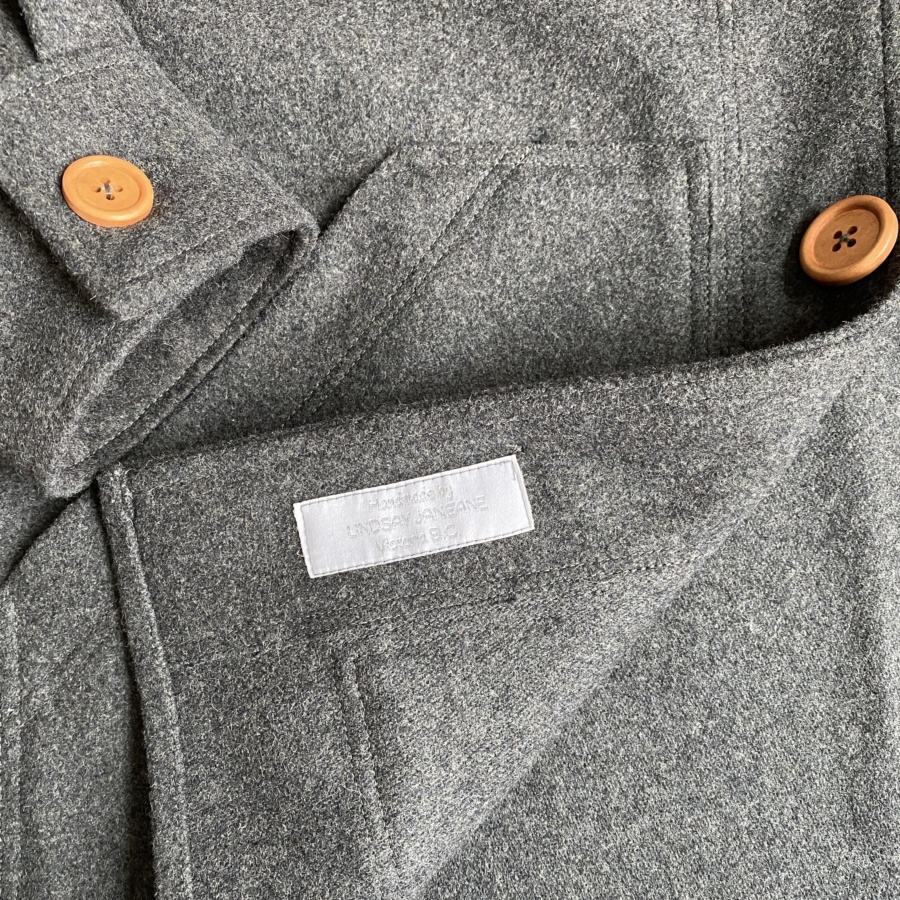
This was a challenging make. Almost entirely because of the fabric. I wish I had a scale so I could share how heavy this is. It’s like a weighted blanket. Sewing it was a challenge. The “Made with Love and Swear Words” label would have been apropos, but I didn’t have one to add. After I’d struggled through the collar (with faux stitched collar stand), I realized I should have used a lighter weight fabric for the under collar and probably also the facings. The double folded hem and flat felled seams throughout required a lot of steam and patience!
I added an inch to the sleeve length before cutting them out but they were still a bit short. We also didn’t like the width at the wrist so we decided cuffs and plackets were needed. Having already experienced difficulty with the thick fabric at the collar, I came to my senses and picked up a small piece of slightly darker 9 oz melton for the placket and inner cuff. The colour difference is barley noticeable.
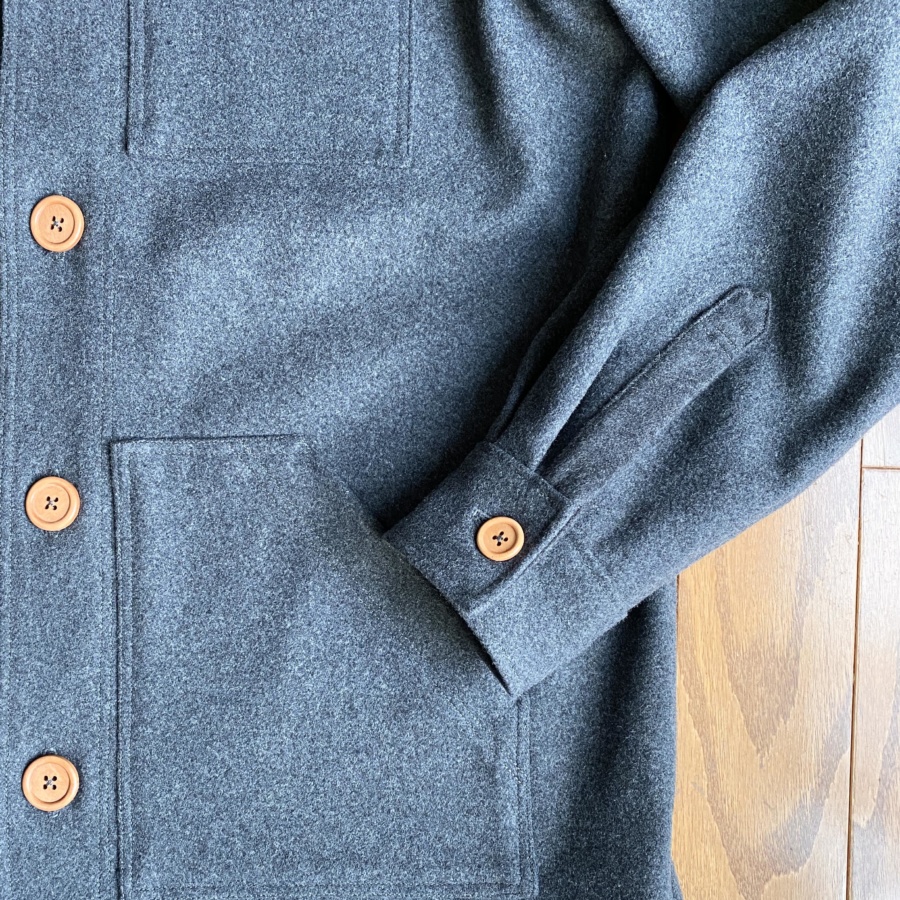
We cut a half-inch from our previously-lengthened sleeves and I estimated where the appropriate spot would be for the placket and cuff opening. I think the placket is four inches from the underarm seam. The sleeves were already flat felled and attached to the jacket at this point and adding plackets to the already constructed garment was challenging. I used my favourite placket method by Angela Kane. I’ve made her placket template in card stock and have her two wonderful sleeve placket videos saved in my YouTube library for easy reference every time I make a shirt. Even with the lighter wool, the placket was the toughest I’ve ever done. That it came out looking decent feels like a huge win after the struggle I had with it!
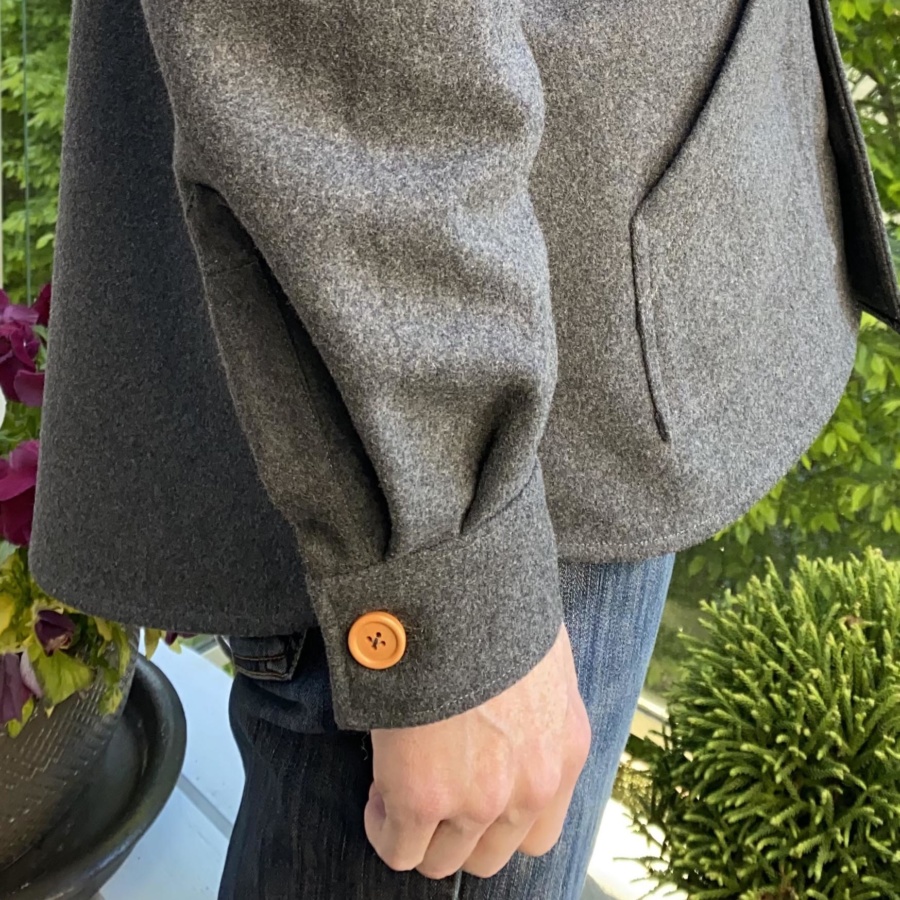
After the placket, I estimated the cuff based on his hand measurement and made two pleats pointing toward the placket to take up the extra volume from the wide sleeve hem. He wanted me to make them an inch shorter but I convinced him to go longer and I’m glad I did. The cuffs stay on his wrists when he reaches forward and prevent the little bit of extra length from covering his hand.
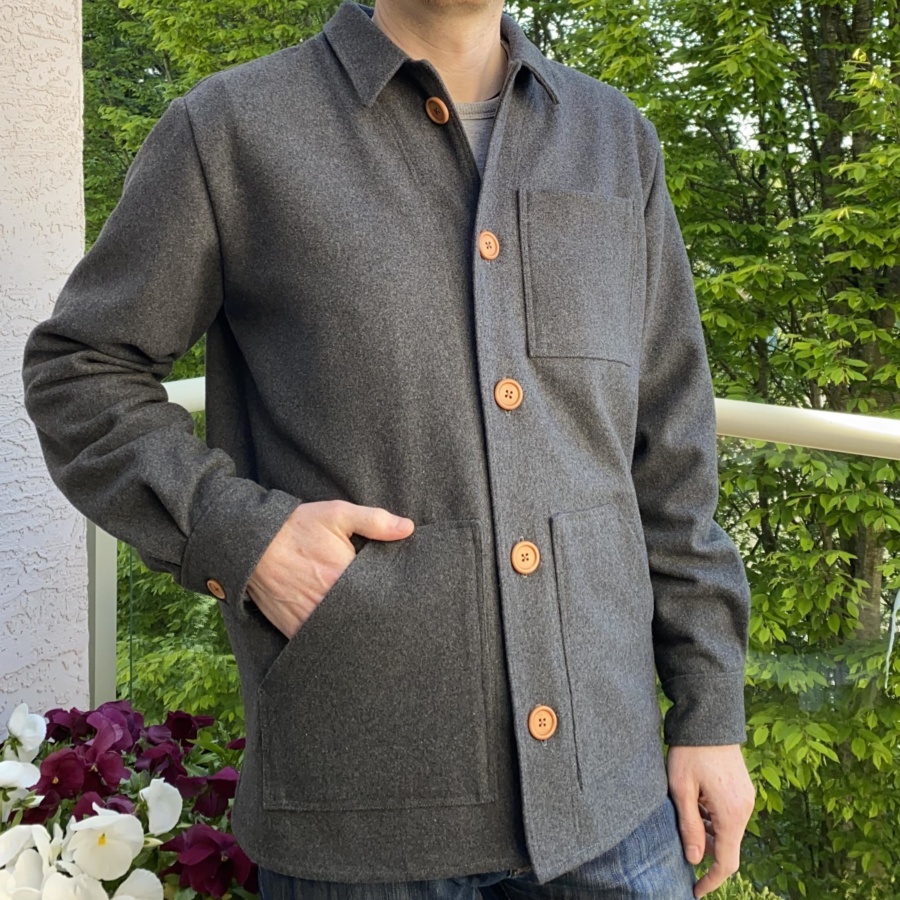
He’s happy with it and was a bit miffed with me when I said he couldn’t wear it until I’d taken photos. He’s wearing it over a sweatshirt in these photos, so it’s got lots of room, which is what he wanted. Which reminds me, he also already got a custom sweatshirt a few weeks ago so I’ve got nothing left for him on his actual birthday! Oh well, I make things and I get excited and then I just can’t wait to give them. He’s used to me after almost 12 years together.
It turned out well but there are always improvements to make. Things I’ll do differently next time:
- High-round back adjustment – I should have known to do this for him and we didn’t toile or I would have caught the need for it
- Cut the back in two and create a yoke – to help with shaping over the shoulders
- Add a collar stand
- Maybe just start with a shirt pattern instead of a jacket pattern and save myself the hassle of too may mods
- Use much lighter fabric for all the tough bits: facings, under collar, collar stand, sleeve plackets, inner cuffs
Thanks for stopping by!
~ Lindsay
P.S. I’ve turned off comments on my blog so the best way to connect with me is instagram or email. I have been inundated with spam for years and I finally got tired of moderating it and trying to sift through it for real people’s comments. It’s always lovely to hear from you though so please feel free to reach out.