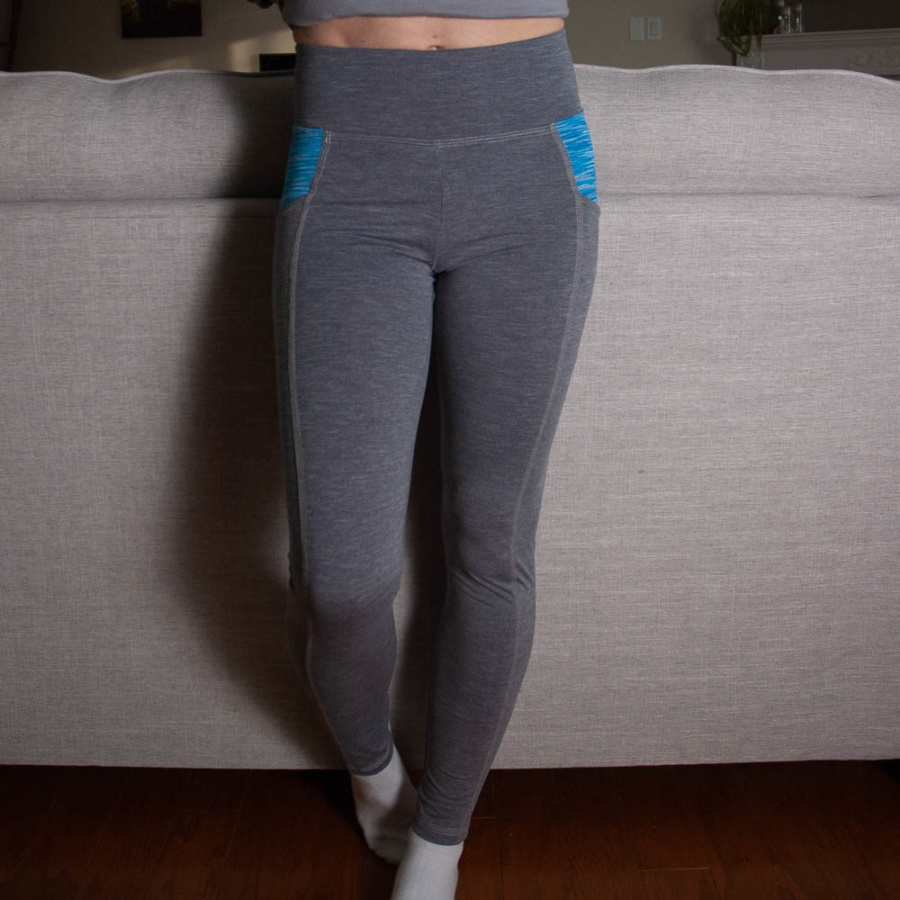
The first makes on my Make Nine 2020 list are a workout set made up of leggings with side pockets for my cell phone and keys/credit card for when I go for a walk, a sports bra, and a fitted half-zip pullover. I started with the Avery Leggings from Helen’s Closet.
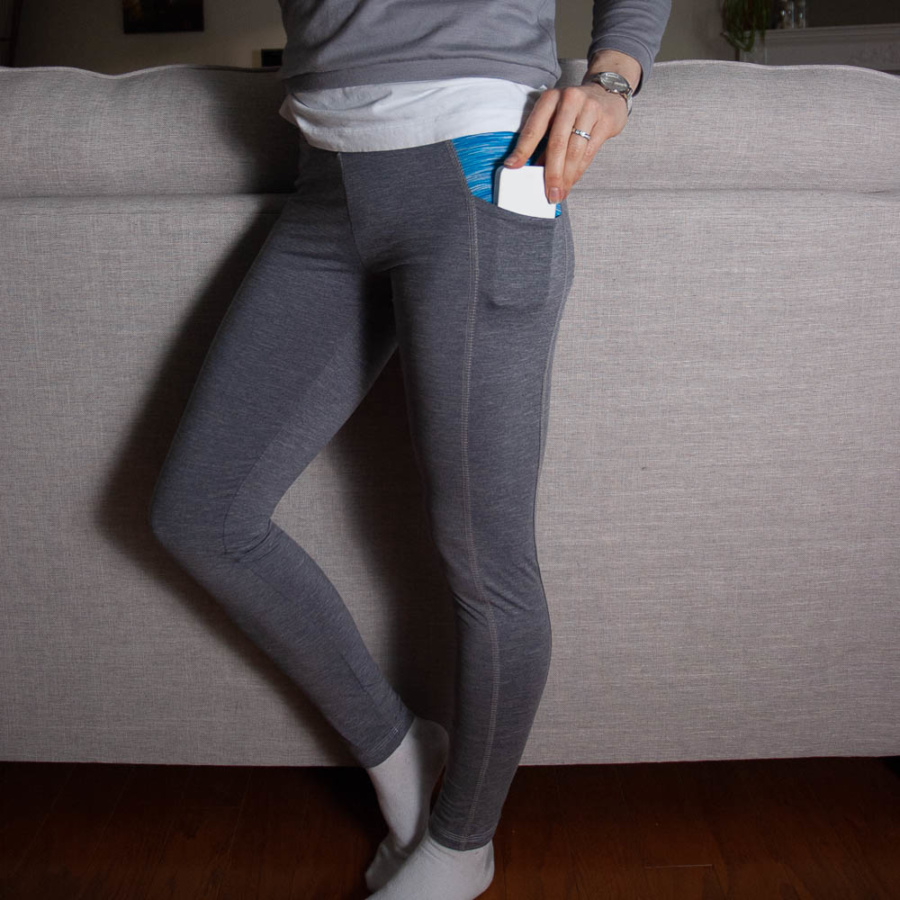
I’ve previously made the Avery Leggings with a back-waist band pocket but I find that my cell phone pulls the back waist down so I decided to try cutting the pattern and adding a side panel with a pocket to both legs.
Here’s how I did it:
- Before cutting the pattern, I transferred the grain line to the centre and to what would be the front piece so that each piece would have a parallel grain line.
- Draw the side panel lines: I wanted a tapered panel and I estimated the size based on my cell phone. I started the panel about 1cm behind the pattern’s front notch and made my panel 8.5cm wide at the top, tapering to 4.5cm at the bottom.
- Draft the pockets: I drafted the pocket based on my estimated reach and the size of my cell phone. Mine is 18cm deep at the front edge and 15.3cm at the back edge. I drew the bottom of the pocket square to the grain line but I slanted the top of the pocket downward to the back, which is where the discrepancy in depth comes from.
- Once I had the panel and pocket lines drawn, I added notches in a few places, made sure all pieces had a parallel grain line and then cut along the lines.
- Seam allowances: because I wanted to sew these with single lapped seams, I only added 1cm seam allowance to the sides of the centre panel. I added these before cutting the pocket pieces.
- Next, I traced the pocket facing pieces (from the top of the pocket opening to the bottom), and the upper side panel (from the top of the side panel to the bottom of the pocket) and cut these two pieces out.
- More seam allowances: I added seam allowances to the bottom of the upper side panel, the top of the now lower side panel, and the top and bottom of the pocket facing.
- The last piece I drafted was a facing for the upper side panel because the blue fabric I used was stretchier that the grey and I didn’t want to the upper side panel to bulge above the pocket.
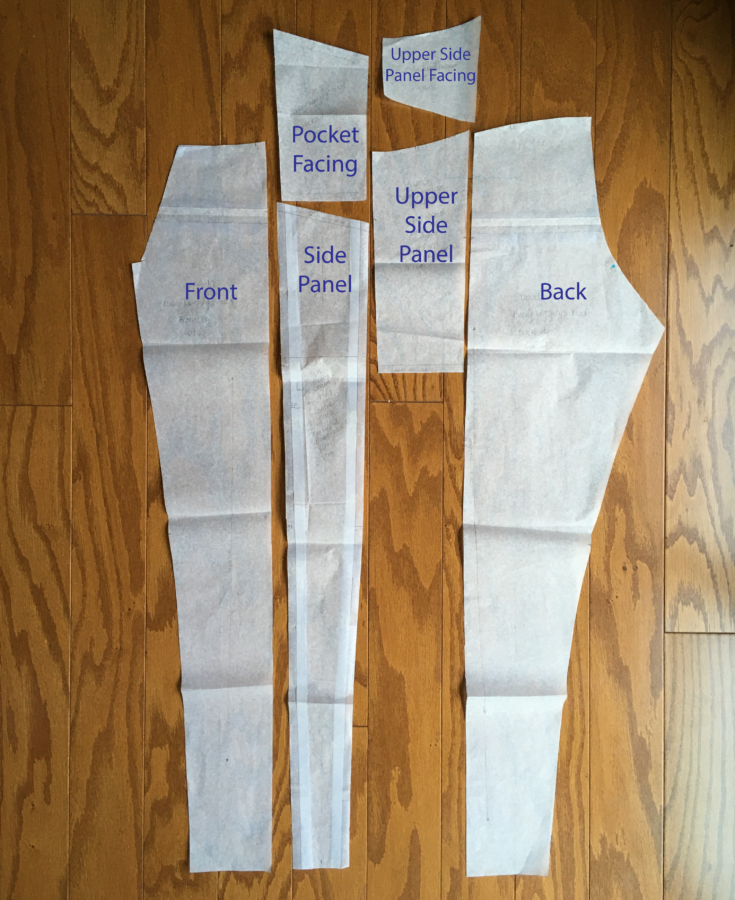
- Once I had all the pieces drafted, I cut out two of everything along with the mid-rise waistband pieces.
Here are what my modified pattern pieces looked like:
Sewing this up was quite simple. I started by serging the pocket facing and side panel right sides together at the top of the pocket. I didn’t understitch this seam but I did press the seam allowances toward the pocket facing for a clean edge at the top of the pocket.
Next, I serged the pocket facing and upper side panel pieces right sides together. I wanted this seam to lie as flat as possible but if you’d like to enclose the seam in the pocket, you would sew these two pieces wrong sides together.
To finish the side panel, I pinned the upper side panel facing on and then serged down both sides of the assembled side panel and pocket to the bottom of the pocket. I also coverstitched the bottom of the facing piece to keep it from curling.
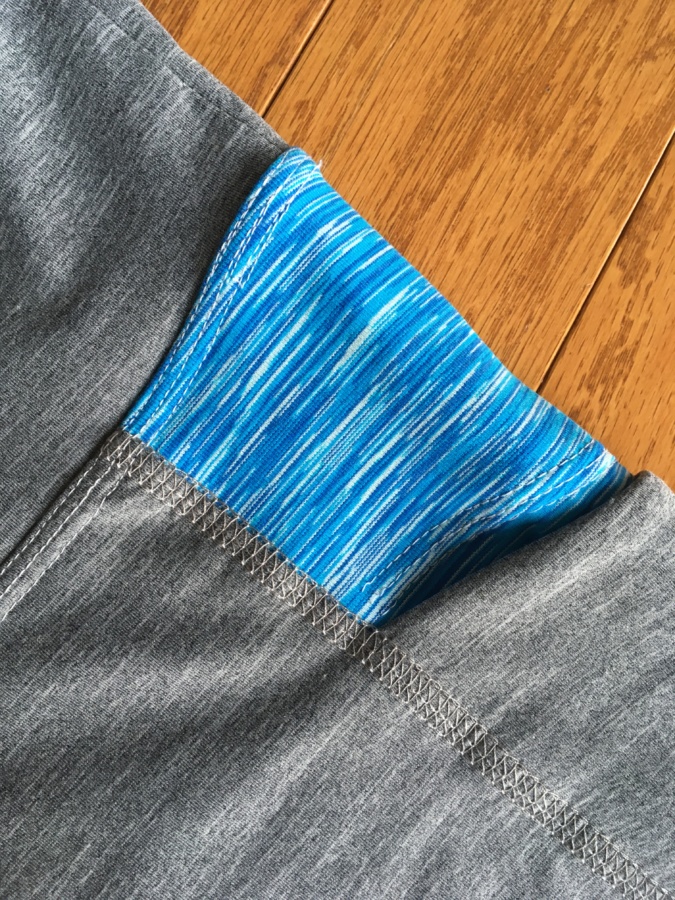
From here, I drew chalk lines at 1cm on the wrong side of the insides of both the front and back panel pieces and used wonder tape the lap the side panel to this line. I tried this without wonder tape to start and it did not work well. Wonder tape made it a breeze and the cover stitching turned out so much better.

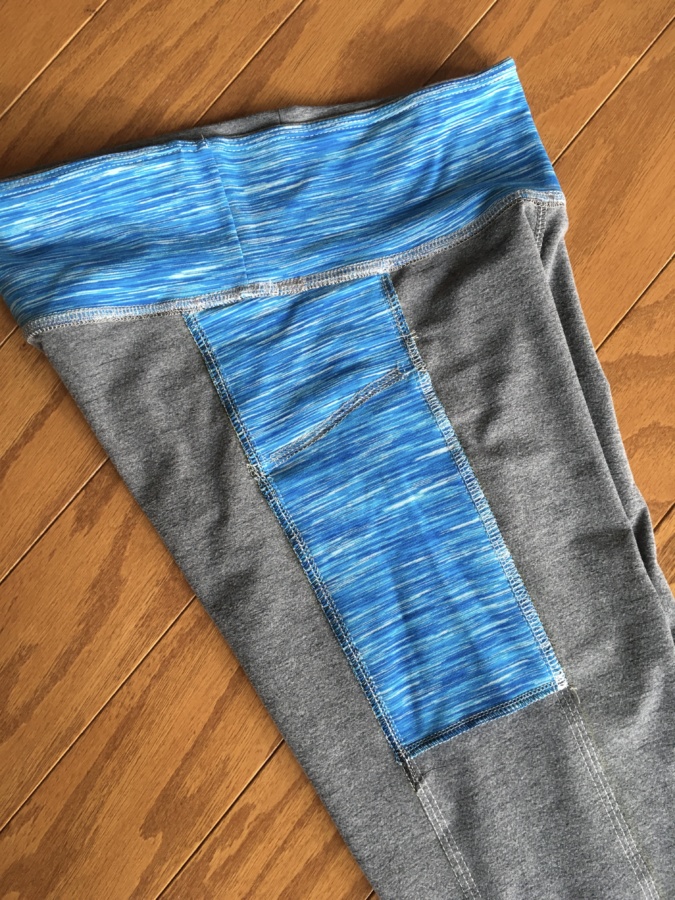
I really challenged myself in this first ever use of my new CoverPro 2000CPX and decided I wanted exposed cover stitching. It took a lot of trial and error and MANY tests before I felt comfortable. Full disclosure: I made these is a size small (like my last pair) to start with but they were way too tight and I could barley get them on. I should have thought ahead and realized the fabric for my last pair was far stretchier than the fabric I had for this pair. Luckily I had just enough fabric to cut out another pair in size medium (only because I was able to cut my new side panels from the back panels of the first failed pair). It was a blessing in disguise though. My first “test” pair helped me work out a number of issues (I didn’t use wonder tape for the first pair) and my second pair came out far better. So when I say I did “many” tests, I mean it!
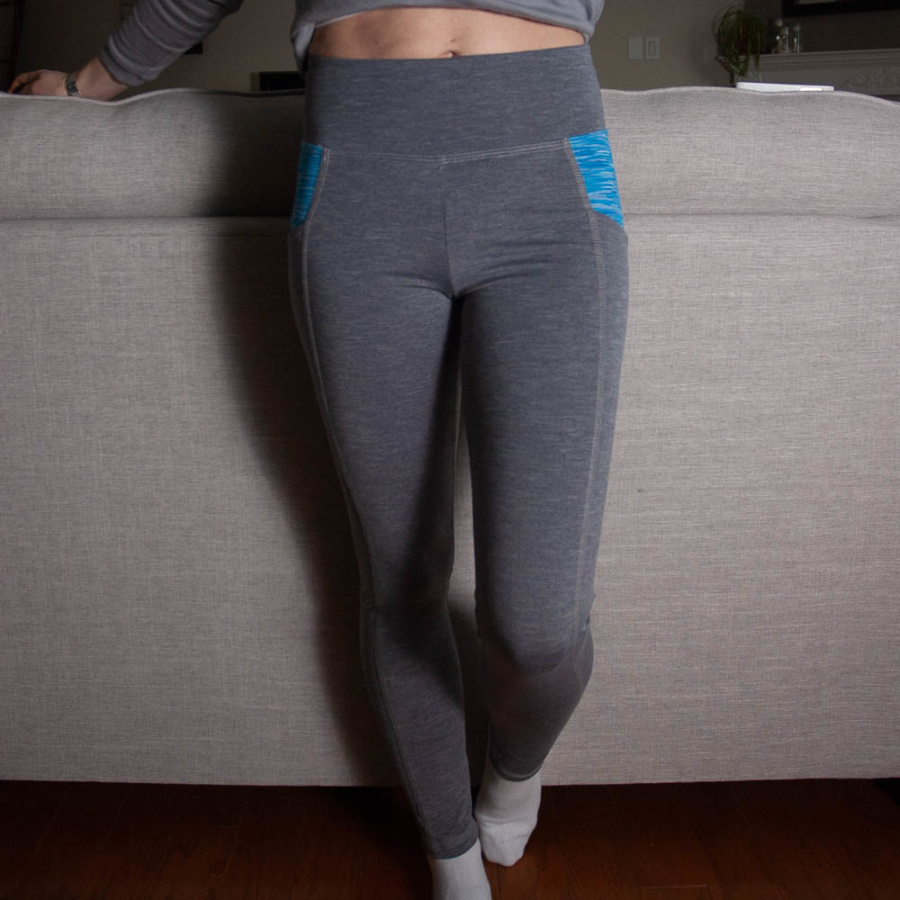
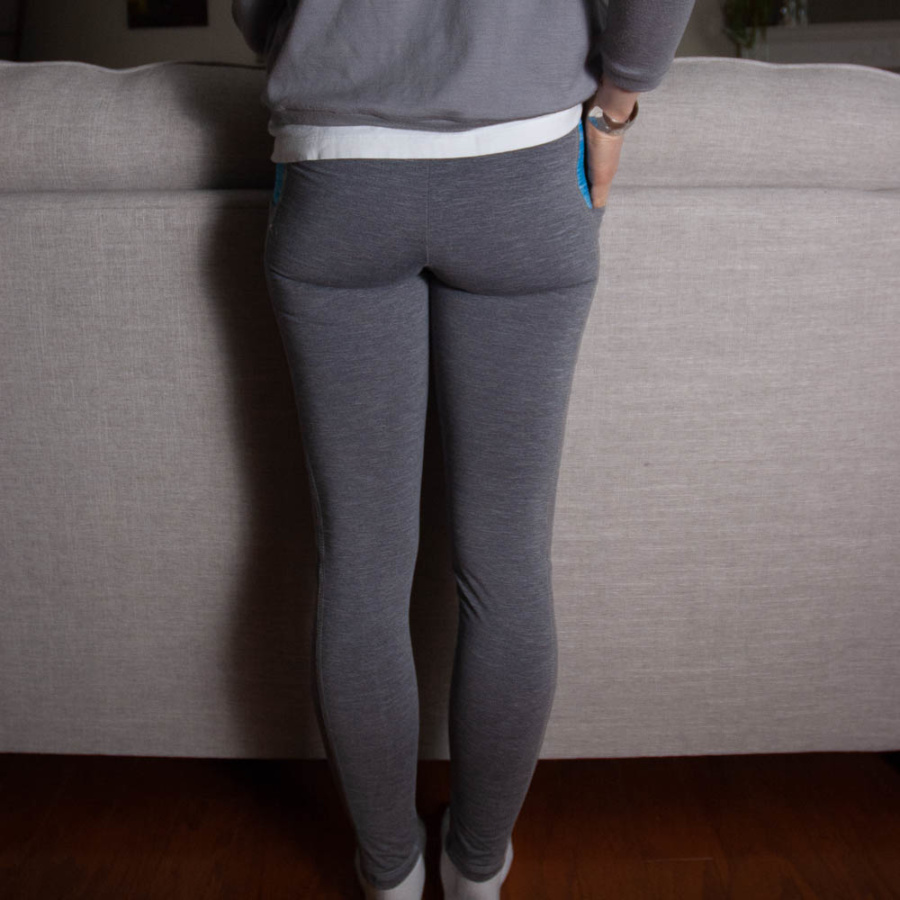
I’m really pleased with how these turned out. The side panel pocket is perfect. The mid-rise waist band makes these exactly the high-rise I want on my short-waisted self. The lapped and coverstitched seams look great – my only concern is the fabric. I’ve had it in my stash for a while. It’s a mystery-ish knit from Dressew in Vancouver. The grey fabric in particular is not very stretchy and I have my doubts if it will hold up with use. Because of its lack of stretch, there is also a lot of pressure on the seams so I think these might be a ticking time bomb. Oh well. At least I’ve got the pattern now so I can make them again if I need to. On to the sports bra next…
Thanks for stopping by!
~ Lindsay