When summer approaches, I always want to start wearing skirts before it is actually warm enough. I made this skirt last year as a way to bridge the seasonal gap and it is a great beginner DIY that you can easily customize to suit you. For this project your will need a fabric with at least 2-way stretch and an elastic that fits around your waist. Make sure the stretch of the fabric is running across the skirt (not up and down) when you cut out the pieces, including the waist band.
 Step 1: Measure your waist, your hips, and the length between the two and draw them onto a large piece of paper
Step 2: Measure the total length of the skirt you want to make
Step 3: Decide what shape you want (e.g. straight, A-line) and fill in the rest of your skirt shape on your paper
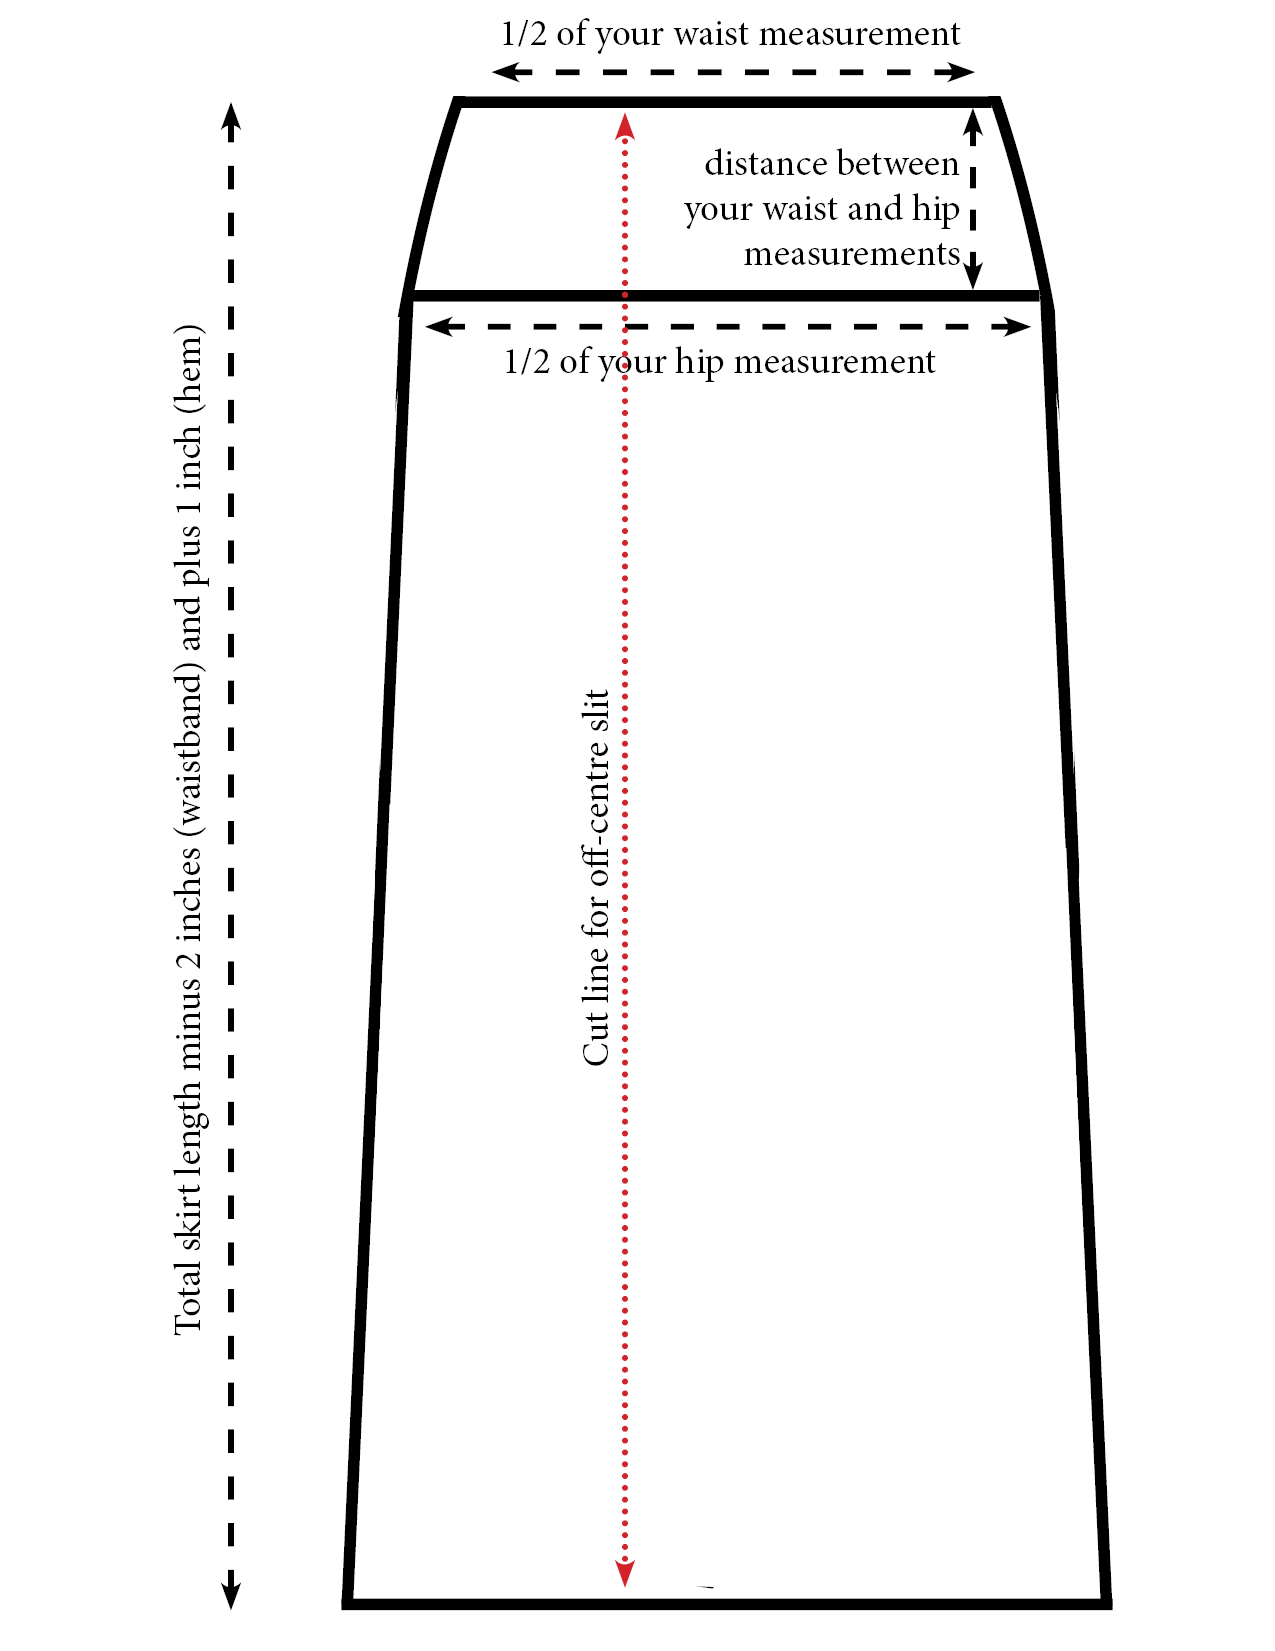
Now you have the basic shape of your skirt. For a skirt with no slit, cut this shape out twice (add seam allowances to the outside lines of the pattern before you cut and don’t cut out your hip line!). For my skirt, I cut out the back of the skirt with seam allowances and then I made a line 1/3 of the way into the pattern (the red line on the diagram) and cut along this line before I cut out one of each of these new pieces from my fabric, adding seam allowances to the inside of both pieces.
The last step was the waistband. I had 2″ elastic so I cut out a rectangle from my fabric that was 5″ wide (4″ plus seam allowances) and as long as my waist measurement plus seam allowances. When you do this, make sure the stretch of the fabric runs along the long edge of your waistband or you wont’ be able to get it on over your hips!
Once I had all of my fabric cut out, putting the skirt together was easy:
- Measure how long you want the front slit to be and sew the front pieces together (right sides facing) above this line
- Press the seam open and hem the open parts of the front slit
- Sew your finished front piece to the back piece at the side seams (right sides facing) – now you will have a basic skirt with no waist band
- Next, sew the short edges of the waistband together (right sides facing) and press your seam open
- Fold the waistband in half along its length (wrong sides facing) and iron along the fold
- Sew the short ends of the elastic together and insert your now-circle of elastic into your circle of waist band (pin it in place if you need to)
- Measure evenly and pin the waistband/elastic combination to your skirt (right sides facing and open ends of the waistband lined up with the top edge of the skirt)
- Sew around the waistband with a zigzag or other stretch stitch (a non-stretch stitch will break when you stretch this skirt to take it on and off)
- Sew as close to the waistband as possible without sewing the elastic inside it
- Finish your waist band seam with an over locker or a zigzag stitch
- Hem your skirt along the bottom and you’re all done!
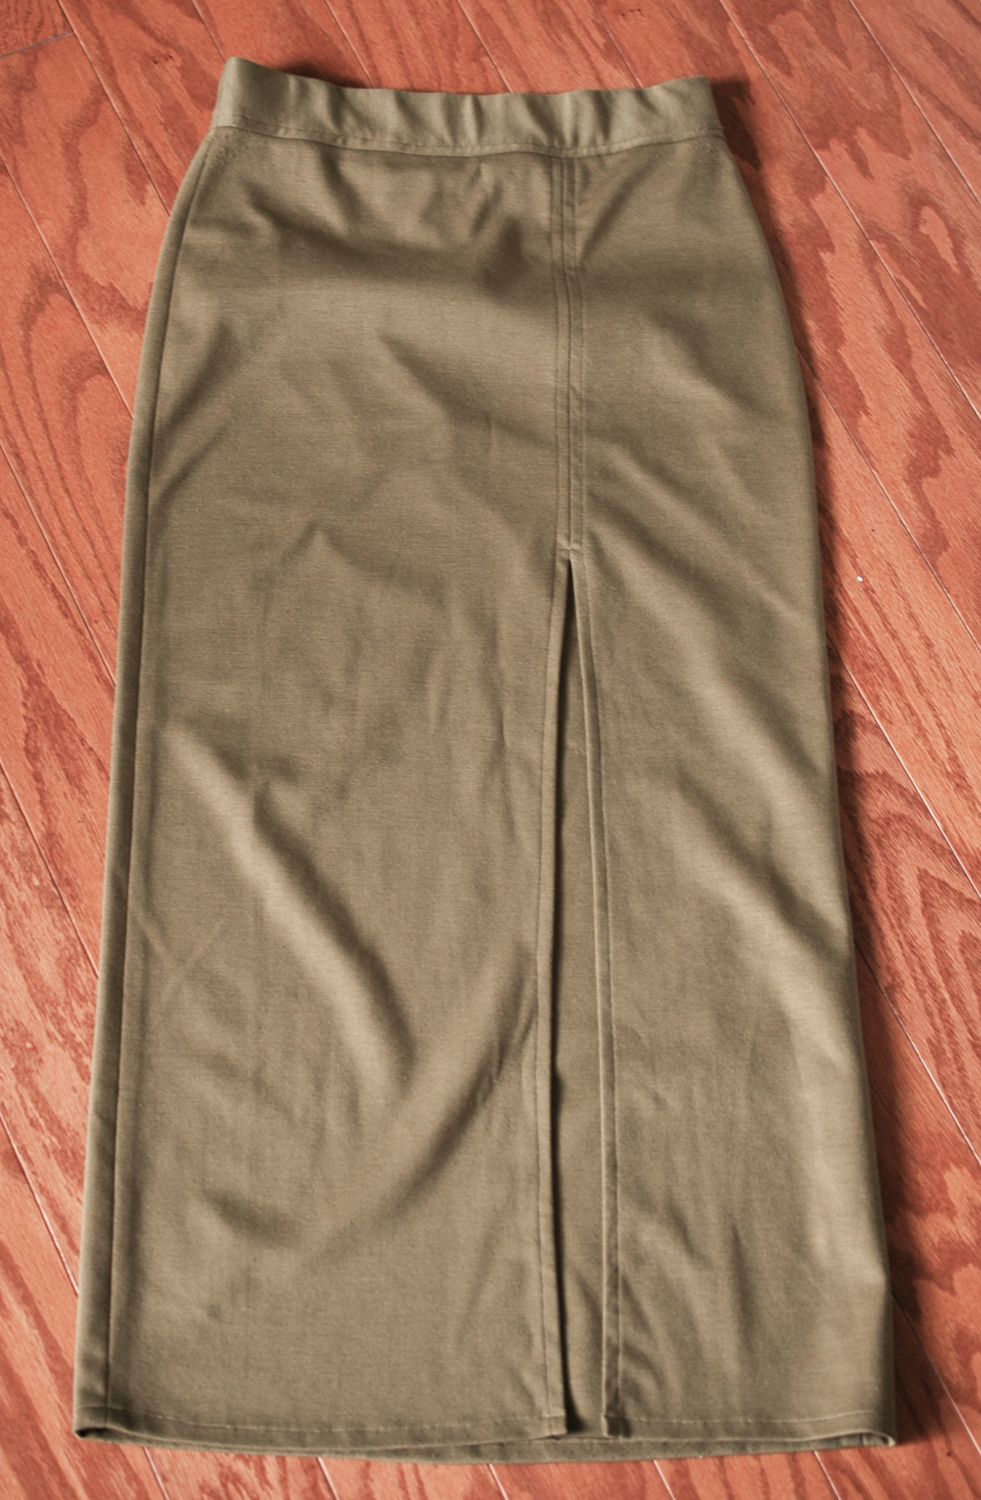
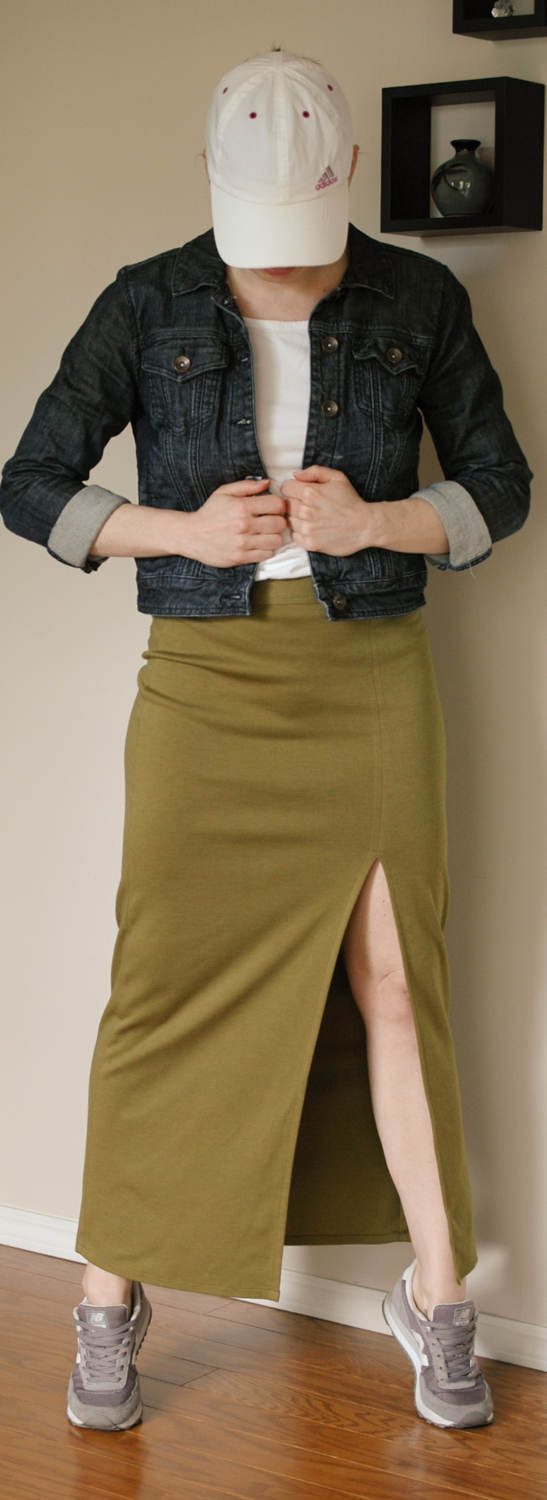
I chose a heavy jersey knit for my skirt so it hangs really well and provides decent coverage over my bum and hips. It’s easy to wear casually with runners or a little more dressed up and is a perfect early-summer transition skirt.
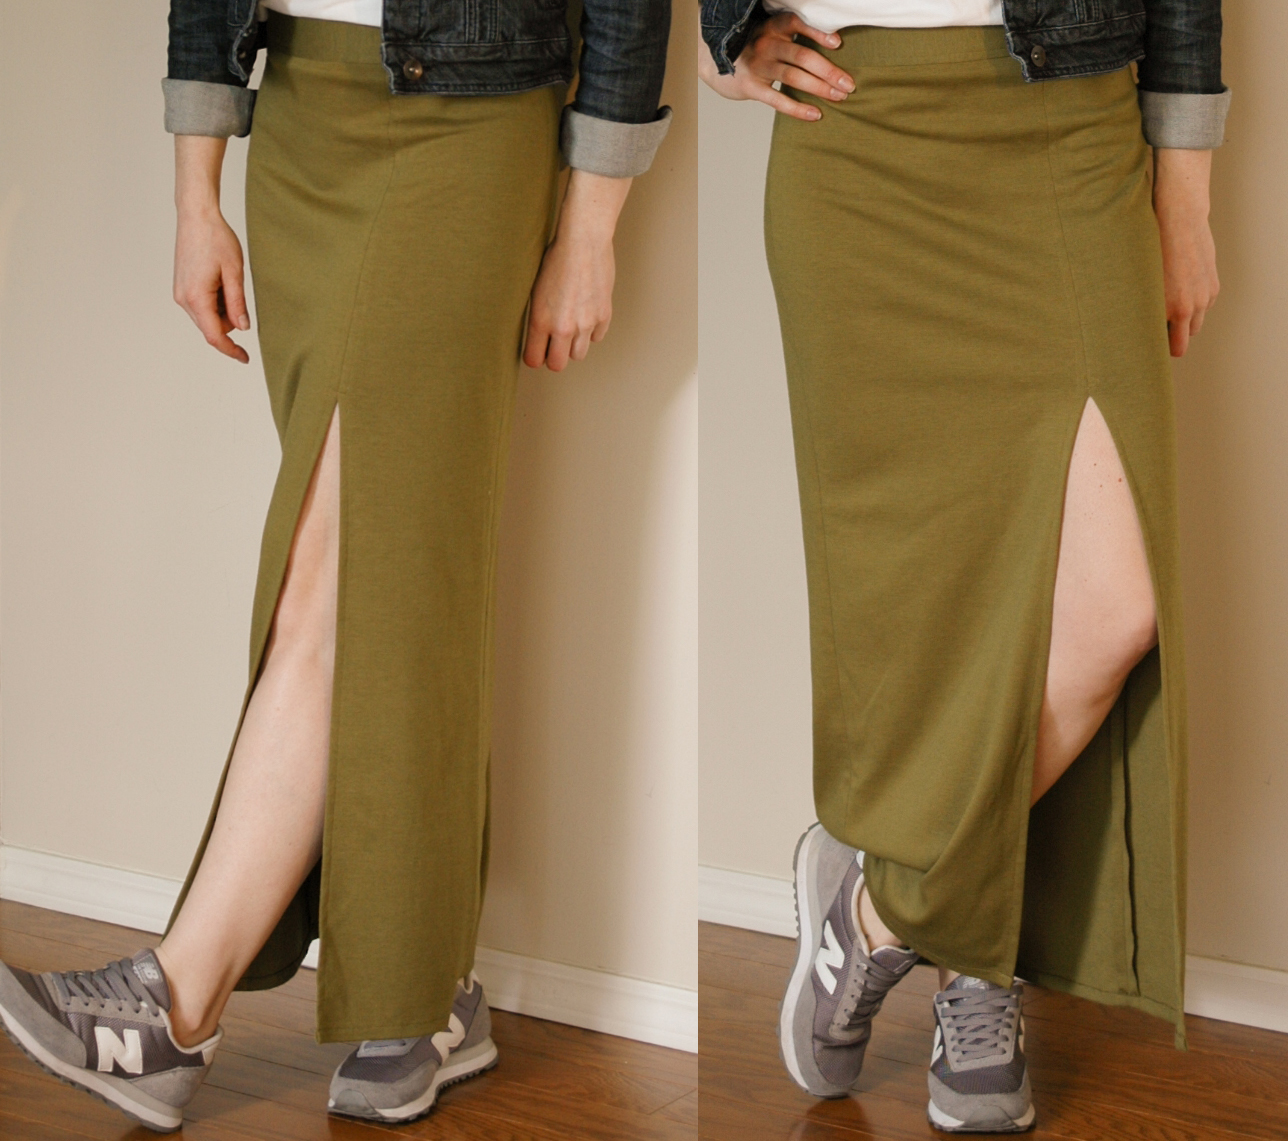
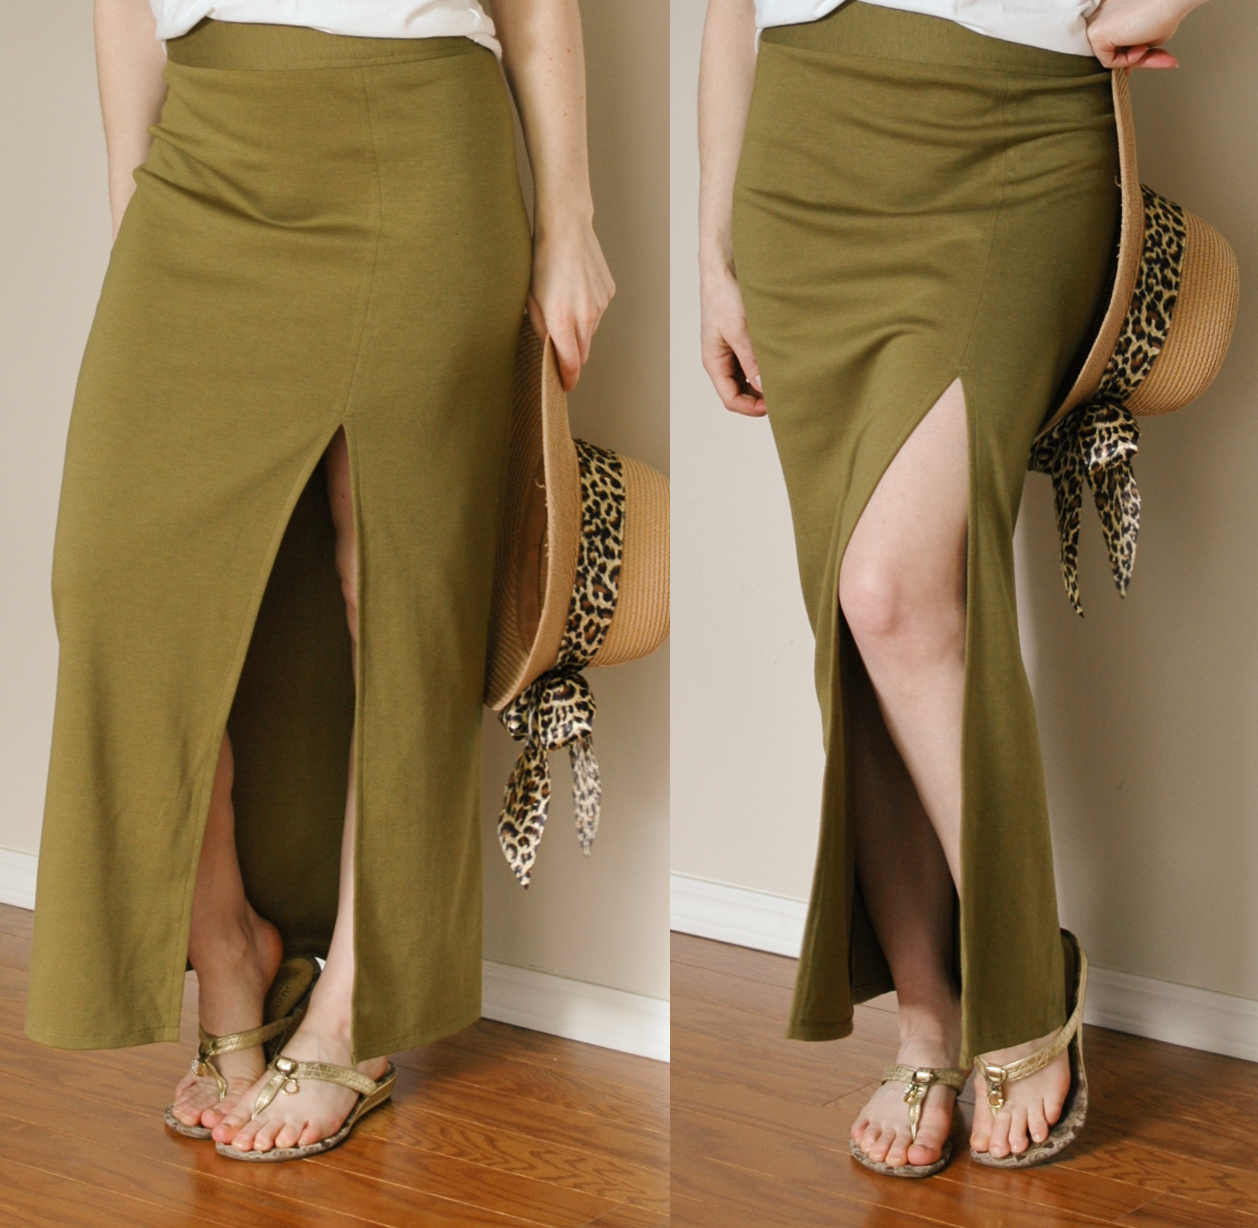
If I was making it again, I think I would make the slit on my front piece 1/4 of the way into the pattern instead of 1/3. This would move the slit a little farther toward the outside. Otherwise, I love this skirt! If you are looking for an easy DIY sewing project, give it a try. You can also modify this pattern in any number of ways to make a skirt that is all your own.
Thanks for stopping by!
~ Lindsay
May 29, 2020 at 6:44 am
Hi
Love the look of this skirt I am going to make it this weekend, but I’m not sure how to do the straight stitch as my machine is quite old. Did you do it with a special stretch stitch on your machine.?
Thanks
Liv
June 2, 2020 at 6:50 pm
Hi Liv. I use the stitch that looks like a lightning bolt. A simple zig zag would also work. Try some test pieces with various lengths and widths of zig zags and see what works best for your fabric.