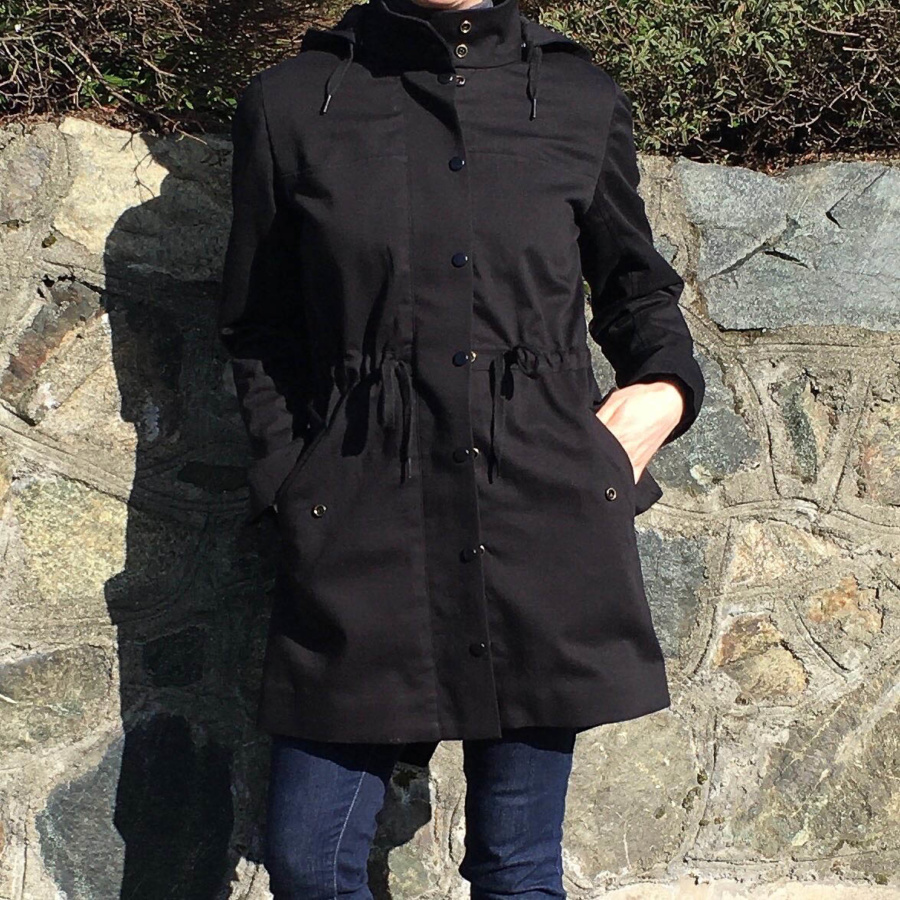
I first made the Kelly Anorak from Closet Case Patterns early last year. My first version was a size 8 (based on my measurements) made of cotton chino twill. I was really pleased with my work on it and I loved it at first. After wearing is a few times though, I found that I didn’t like it. It was too heavy for the spring coat I was looking for, partly because of the fabric, partly because of the pockets, and mostly because it was just too big so there was too much extra fabric. I gave up on it earlier this year and gave it to my sister. She loves it so I’m glad I made it. It also helped me figure out how much ease this pattern has (a lot) and what size to make for my second version.
Here are the mods I made for my 2020 Kelly Anorak:
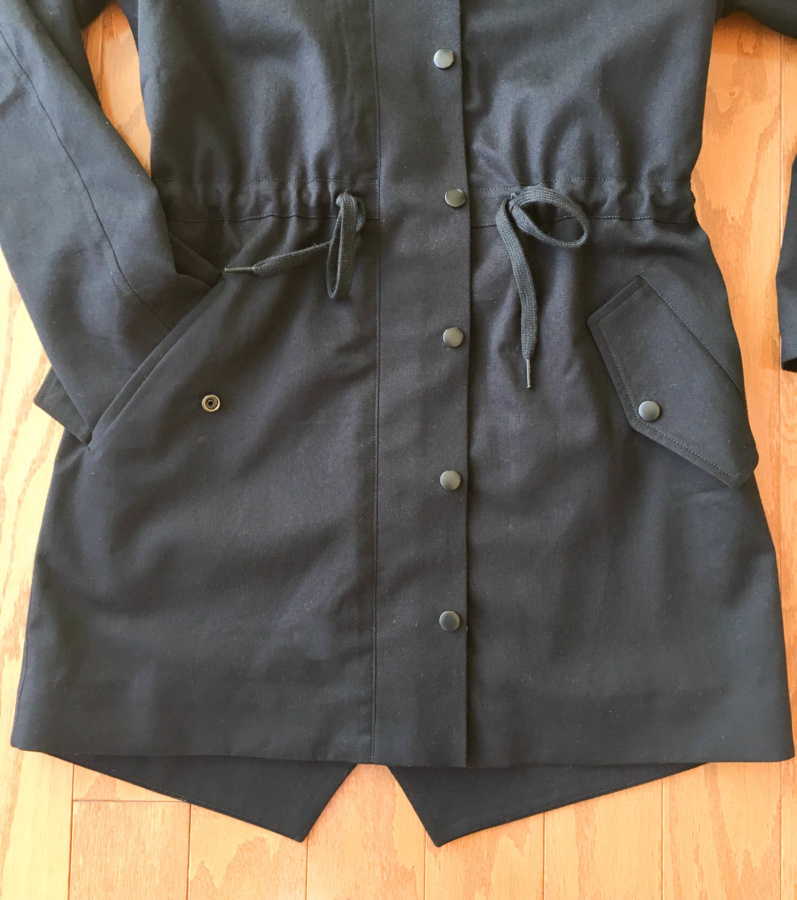
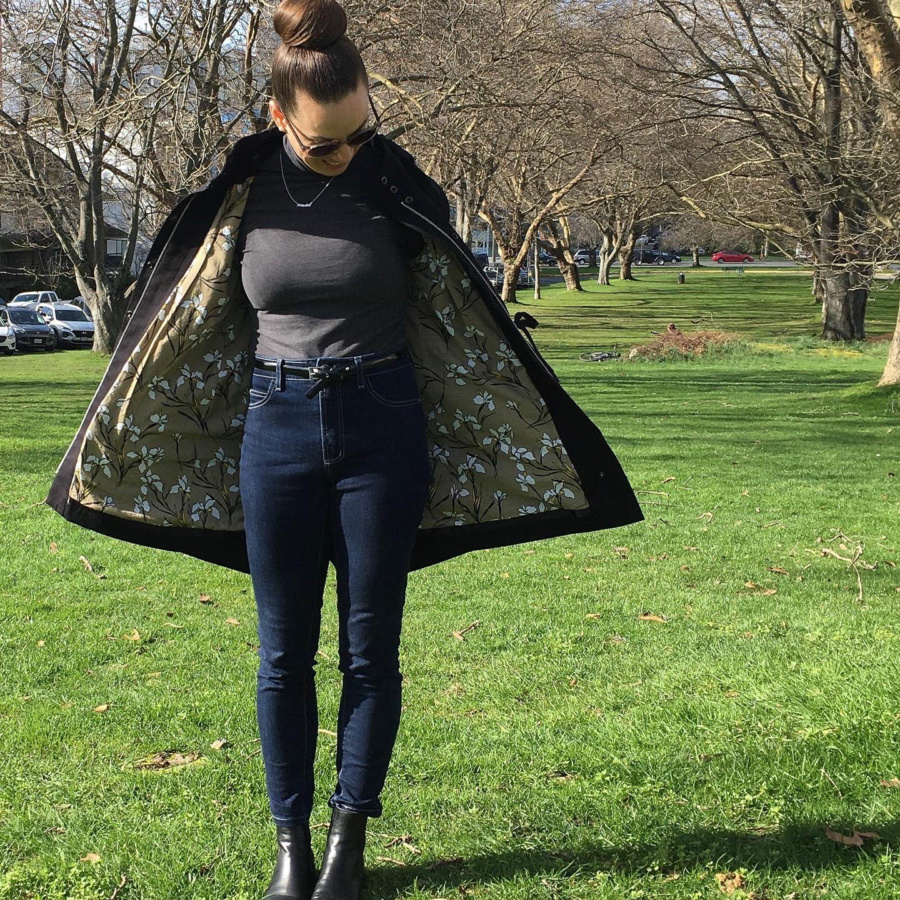
- Dropped two sizes and made size 4 this time based on the finished measurements
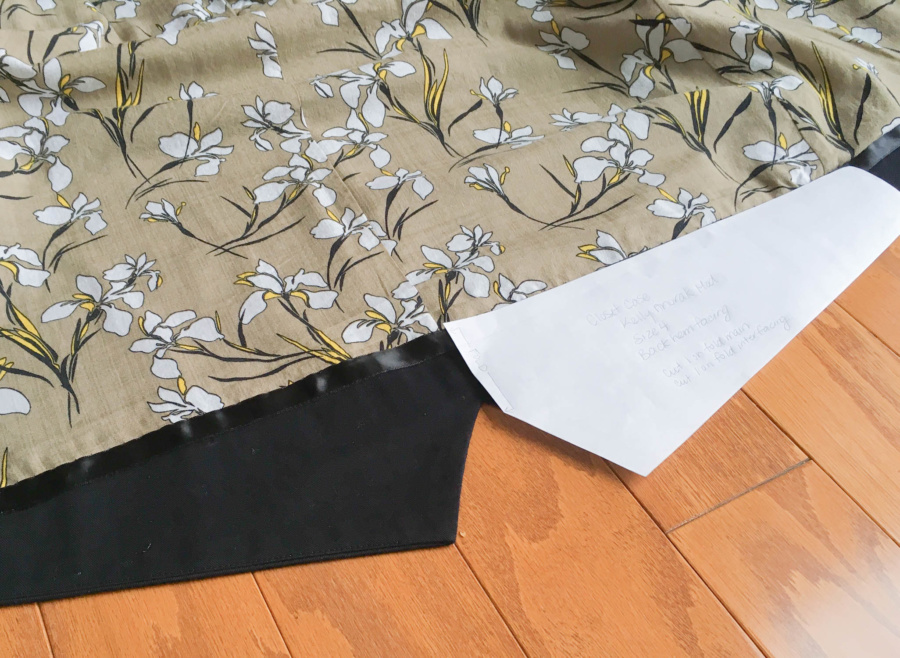
- Kept the back hem mod and extra length from my first version
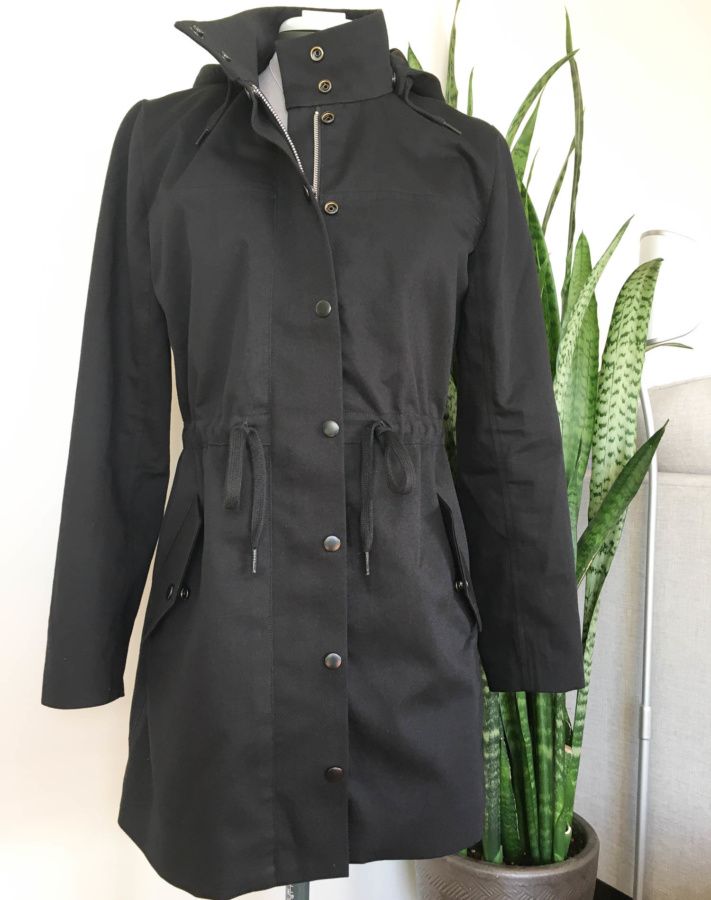
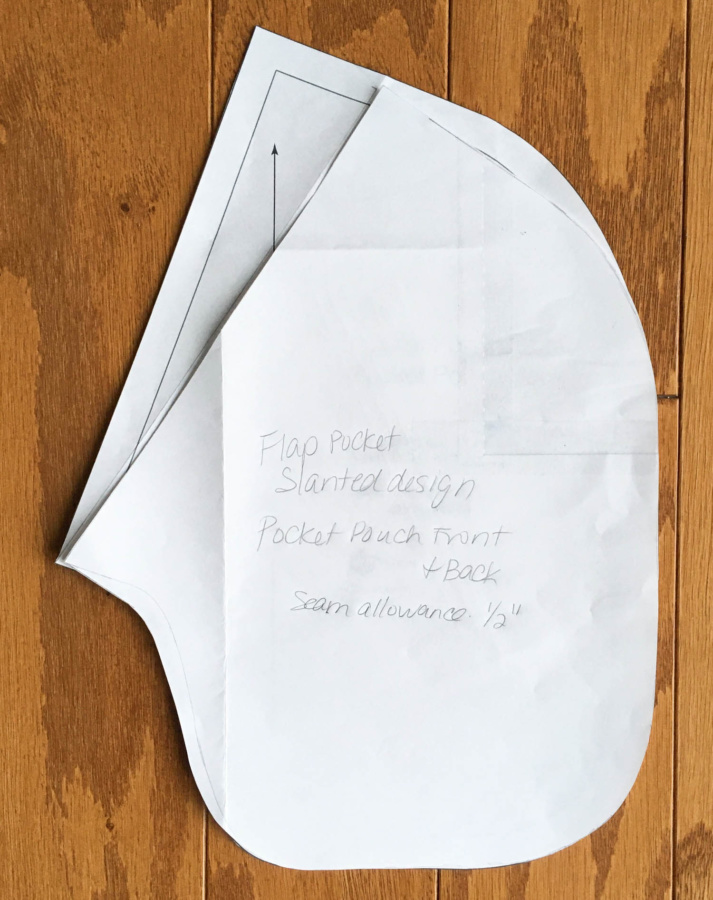
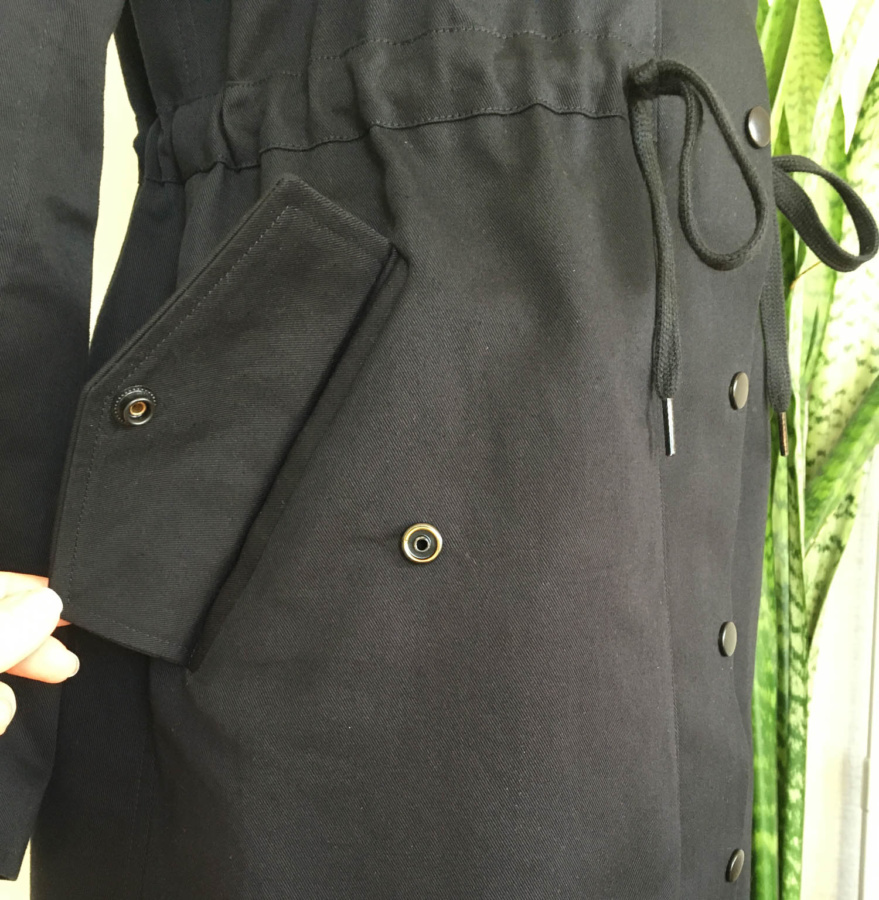
- Used a modified version of the the slanted flap pocket from Waffle Patterns 23 pockets pattern for the two front pockets. I modified this pattern by flattening the slant and increasing the flap size to bring it closer to the look of the original Kelly pocket.
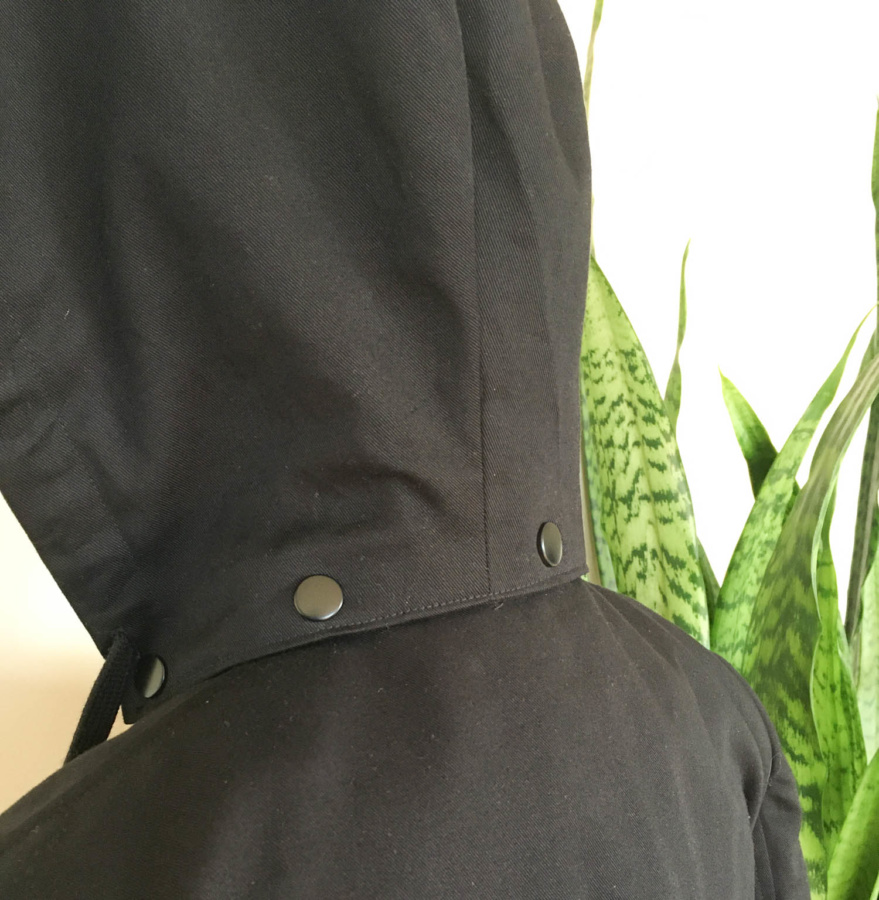
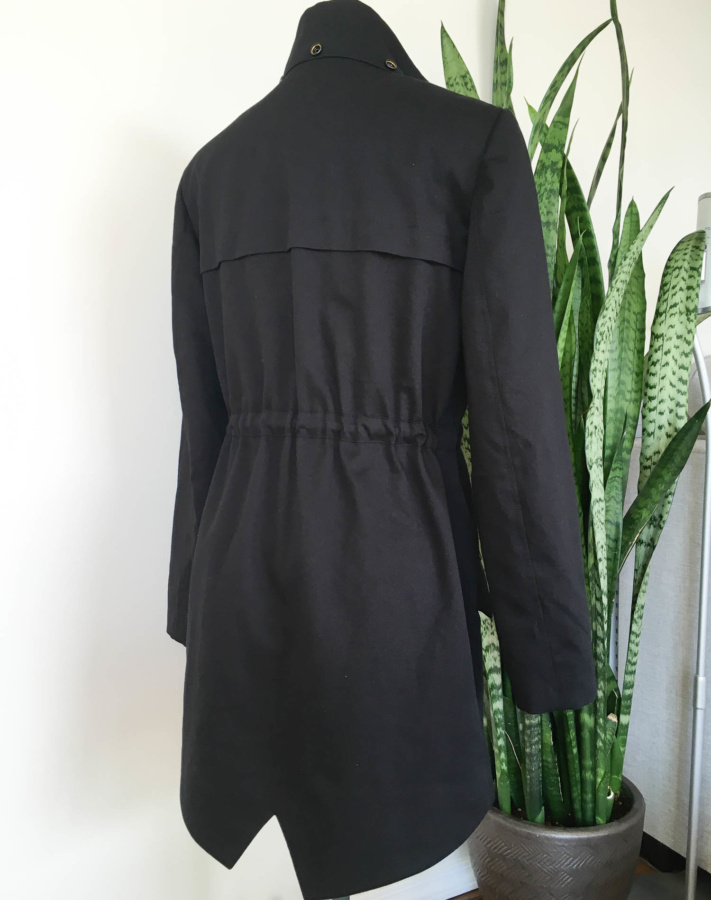
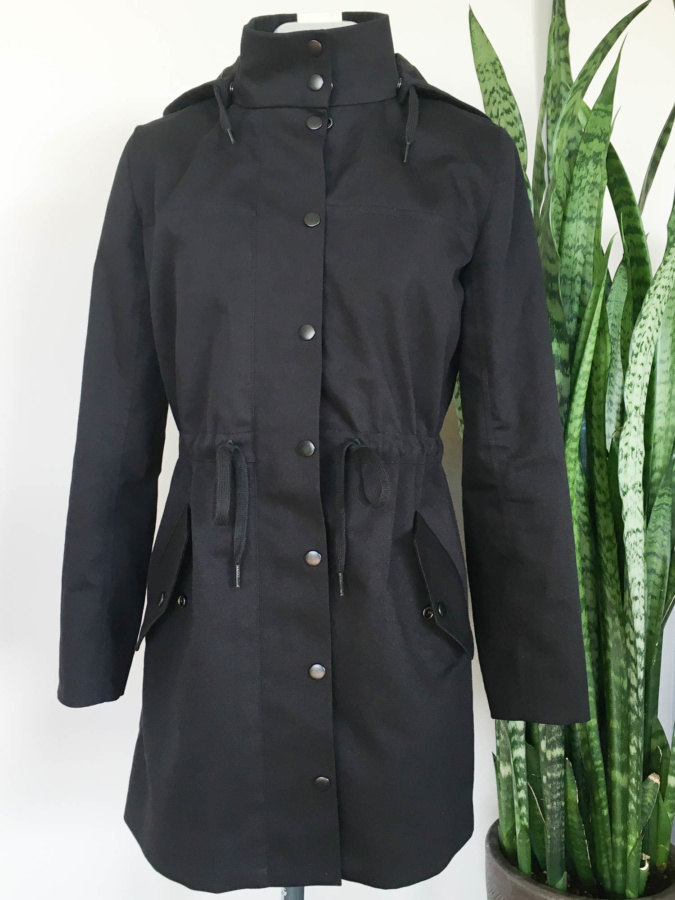
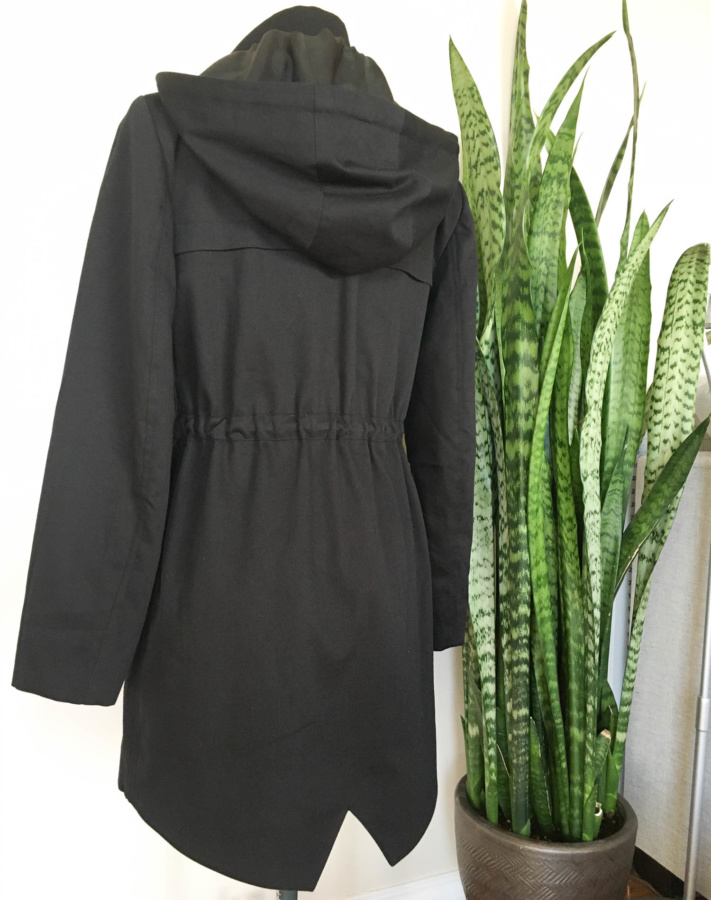
- Made the collar version and drafted a detachable hood that I attached with snaps
- Added cords to the detachable hood to hold the hood down on windy days
- Added sleeve heads
- Didn’t sew the waist casing through the lining layer
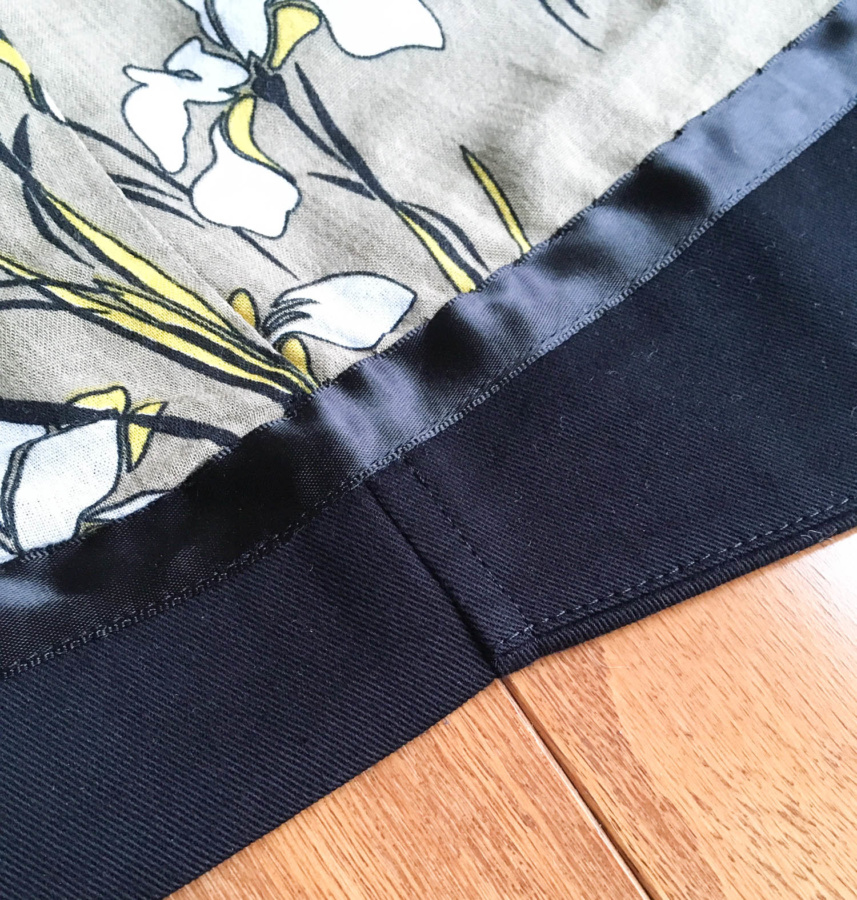
- Finished the hand-sewn hem with a strip of black satin ribbon
All these mods seem like a lot but I took them one at a time, starting with the pockets. The alterations brought the slant of the opening and the size of the flap in line with the Kelly pocket from the pattern. The Waffle patterns instructions were great and I found it pretty easy even though it was my first time making a pocket like this.

Next I made a small change to the angle of my back hem mod from last time but otherwise kept it basically the same.
For the detachable hood, I started with the hood from the pattern and cut off the extension on the main hood pieces and facing pieces. I didn’t want the excess fabric since I’d have the collar. I estimated I would need about 1.25″ of facing at the bottom of the hood to attach the snaps and a half inch for seam allowance so I extended the main hood pieces and hood facing pieces by 1.75″ and drafted a facing piece that was 2.25″ deep (to account for seam allowances), and the width of the lining hood at the neck edge.
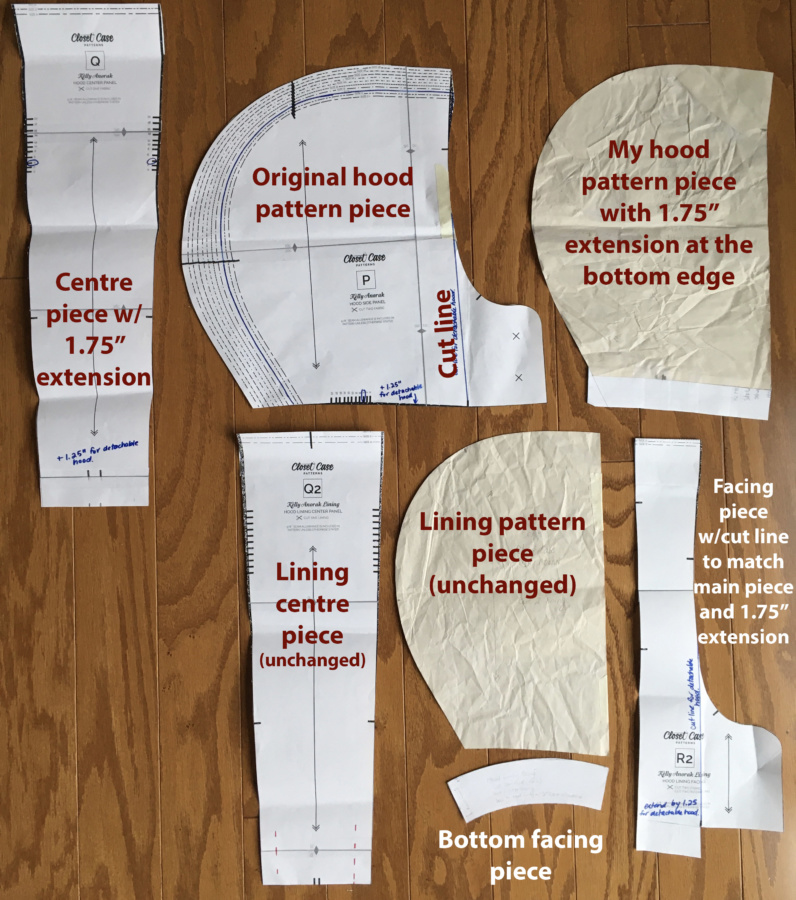
I sewed the main hood pieces together first, adding button holes for the drawstring cord. Next I sewed the lining hood pieces together, sewed the facing on at the neck edge, and attached the front facing pieces that I’d previously lengthened by 1.75″. From there, I assembled the hood the same as normal, but sewed the bottom shut (after adding the cord) and top stitched 1″ away from the front edge to lock the drawstring in and form a casing.
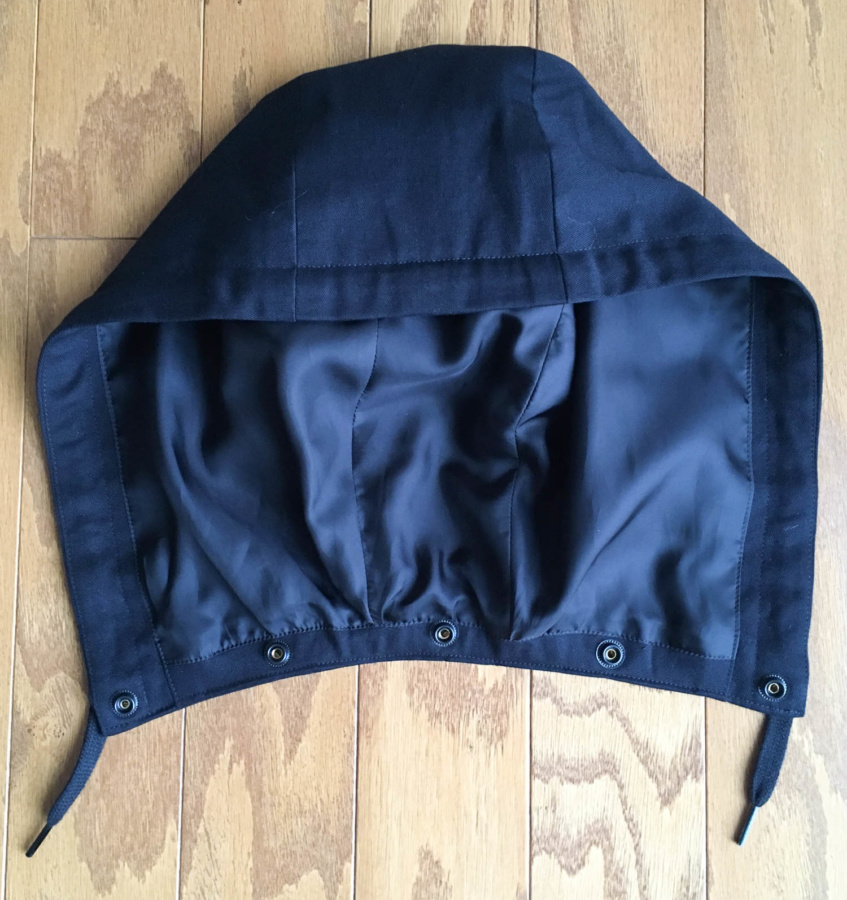
The hood turned out fairly well for a first try. The neck edge facing I drafted was a bit short so I had to reduce the width of the hood at the neck edge by about an inch, but not enough that it matters. If I did this mod again, I think I’d attach the hood with buttons or add the snaps to the outer collar piece earlier so the snaps wouldn’t have to go right through the collar. This hood is seriously HUGE. It even fits over my hair when it’s in a big top bun!
After my difficulty finding toggles or aglets that I liked last time, I decided to go with spare shoelaces. They work great! I used a full length one for the waist and sewed the second one in the middle to make it the perfect length for the hood. I tacked it down to the inside facing at the centre of the hood to keep it from sliding out.
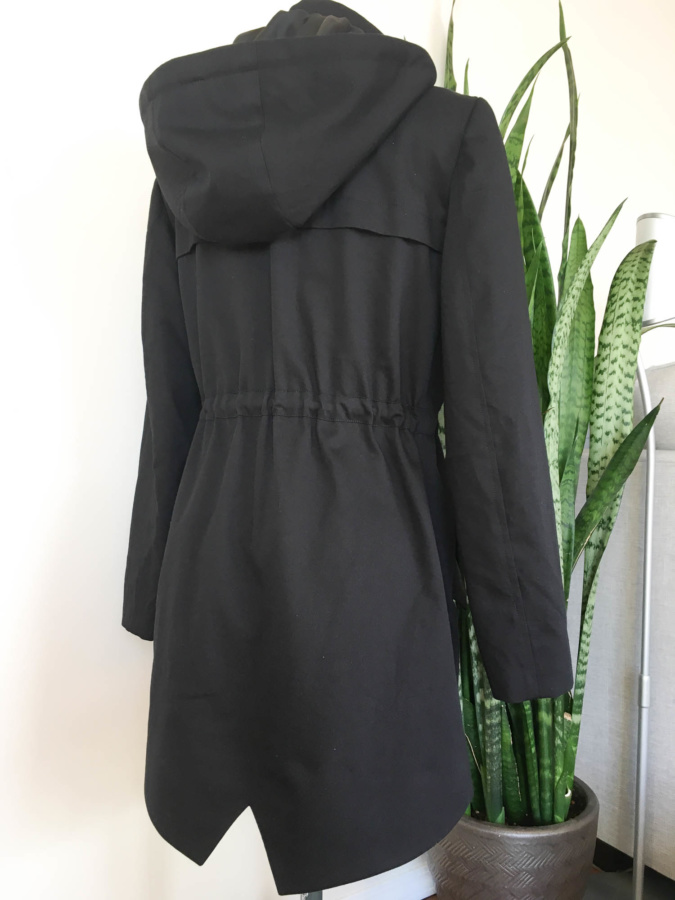
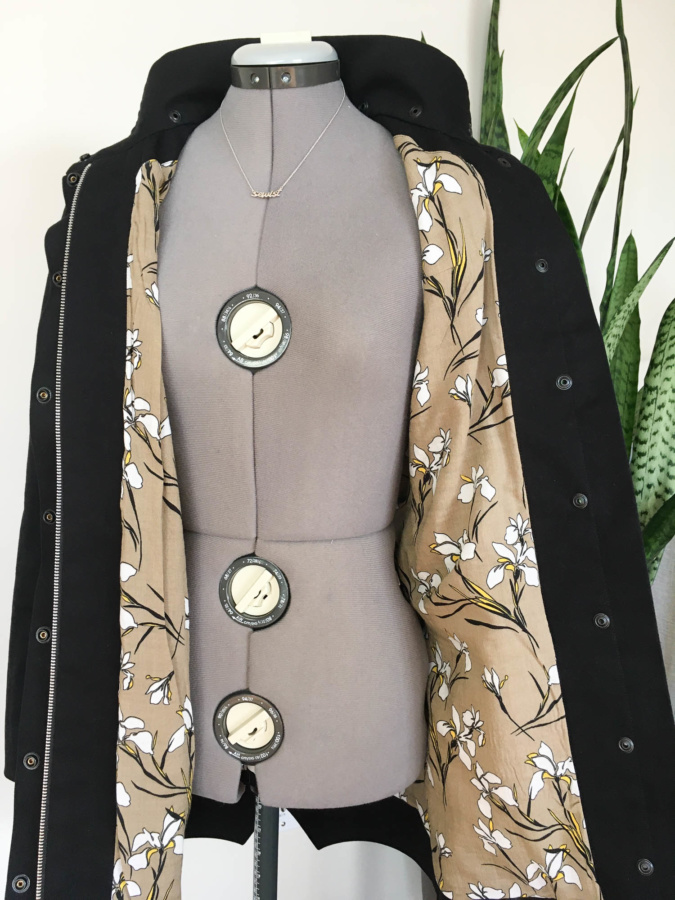
Assembly of the rest of the coat from there was straight forward. The order was the same as my last version: back hem facing attached to the back hem first and understitched before sewing the side seams. The facing acts like the hem allowances on the front pieces and everything folds up together when the hem is pressed. I used a length of black satin ribbon to finish the hem and hide the raw edge.
The Japanese cotton twill from Blackbird fabrics is lovely but quite light-weight so I decided to add sleeve heads to provide some support to the sleeve caps. I traced these from the sleeve heads in my Jasika Blazer kit and made them out of a light poly/wool blend melton leftover from my first Rumana coat.
The only thing I will change if I make this again is the snaps. I ALMOST went for hidden buttons this time around and buttons for the pockets and hood attachment as well. It would be an easy mod and would just require interfacing the entire right front facing and adding the button holes to the inside before folding it and attaching it to the coat. Attaching the snaps was a ridiculously long and difficult process and buttons would have made for a nicer look I think. Oh well. Now that I’ve nailed the fit, there will eventually be a next time and I can do it then.

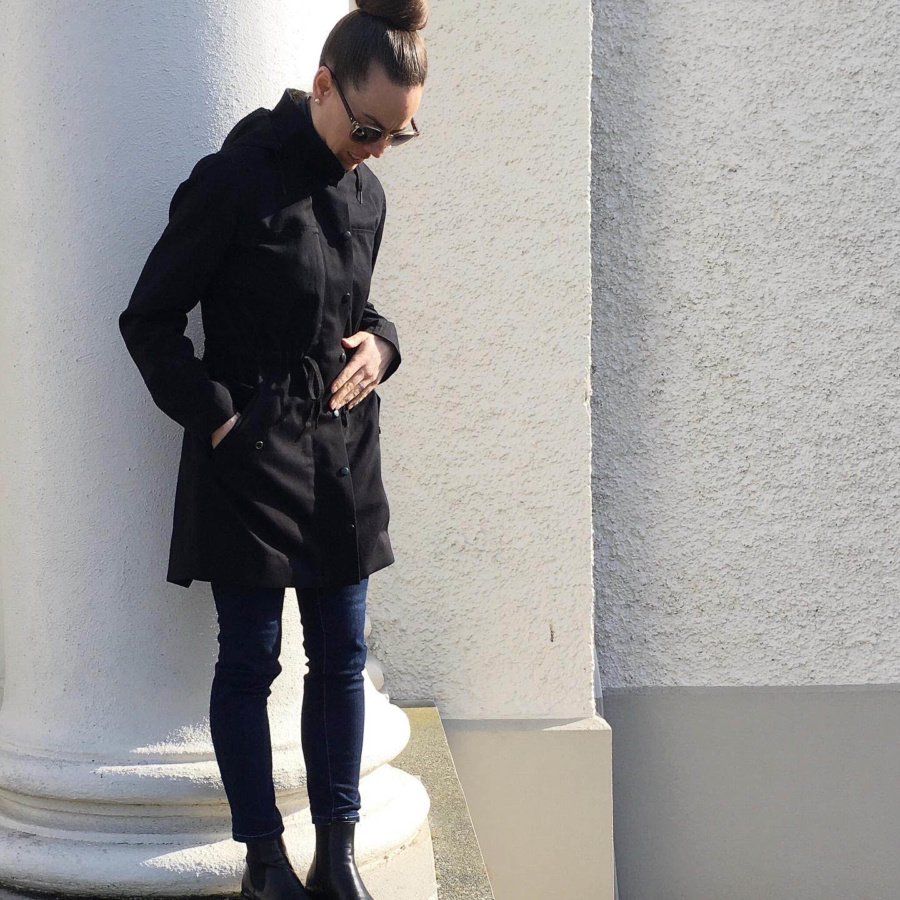
Other than that, this coat turned out pretty much exactly as I’d planned. It fits perfectly – much better than the first version – and the hood and inset pockets turned out really well. This one is also a true spring coat. Event though it’s black, it’s quite light-weight. The lining is a mix of rayon/cotton for the body and rayon Bemberg in the sleeves and hood. Neither give much additional weight and both are breathable. The first buds have been out for a couple of weeks here in Victoria but I’m still wearing my wool coats until it gets a few degrees warmer.
This project is the third on my Make Nine 2020 list. Next up are two new Ginger Jeans mods and a (hopefully) wearable toile of the Waffle Patterns Men’s Tosti jacket for my husband (before I tackle a winter version for him later in the year). I’m pleased with my progress so far, though my next few are going to be quite challenging so my pace will probably slow down a bit.
Thanks for stopping by!
~ Lindsay
February 16, 2020 at 9:56 am
What a great post!
I’m in the throes of making a quilted Kelly Anorak and reading about/seeing your custom coat gives me fuel to keep going.
Love your version of detachable hood. My zip version is similar although I didn’t add length to mine. I hope it won’t feel too small.
I love the finished look of snaps and I’m just mulling over what kind of snap to use on this version. I don’t remember having a lot of difficulty with my first Kelly, so hopefully things will go okay…when I finally get to that stage.
The early-ish spring weather is fantastic….except that I’m making a winter jacket, LOL. I didn’t think I’d take this long to make it and I hope I get to wear it at least once before putting it aside in favour of spring garments!
February 16, 2020 at 10:00 am
Thanks Sue! I don’t think yours will be too small without the extra length… mine is huge and easily fits over my head even with my top bun!
February 24, 2020 at 8:04 am
I liked reading about your hood mod. I’m thinking of doing a zipper in the outer collar, and it’s interesting to see how you approached modifying the pattern pieces! Thanks for sharing
February 24, 2020 at 11:27 am
Thanks Tighe! A zipper would also work well. Good luck with your mod!