I think this is the best thing I’ve ever made. By ‘best’ I mean best fitted and best workmanship. It’s also now the dressiest coat in my closet and the last make on my 2019 Make Nine list so I’m feeling awfully happy about it. Like my last version of this coat, I’ve worn this one every day since I made it.

I started my second Rumana right after finishing my very wearable toile. I forgot to mention sizing in my toile post. My measurements put me at a size 8/12 but I cut a size 6/10 based on the finished sizing. I felt comfortable sizing down because I was making this double breasted so I knew I’d have extra room if it ended up small. I’m also learning that when I make things according to the sizing for my measurements, they always end up too large. In my toile I added extra room in the upper back but I removed it in this version because it wasn’t needed.
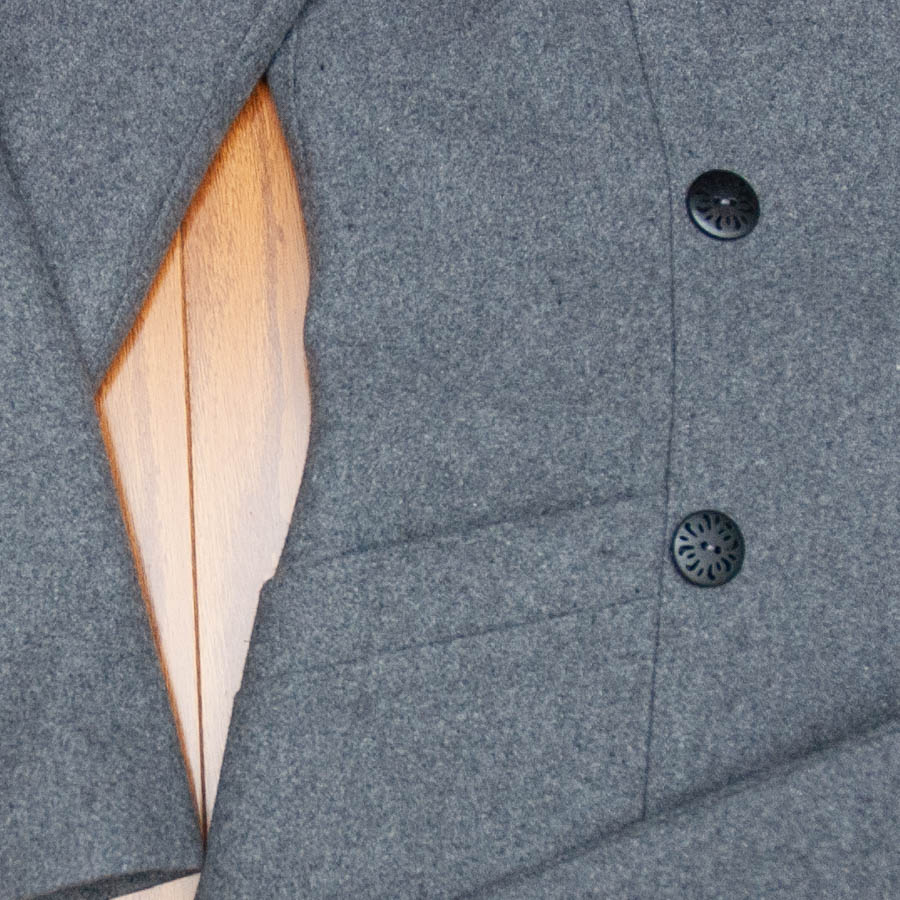
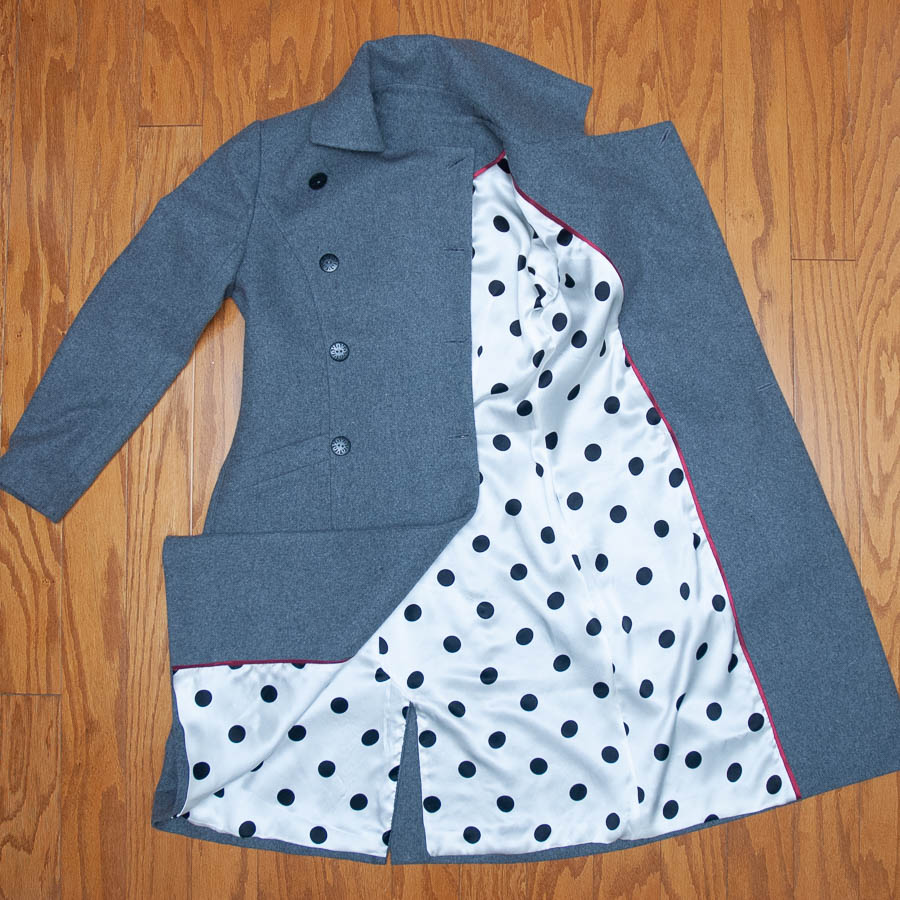
I wanted much more structure for this one so I used the interfacing instructions from my Pauline Alice Quart Coat plus a little extra. I also interfaced the pocket top on the bias (not shown below).
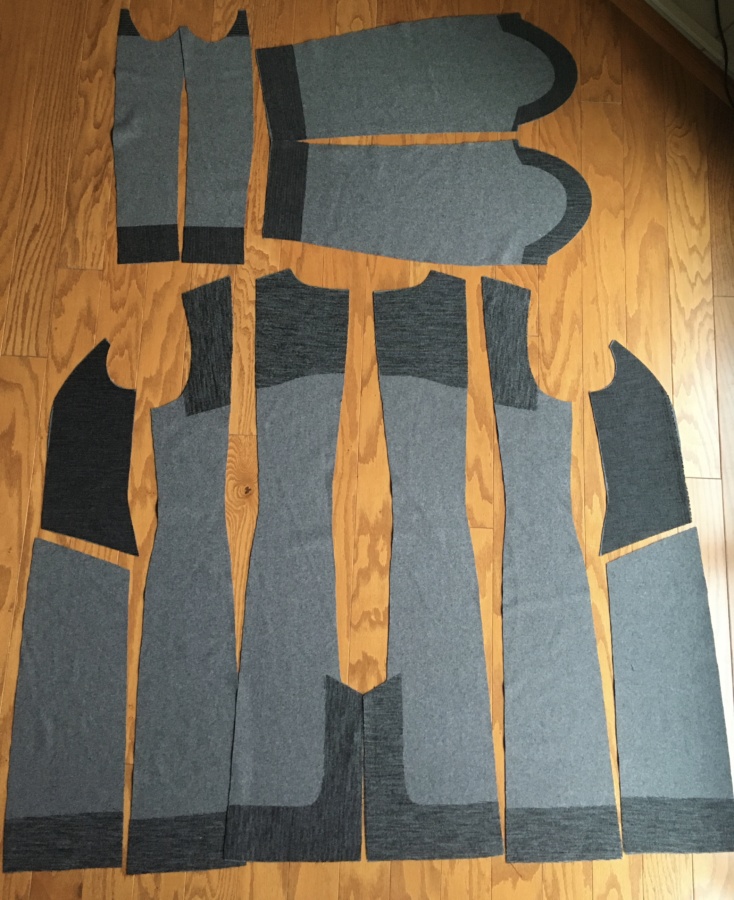
For this version I kept the mods from my toile:
- shortened from the hem 24cm
- shortened the sleeves 2 inches (this time from the middle of the forearm)
- double breasted and wide collar mods
- Added shoulder pads and sleeve heads
I also made a bunch more changes:
- Reduced the double breasted mod from my toile by an inch
- Reduced the wide collar mod by an inch and re-adjusted the angle of the collar point to midway between the original and my toile version (see the toile post for a picture of the original mod)
- Took in the under sleeves to the smallest cut lines (making sure I kept the notches from the size I was making so everything would still line up)
- Took in the back princess seams by about a centimetre on both sides, tapering to nothing around the shoulder blades and at the hem
- Reduced the curve by a tiny bit at the top of the bust on the side front pieces
- Moved the ease in the sleeve head slightly forward
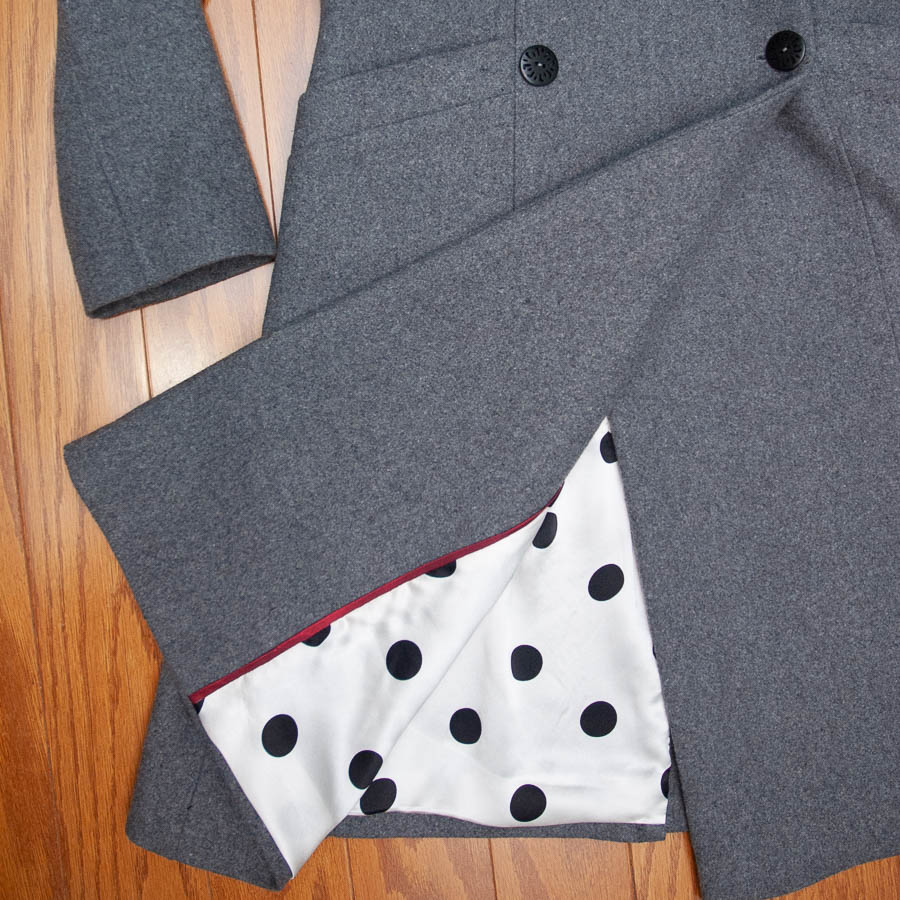
- Sewed the lining at the vent in a different order than instructed
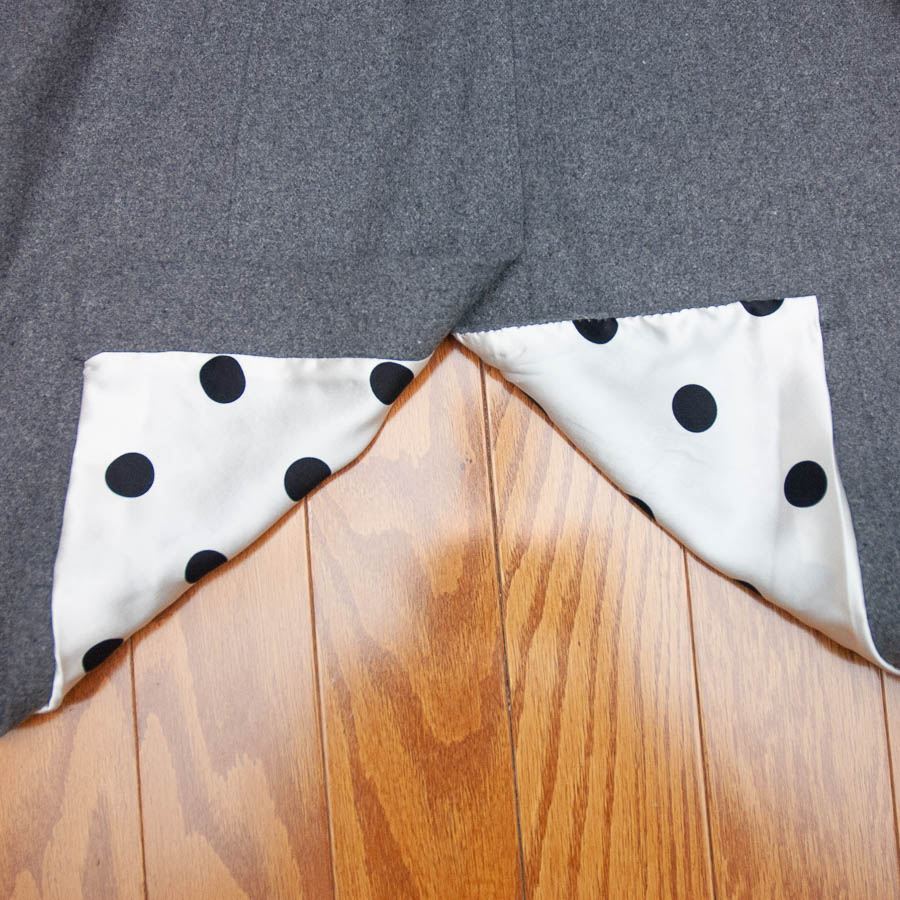
About that last point – I talked a bit about my vent/lining woes in my last post. Sewing the lining into the vent starting with the vent extension pulls the lining too tightly and doesn’t allow for the ease needed for the vent to sit flat. This time, I decided to press the vent and hem as instructed, then I sewed the lining to the hem first.
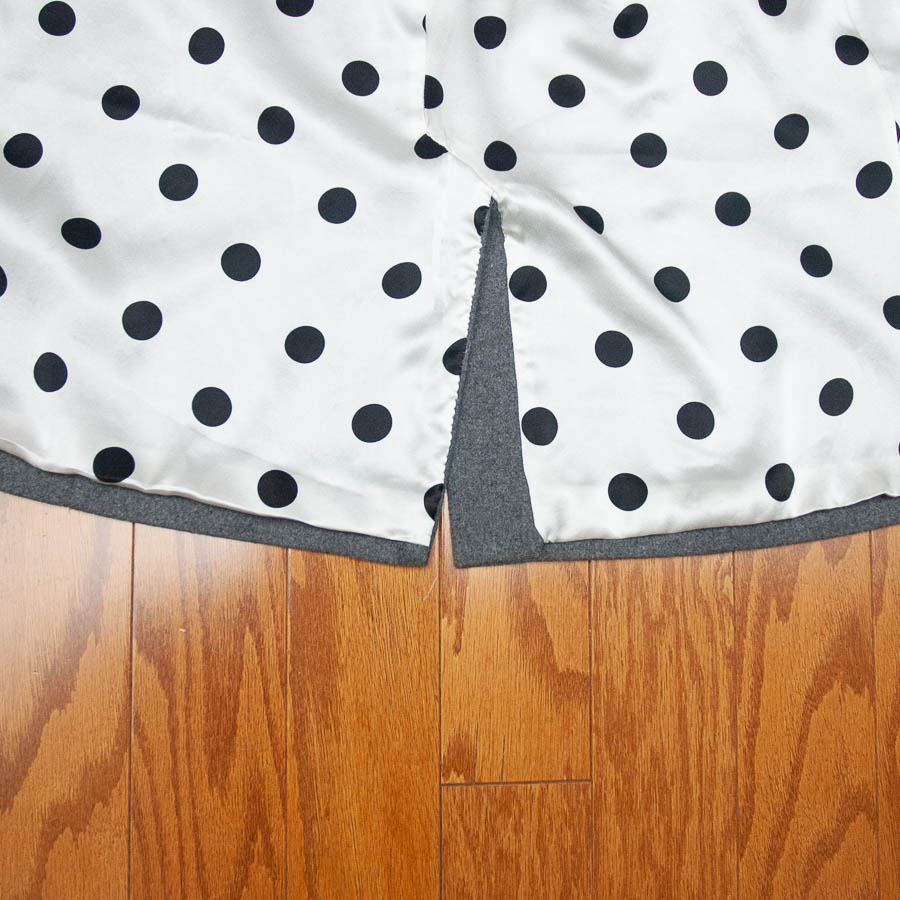
I only sewed the lining to the hem for about 15 cms on either side of the vent. Once I’d done that, I folded the hem up and only sewed the lining to the vent extension from the top of the extension down to the folded up hem. I left the other side to the end and tucked the ease in when I hand sewed it. I know this sounds confusing; it was confusing to do and I didn’t manage to get any pictures that show it well. The resulting hem isn’t perfect but it’s better than my last version and the vent sits nice and flat so I consider it a win.
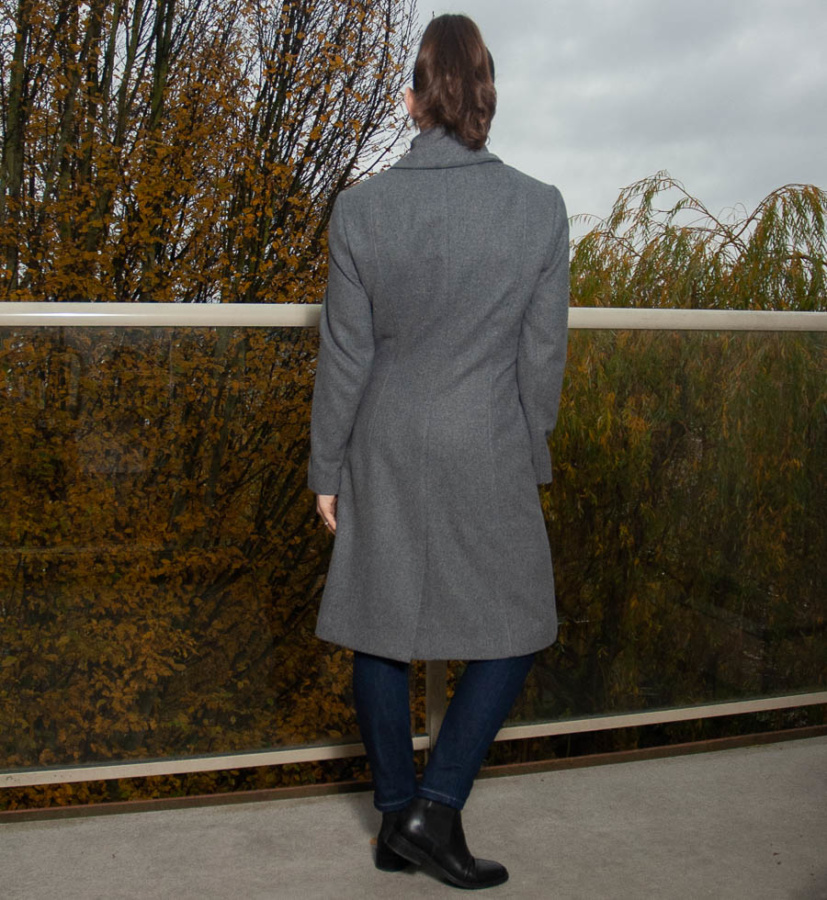
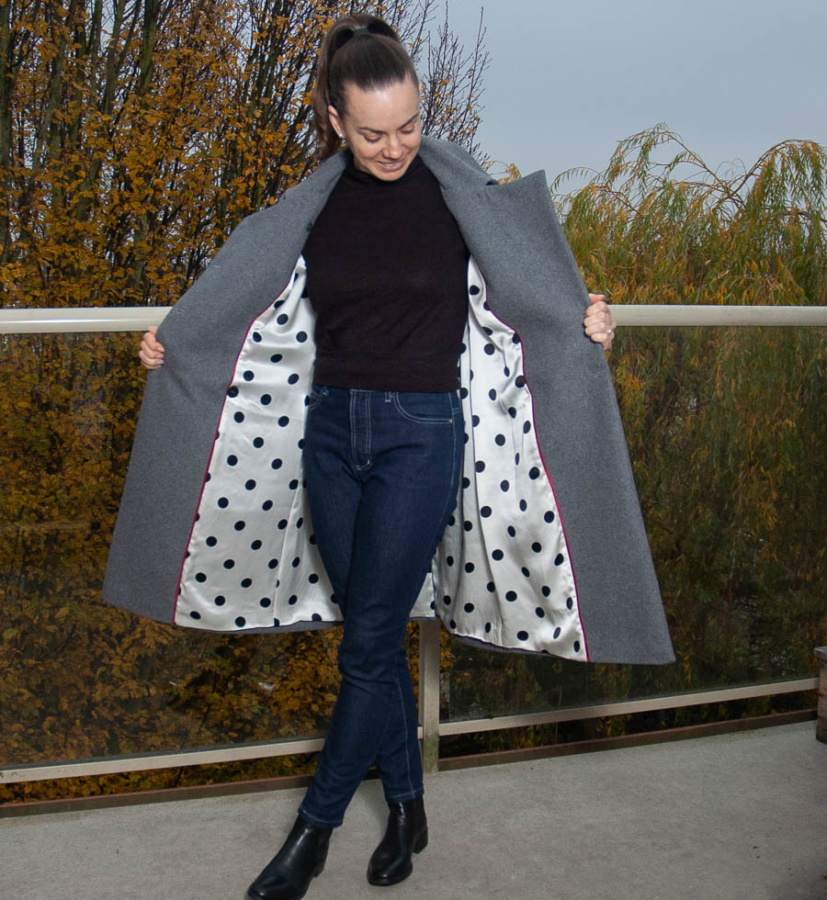
I worked hard on this make. I inserted red taffeta bias binding between the lining and self for the first time. I also hand sewed the hem in place from the inside before closing up the vent lining. This step isn’t included in the instructions but I like the way the hem hangs better when it’s firmly held in place.
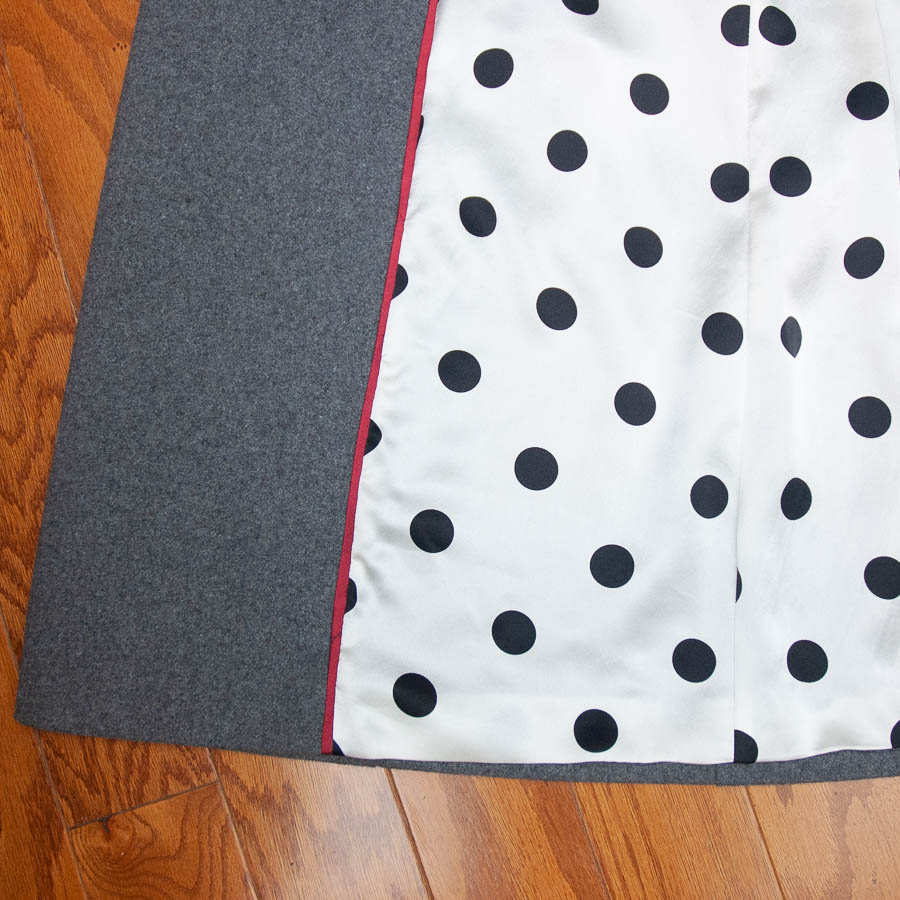
Now the fabrics. The gorgeous polka dot lining is a luxurious silk from Gala Fabrics that I’ve had in my stash for tow years. The lining was the initial inspiration for this coat and despite being silk was lovely to work with. The outer fabric is a wool/poly blend melton from Blackbird Fabrics that I bought last winter. Buttons and bias tape are also both the Gala Fabrics.
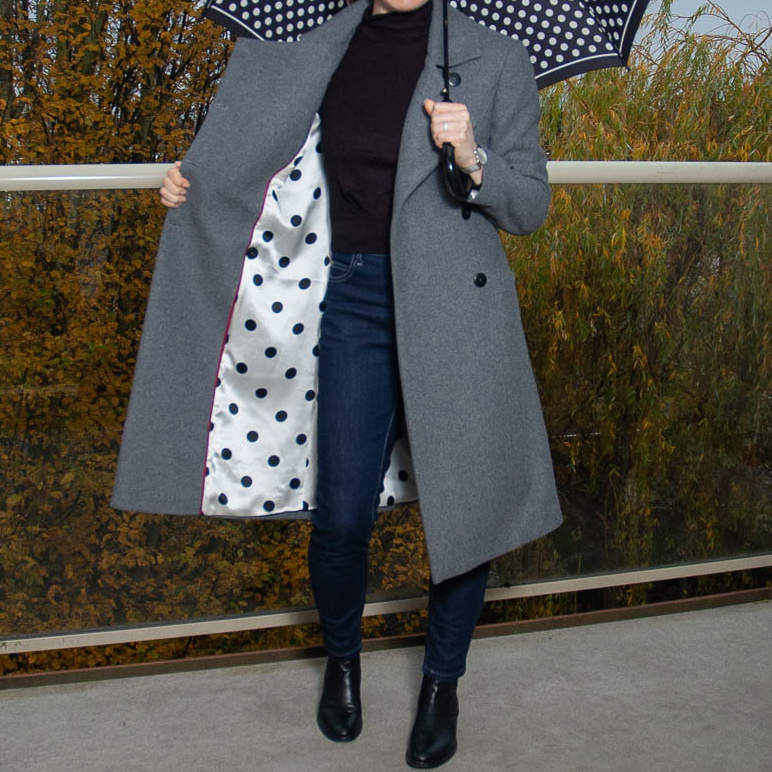
Did I mention the lining coordinates with my umbrella? Not that you can see it when the coat is closed, but I know and it makes me smile. And I needed the umbrella for these photos, it was pouring rain when I took these pictures on my balcony. These will be the last of the year out there… the leaves are almost gone!
As previously mentioned, this is the last make for my 2019 Make Nine. I’ll do a Make Nine wrap up post soon but I’m so happy I finally made this coat and closed out my sewing plan for the year with it. I’m also done with more than a month to spare in the year… but I think I’m going to take a break from the hard stuff and make a new ironing board cover, some Christmas gifts and some reusable produce bags. They’ve been on my list for a while and will be a good, quick pallet cleanser while I still have white thread in my serger.
Thanks for stopping by!
~ Lindsay
November 21, 2019 at 4:27 am
Lovely coat and fantastically happy lining! Especially love the red binding, it really makes it pop, well done!
November 21, 2019 at 6:19 pm
Thanks Sandra. I’m pretty thrilled with this one :)