I started this project in early fall 2019 when my husband was looking for a very specific style of coat and couldn’t find it anywhere. So I offered to make it for him… eventually. He picked up the wool in Florence from Bacci Tessuti on our trip to Italy when flying for a holiday was still a thing people did (the same shop I picked up the wool for my Jasika Blazer and Oia Dress). I added it to my 2020 Make Nine and made him a wearable toile last spring with full intent to get him his wool version before the end of the year.
Well, I didn’t. Because I procrastinated too long on my blazer and then there was scope creep because he decided he wanted a quilted lining, which I’d never done before and did not know how to handle in a coat with two vents. Plus we had to order Thinsulate from Club Tissus in Quebec. So yeah, I didn’t get it done in 2020. I put it on my 2021 Make Nine and made it my first priority once the Thinsulate arrived. I finally finished it, after 36.5 hours of focused work, on January 31, 2021.
Finishing this make was a huge relief – because I was done and because it turned out well. It turning out well wasn’t a guarantee throughout this make. It challenged me even more than my blazer project.
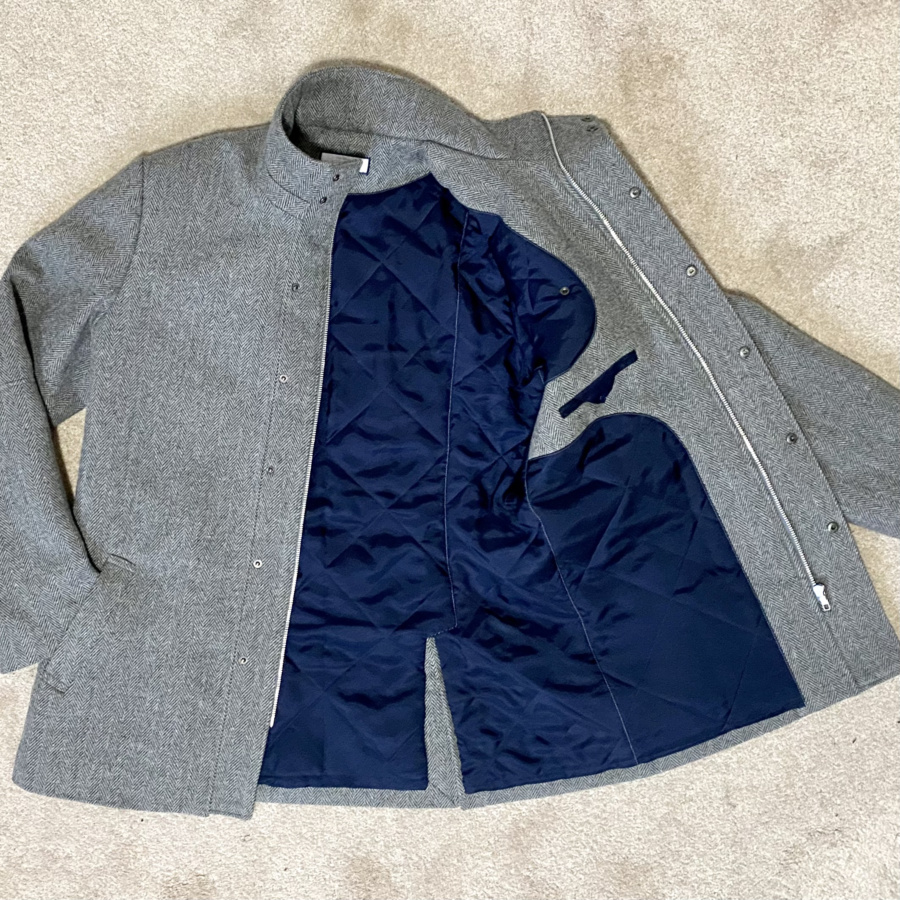
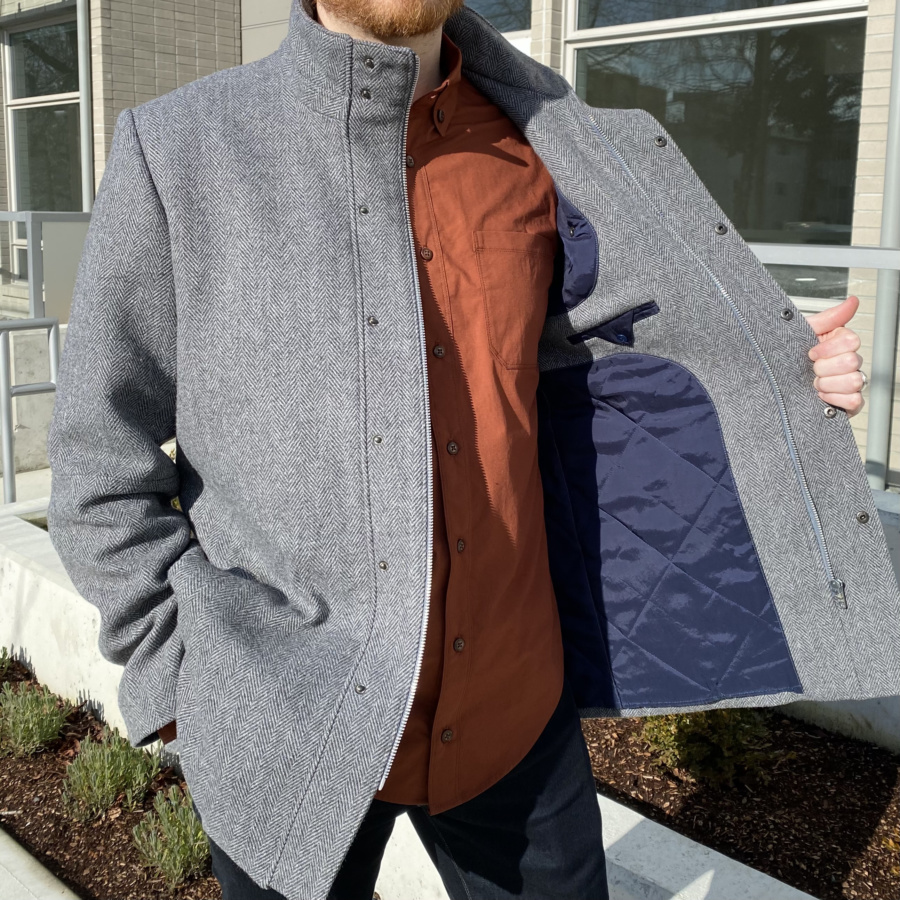
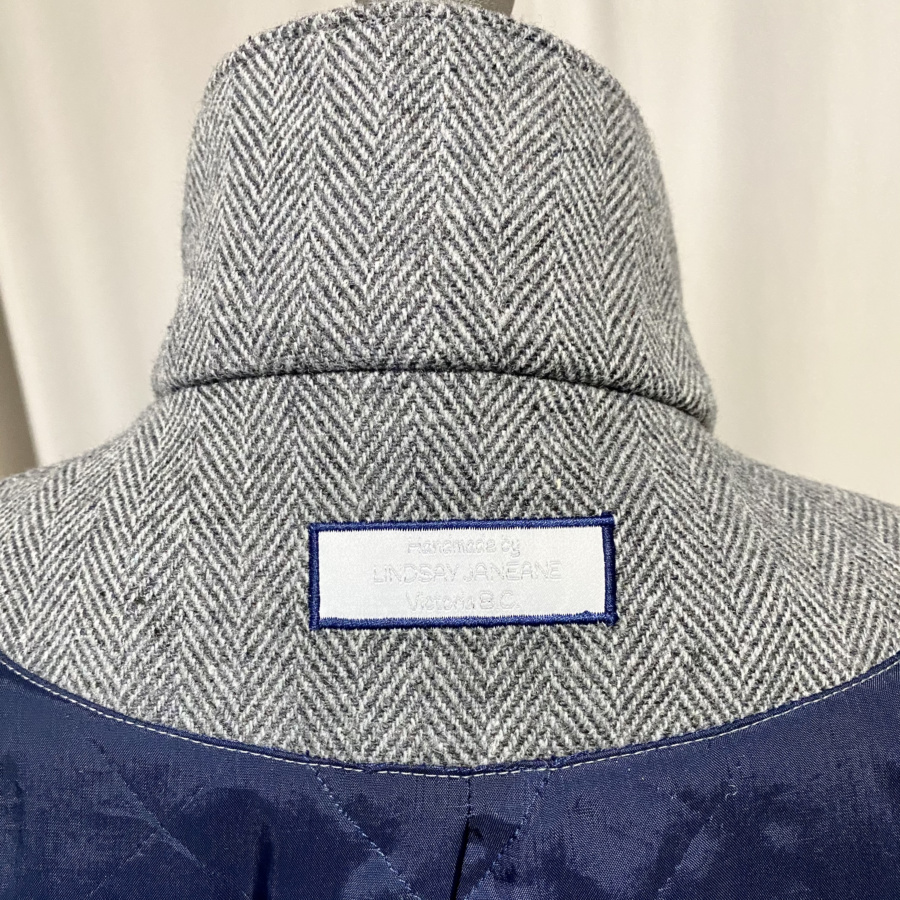
First I had to figure out how to modify the pattern to have a quilted lining. The pattern as drafted has excess ease in the lining at the side back, side, and sleeve seems. You sew these seams with a regular seam allowance and then press an additional crease into the seam, something that I knew I didn’t want to do with a quilted lining because of the excess seam bulk that would create. So I reduced the width of all the lining pieces to remove the excess ease.
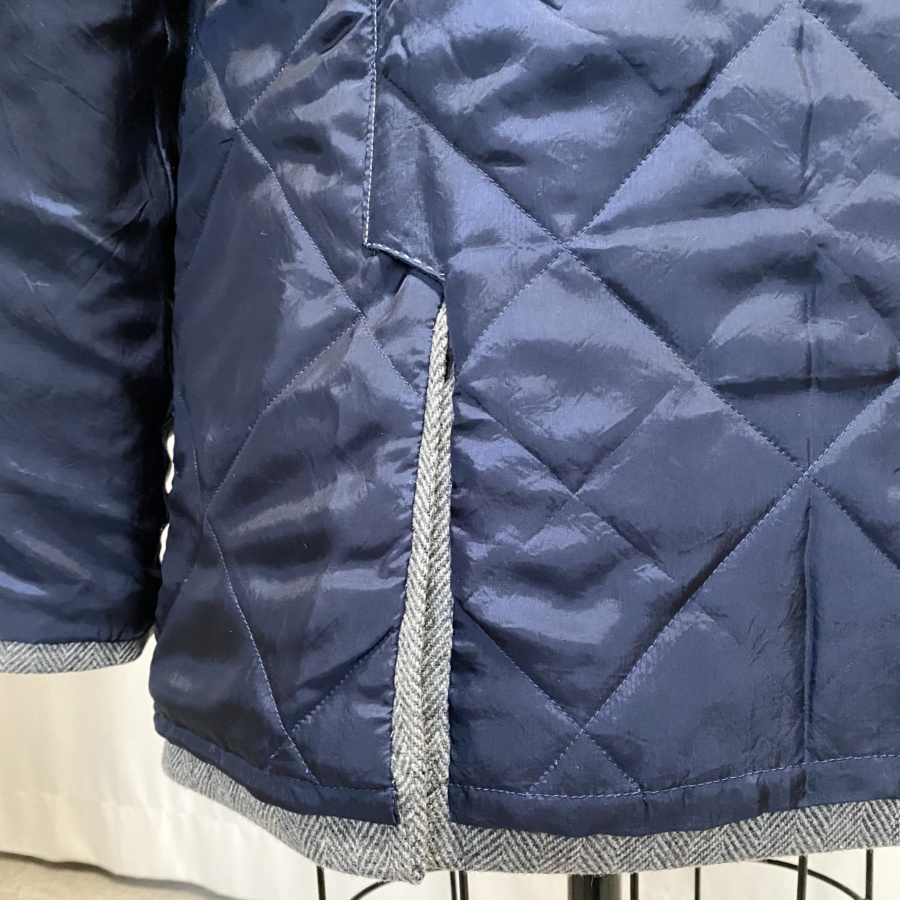
Figuring out how to do the hem and vent lining was also tricky. I ended up sewing the Thinsulate to the lining at the seam line and then trimming it right back so that I could fold the lining back to stitch it to the vent. For the hem, I cut the Thinsulate back by four centimetres so that I could press the two centimetre hem up without melting the Thinsulate (oh boy, does it ever melt).
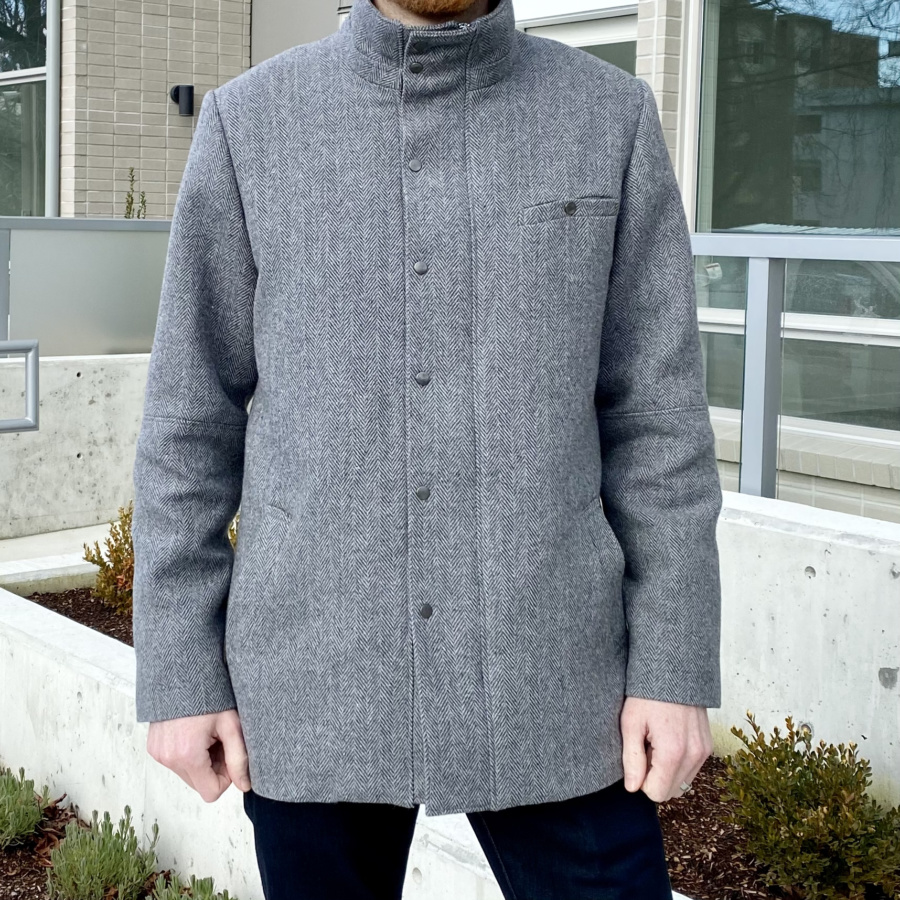
Next I had to figure out which of the mods we’d decided on after his toile would still apply after adding a 70g Thinsulate lining. I decided to add an inch to the sleeves and add back in some of the width that we’d removed in the body of his toile. I did maintain the half-inch reduction in shoulder width though because I didn’t think that would be affected by the bulkier lining. Here are all of the mods and sizing:
- Size 48
- Interfaced ever piece of the main fabric and facings
- Reduced coat length by one inch
- Lengthened sleeves by one inch
- Reduced shoulder width by a half inch at each arm hole edge
- Took in the upper sleeve width by a half inch (after sewing it up so it’s not a clean half inch, more of a taper between arm hole and elbow)
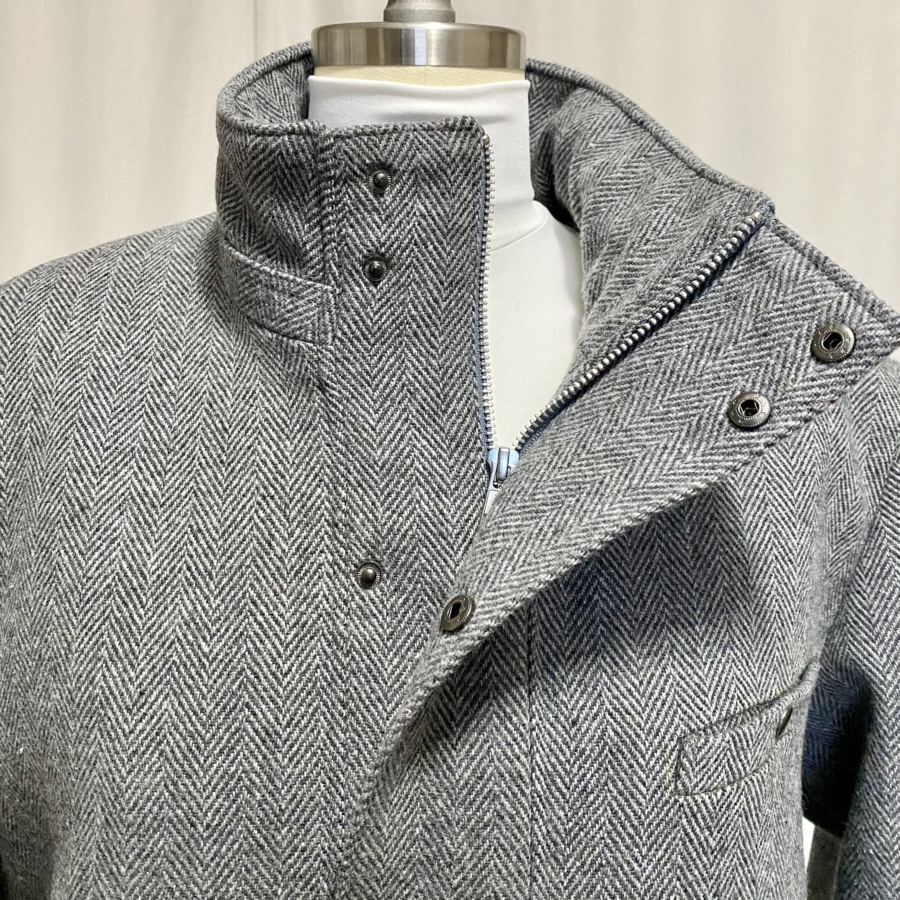
- Brought the neck line up by 1cm all around
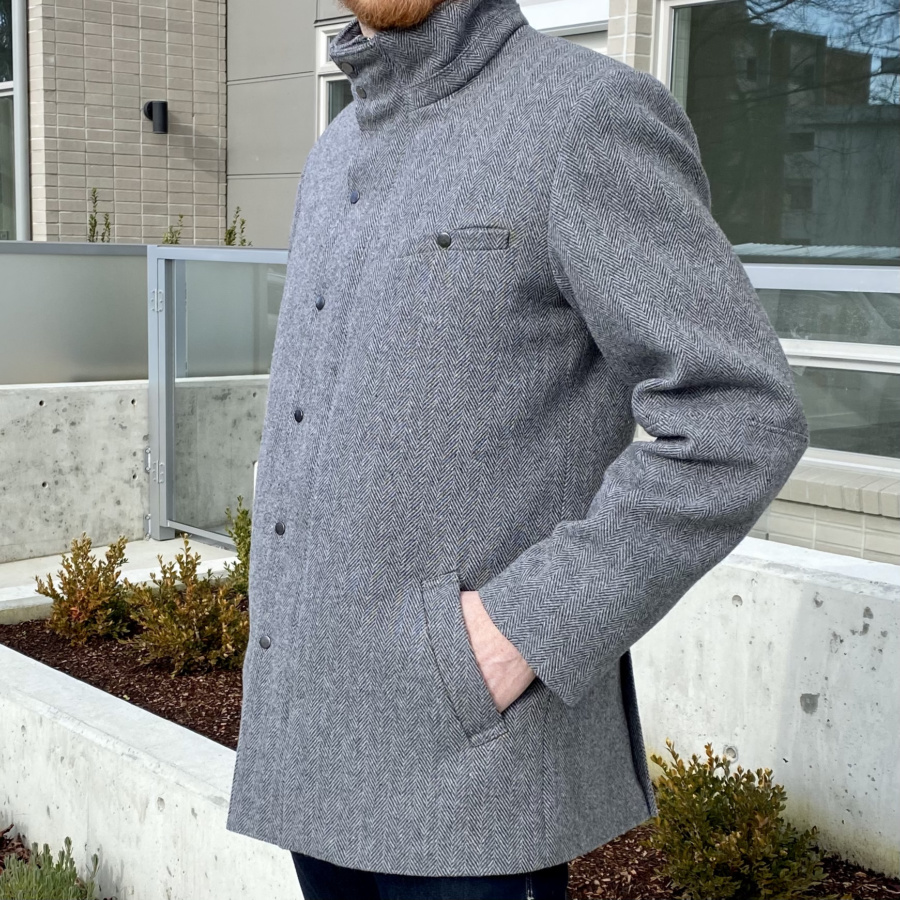
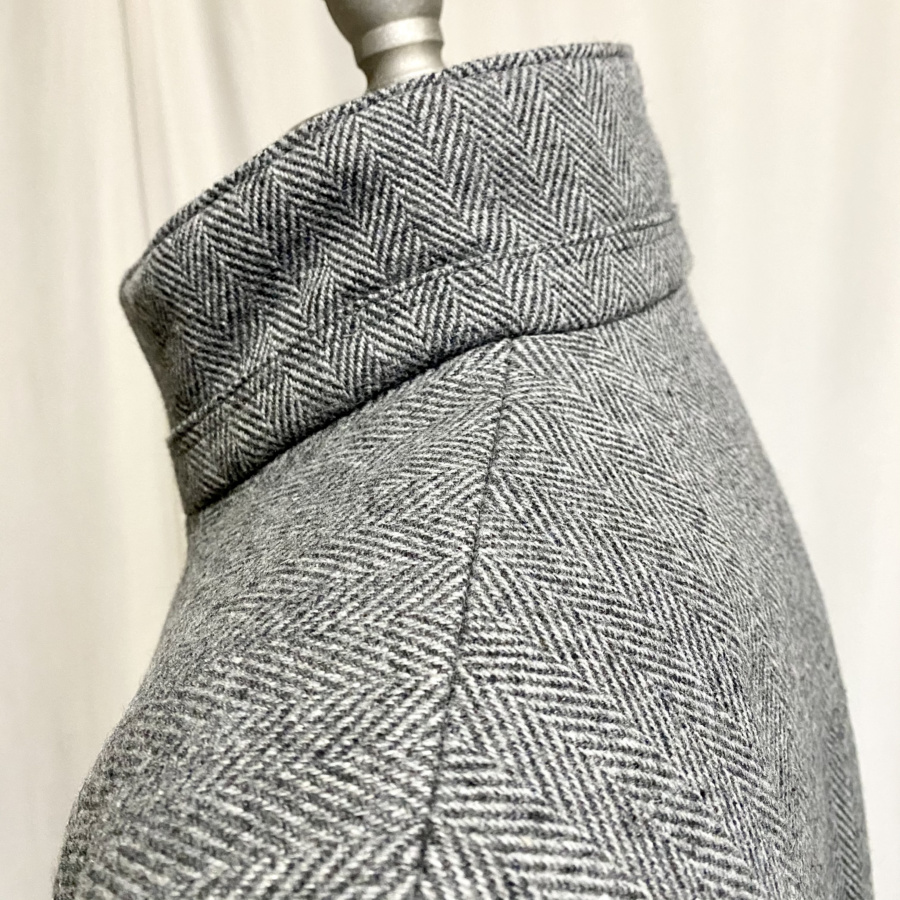
- Drafted a new collar based on the Kelly Anorak collar (the collar of the Tosti is draft to be very tall with a reverse curve so the upper edge is wider than the neck edge – I wanted an inward curved collar that would stand up to keep his neck warm)
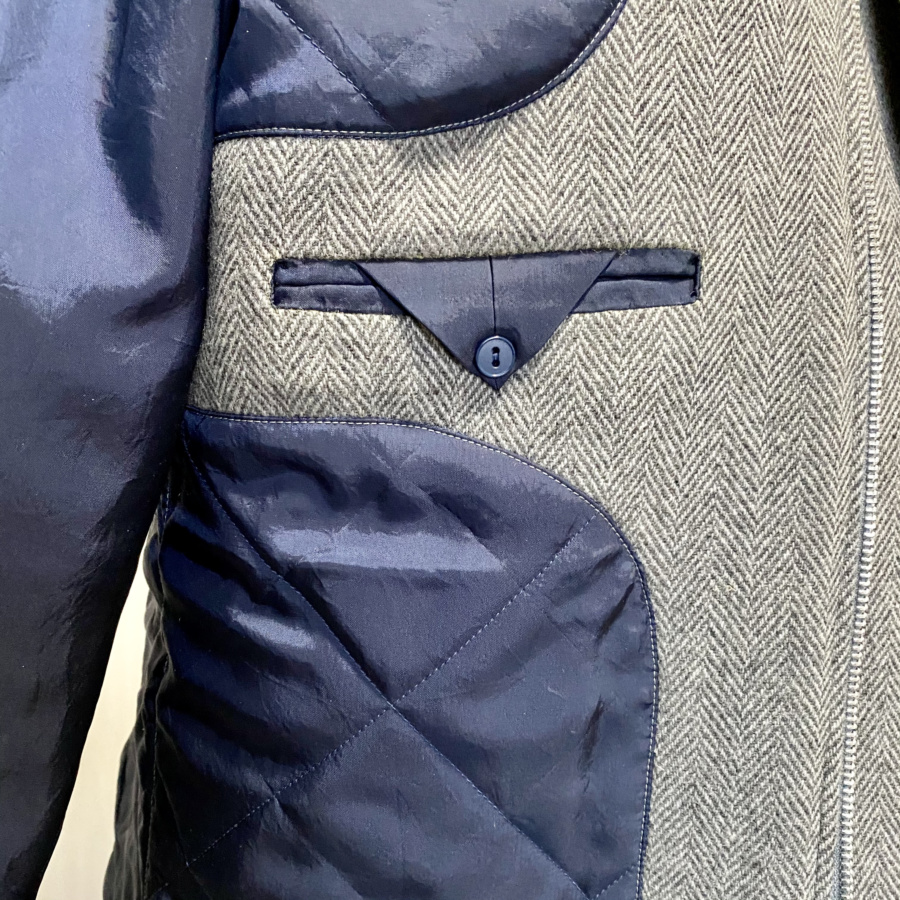
- Used the Jasika Blazer pattern to draft a breast pocket
- Used the Waffle Patterns 23-pocket pattern to add angled welt pockets
- Added a triangular tab for the inside welt pocket drafted based on a current RTW coat he has
- Didn’t add the detachable hood
- Quilted the sleeve lining originally but that seemed too warm for our very mild Victoria winters so cut out new sleeve linings, sans quilting
- Quilted the rest of the lining with a two-inch diamond pattern but that amount of quilting shrunk up the lining pieces too much so I ripped out half of it to make four inch diamonds (the lines from my original stitching still show though and I can’t press them out, because of the Thinsulate)
- Added horsehair canvas facings to both upper fronts and shoulder seam twill tape (tips taken from the Closet Core blazer course)
- Added thin shoulder pads and sleeve heads from the Closet Core sleeve head pattern
Wow. Writing out everything I did sure brings home how challenging this project was, from figuring out the mods, to cutting (four versions basically: main, interfacing, Thinsulate, and lining), to the time it took to put it all together. I’m so glad I did it though, and that it fits and he likes it.
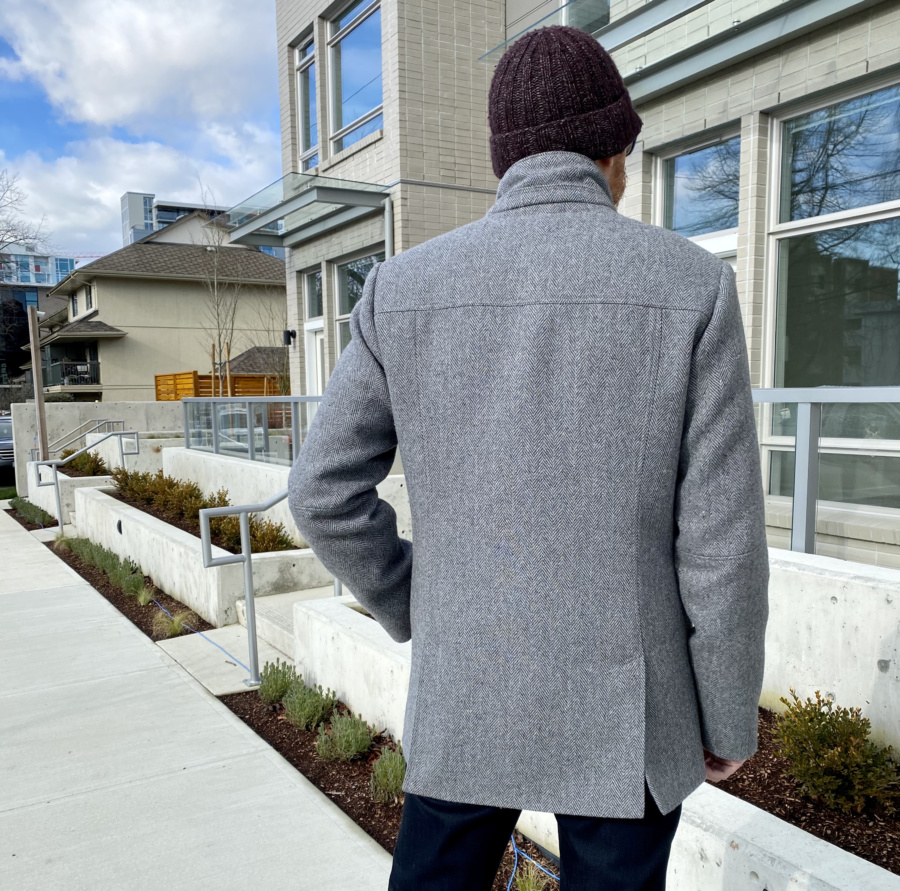
He has his coat now. Though the coldest months of winter have most likely already passed (not that it gets very cold here in Victoria – it has yet to dip below freezing so far winter) but it will fit him for a long time and should be constructed well enough to last for many, many, many winters.
Thanks for following along on this journey!
~ Lindsay