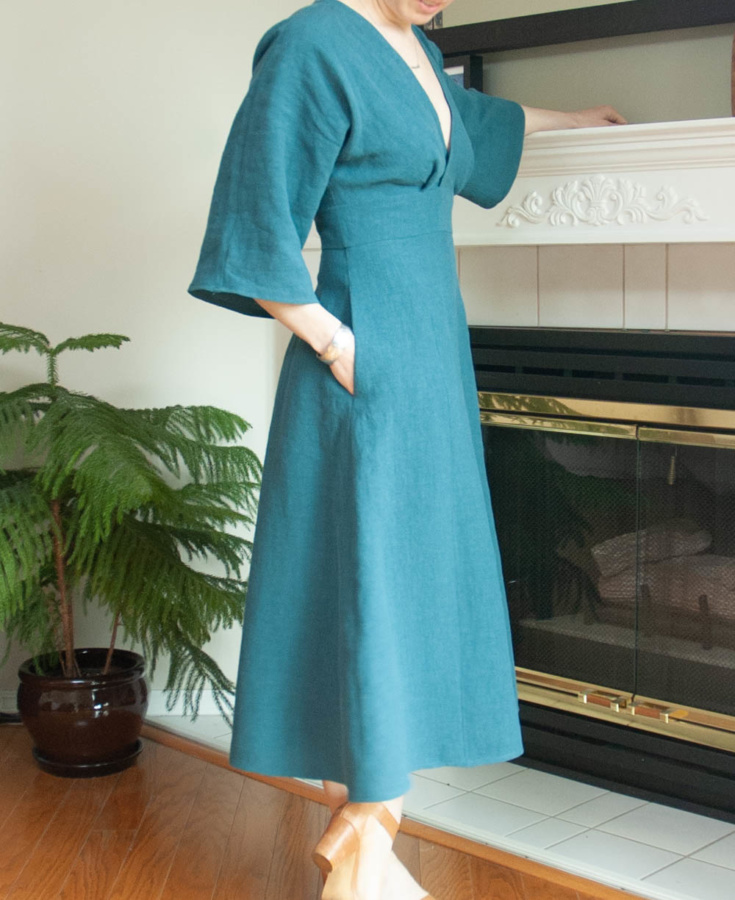
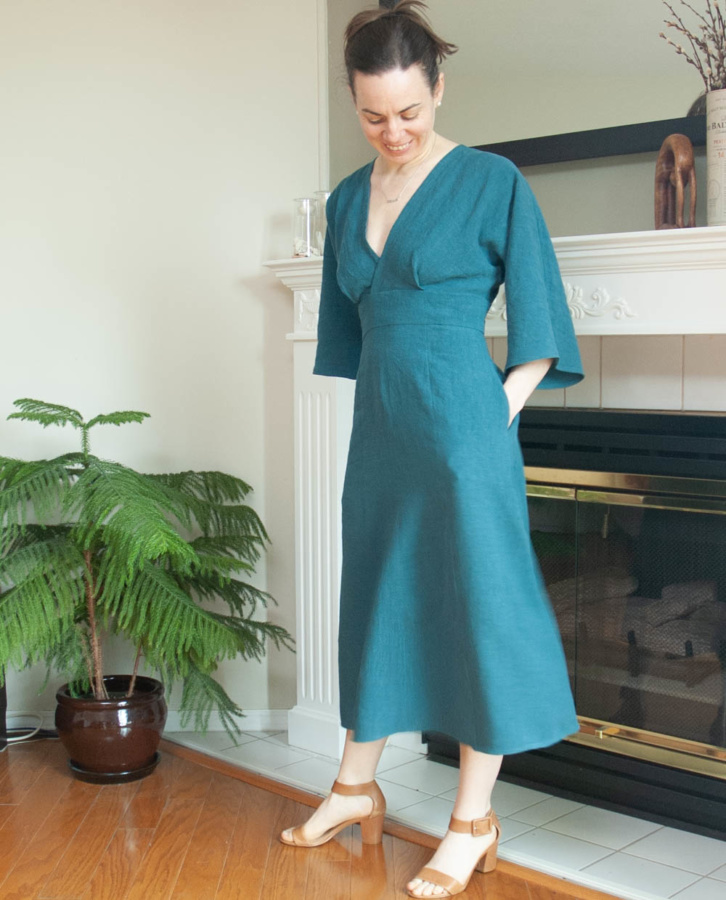
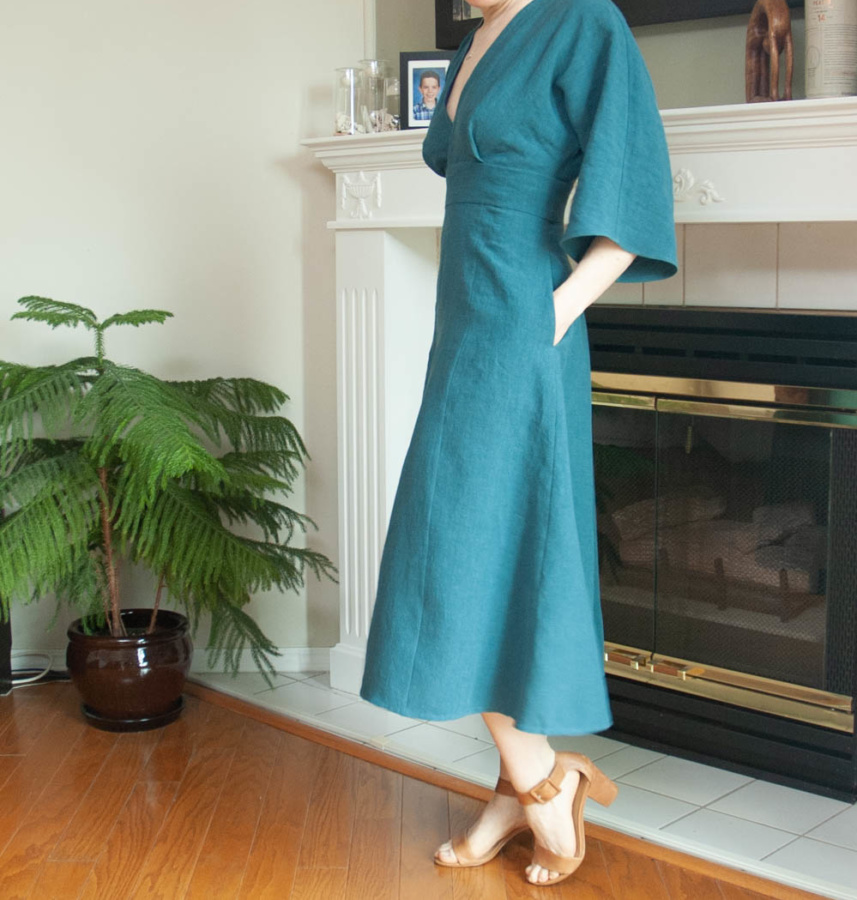
Yes, it’s the dress that everyone seems to make. I’ve scrolled the hashtag on Instagram for so long wondering if I should make it too. Then Sitka Fabrics gifted me some lovely washed linen in the colour teal and I decided the time was right to tackle this fan favourite… but not the same way everyone else made it.

From all of my perusing of the hashtag I went into this project knowing a few things:
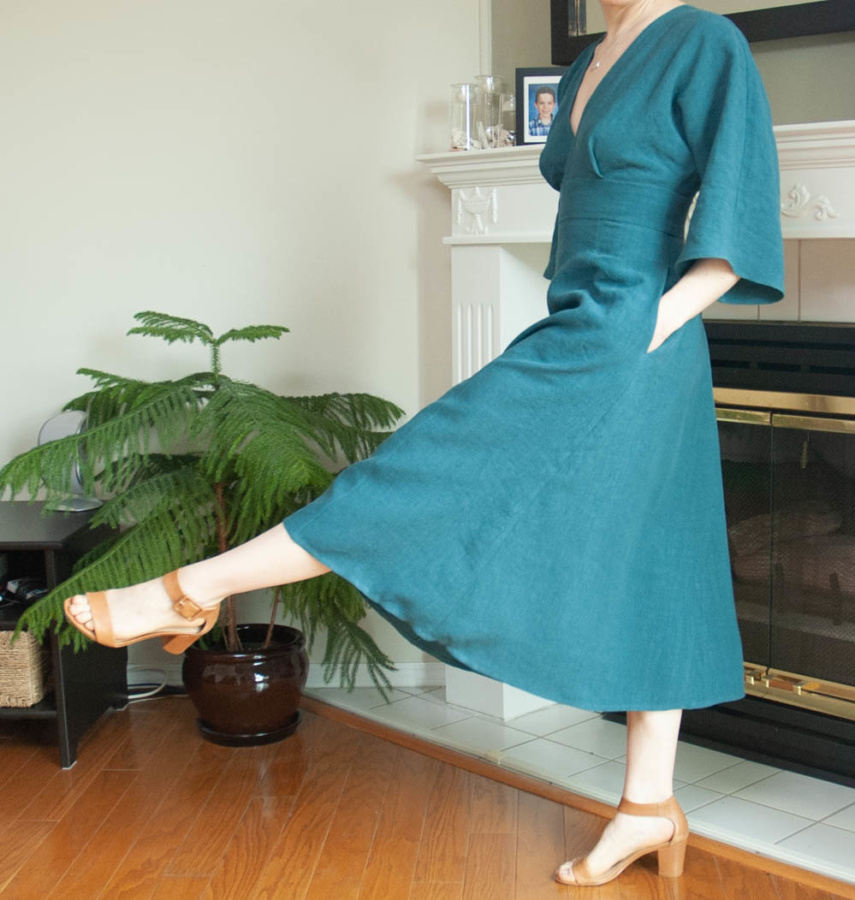
- I didn’t want the deep V to be so deep that I’d never have anywhere to wear it. In addition, many of the ones I saw on Instagram looked like they had too much fabric at the centre front so I wanted to watch for that.
- I didn’t like way the waist seam sat on most people so decided I’d have to work on that as well.
- The pleats in the skirt look great on some people but I knew they would be far too much for me, especially because I was using linen, so I decided to remove them.
- The ties seemed to be hit or miss on Instagram, looking great on some and sitting way below the waist seam on others. I wanted to fit the bodice and waist properly so that the ties wouldn’t be essential.
- It’s a Vogue pattern so I new I’d have to size down.
So I got started with these five things in mind. The first thing I did was decide what size to cut based on the finished garment measurement on the pattern pieces. I went with size small, though my measurements put me at a medium, and I knew I’d size down a bit more as I fitted the dress to myself. I cut the small and then used my new dress form, Margot, to “drape” the pattern and see how it would sit on me.
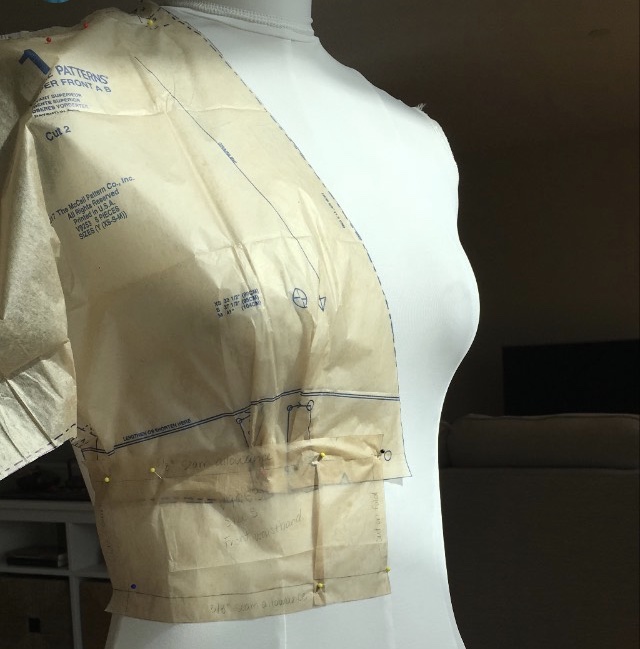
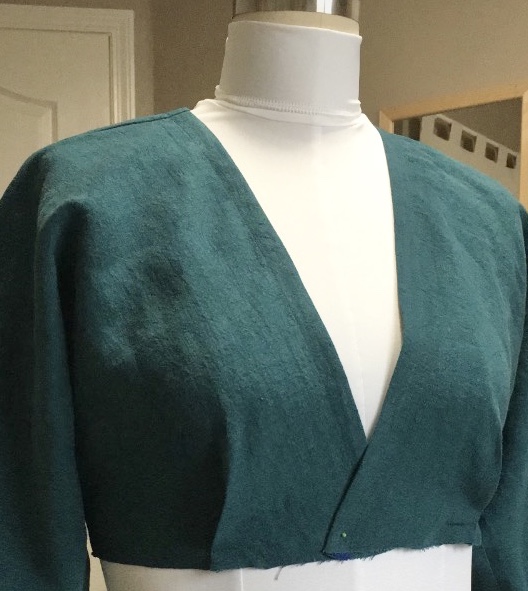
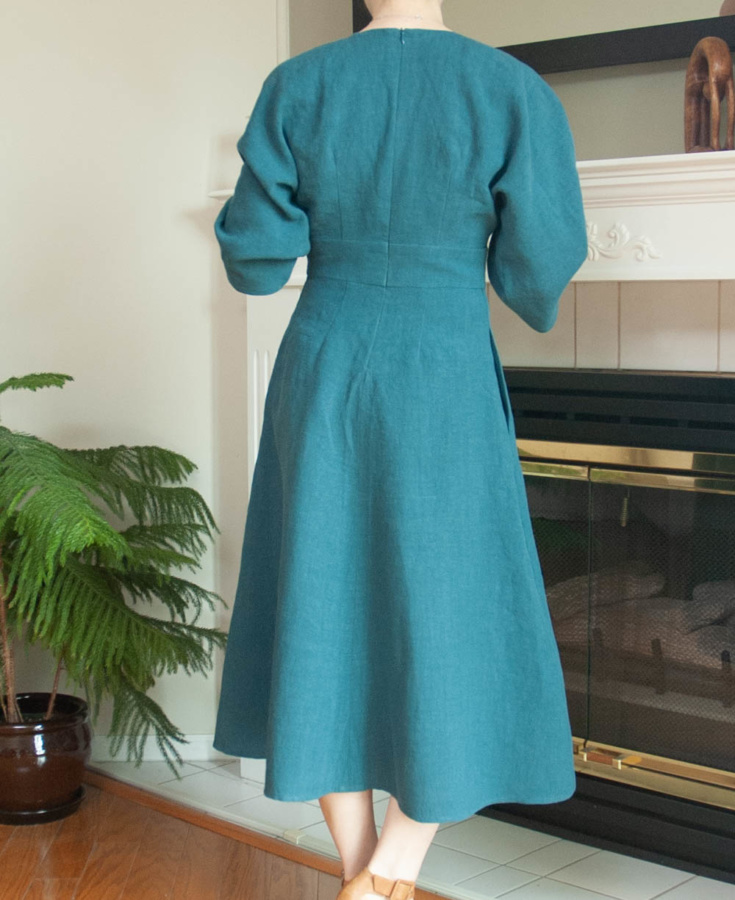
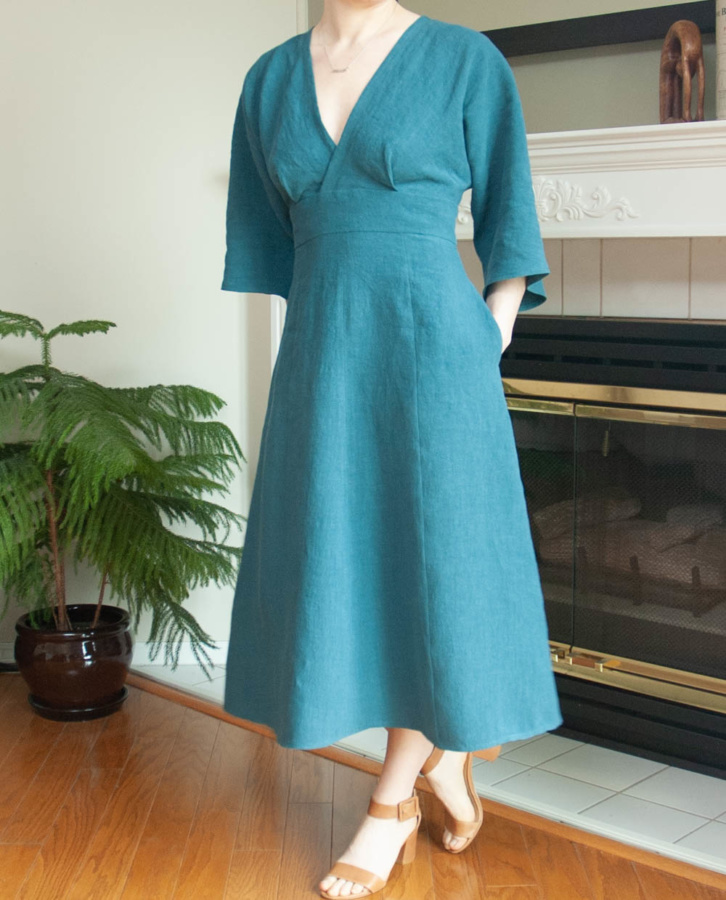
I decided to overlap the front and reduce the pleating below the bust. I marked the bust pleats but didn’t end up using them except to make sure the cross over and my pleats were centred. In addition, I switched the direction of the bust pleats as I preferred them facing away from the bust. Knowing my body, I decided to bring the shoulder seam forward by a half inch and added a half inch to the back piece below the neckline by slashing and spreading. I only made this change at the inside edge and tapered to the original seam line at the cuff.
To remove the front pleats in the skirt, I folded out the pleat along the grainline and taped it down. I debated re-angling the front and back centre seams so they were on grain but decided to leave them as that would have made for an a-line skirt (which wasn’t what I was going for). Then I just cut it out. At this point I thought I would add a waistband but I still didn’t know for sure so I cut the skirt and pocket pieces as they were. Later, when I added the waistband, I cut three inches off the tops of all of these pieces.
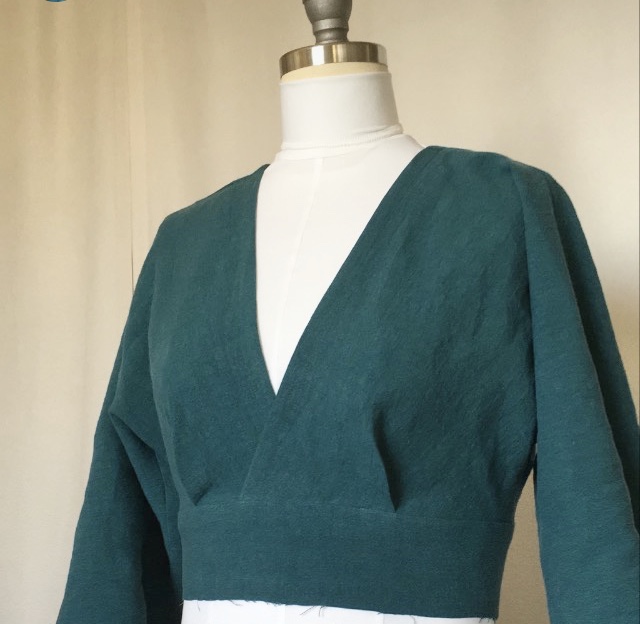
About that waistband. I didn’t draft my own – I used the waistband pieces from my Deer & Doe Magnolia dress. I cut two front pieces on fold and four back pieces so that my waistband could be double sided and hide all of the waist seams. This also gave the waistband more structure so I could really snug up the fit. I didn’t interface the waistband at all.
Once I had the waistband on, I realized the skirt without the pleats no longer carried the design lines from the bodice. Luckily I had a bit of excess width across the front of the skirt so I marked the upper edge on either side where it lined up with the bodice pleats, pressed a line from that point to the bottom of the skirt along the grainline, and sewed a tiny seam from the waist to the hem. Kind of like a pin tuck but with the tuck on the inside. This makes the skirt look like it has four panels across the front and the new seams match up with the bodice to carry the design lines into the skirt. A bit DIY but it worked!
I debated, with the help of my Instagram stories, whether or not to add ties. Before I’d sewed in the zip and seen the final fit, I decided to sew the two ends of the tie pieces together so it could be worn as a sash or taken off. Once I had done the final fitting (and added about 3/8 inches to the existing seam allowance at the centre back), I found that the dress fit so perfectly that it didn’t need ties. I’ve kept the sash in case I ever change my mind but I prefer the look without for now.
Here is a link to the beautiful washed linen that Sitka Fabrics provided me with for this project. I really enjoyed working with this fabric. It is 100% linen so, of course, presses perfectly. It is
165 gsm (about 5 oz) so it’s not too heavy but it has a wonderful drape. The colour is what really sold me though. It’s just gorgeous and I can see it working in the spring and summer with heels or sandals and into fall and winter with a turtle neck and tall boots, which is good because I want to wear it out just as soon as the world has recovered from this pandemic but who knows what season we’ll be in when that finally happens. I hope you are staying safe out there and staying home if you can.
Thank you Sitka Fabrics for this lovely fabric. And thanks everyone else for stopping by!
~ Lindsay